The Simple Salon Dome is your multi-site solution. Whether you're managing a few salons—or many—utilising this powerful tool will help you run your multi-location business efficiently. The Dome allows you to replicate your formula by sharing the same clients, services, products, packages, vouchers, etc. effectively across each location.
Each of your salon locations (also referred to as "child" accounts) has their own Simple Salon account, and the Dome is the umbrella over them all. It encompasses all of your locations, allowing you to manage, report, and market across all locations. Each location account operates independently from the other locations, therefore you can still manage, report and market from a salon level.
The following article will run you through an overview of the Dome's great features. We will link through to further set-up articles where necessary, and you can contact our Support team for any further questions:
- Dome and Child Location Dashboards—Live Snapshots
- Switching Between Locations
- Sharing Items into Location Accounts
- Creating Rosters For All Locations Through the Dome
- Global Appointments and Client Sharing
- Packages and Gift Vouchers
- Online Bookings with Dome
- Transferring Stock Between Locations
- Sharing Dome SMS Account with Location Accounts
- Adding New Location
- Reporting and Marketing within the Dome
Dome and Child Location Dashboards—Live Snapshots
When logging in, you'll be greeted by the Live Snapshot (& Quick Visit List).

The Live Snapshot is all of your location's sales figures in real time, that automatically refreshes every 5 minutes. This makes it easy for you to see all of your locations' current live progress in the one spot (you can also view week to date). This page can be accessed at any time by selecting the Dome tab.
If you want to access a more detailed location sales summary, you can select the location name in the Quick Visit list, or select Dashboard while on the Locations tab.
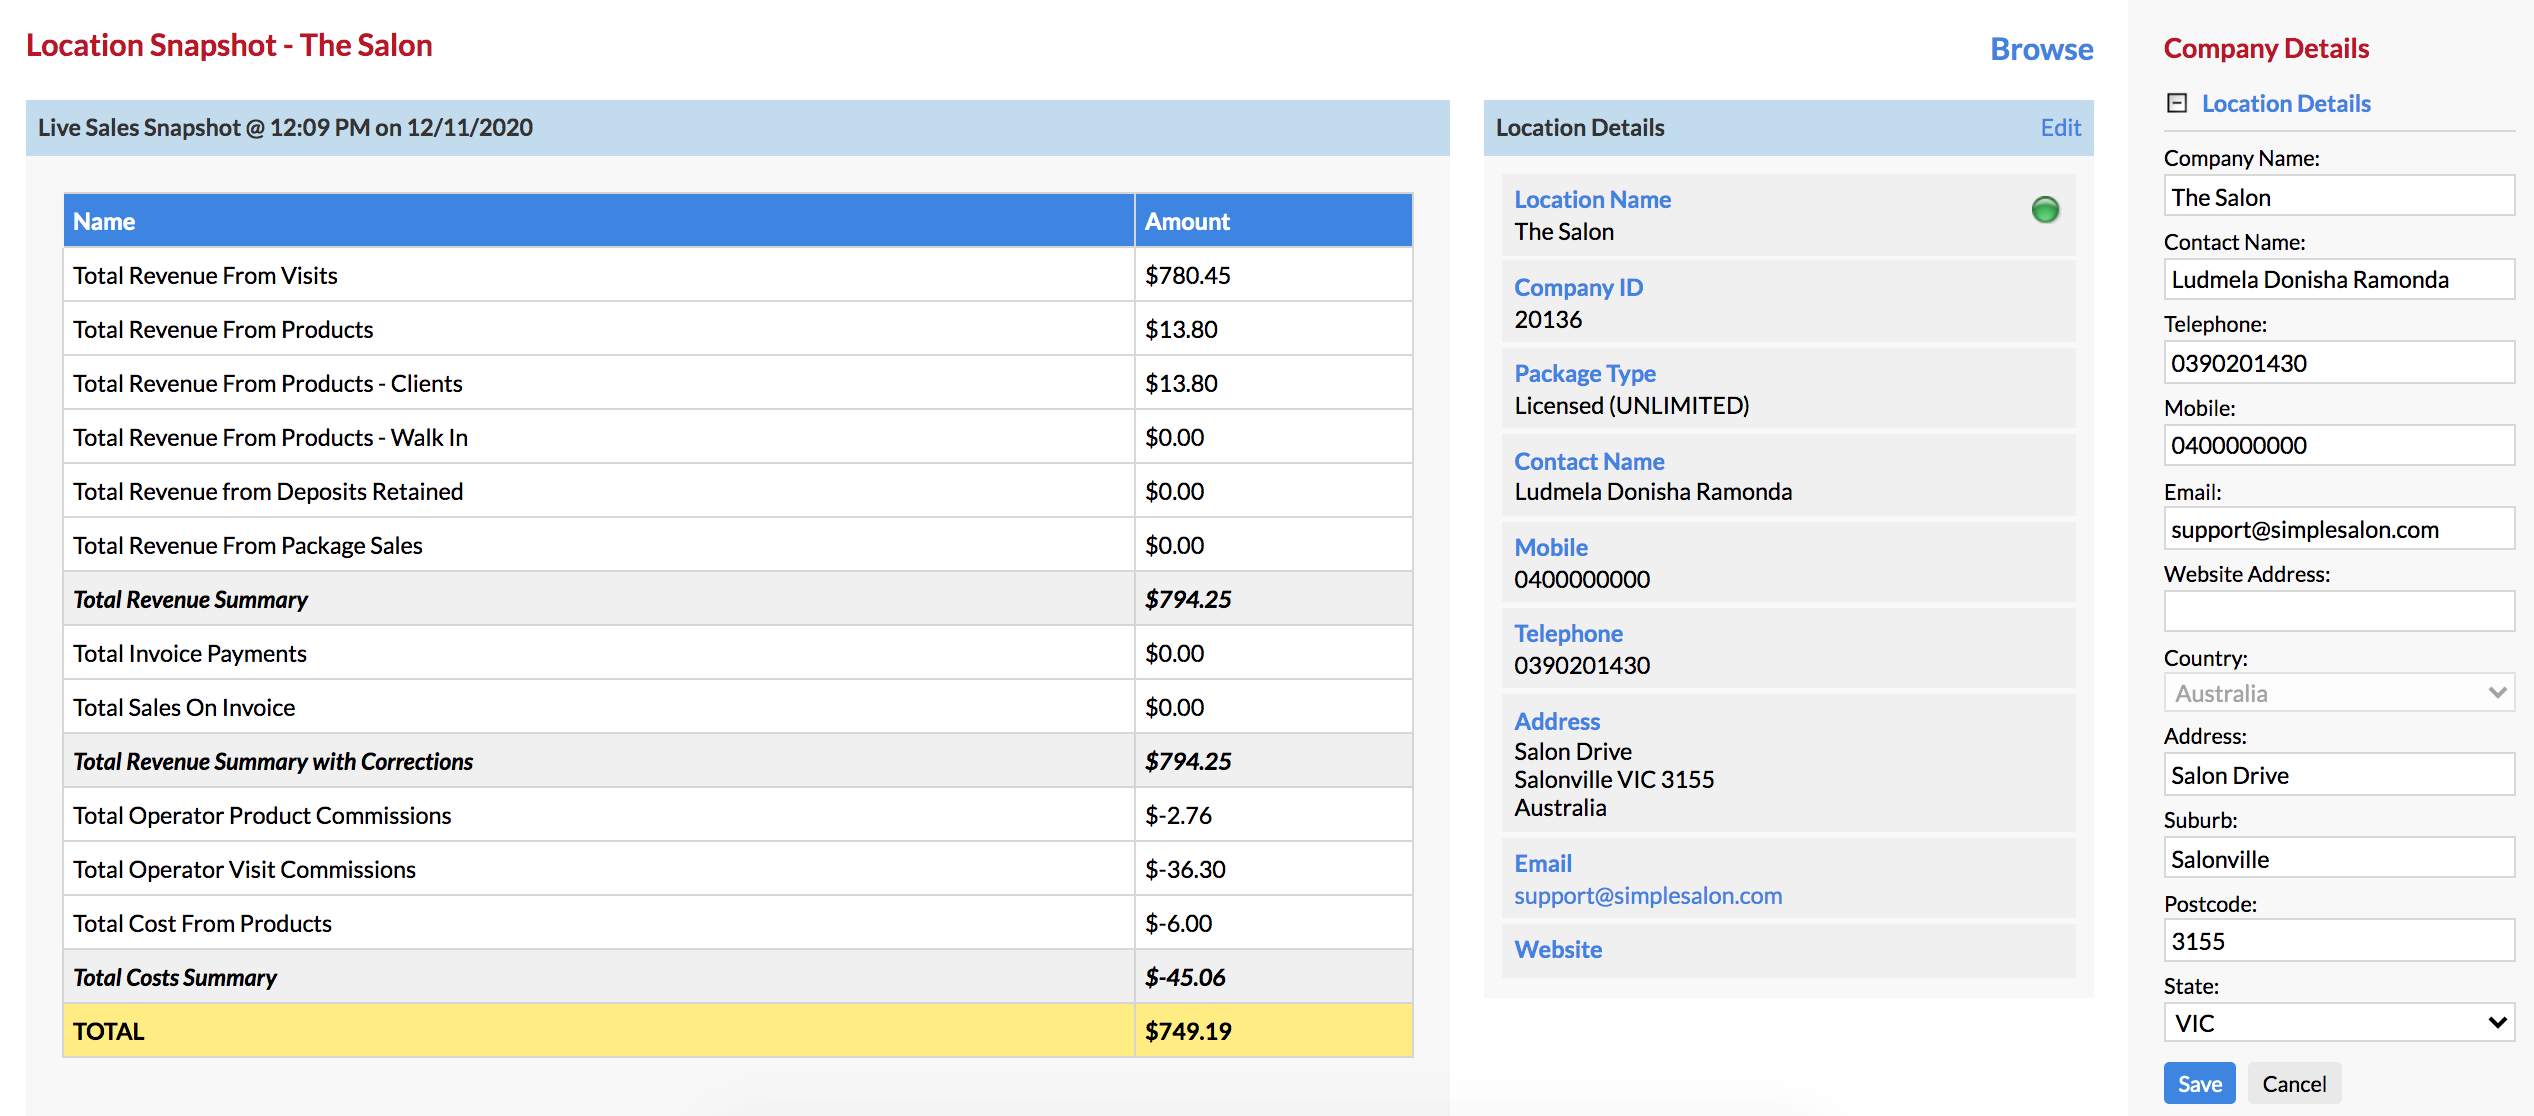
While on this dashboard, you can view a detailed summary of their live sales details—as well as edit any of their location details by selecting Edit.
Viewing and Switching Between Child Locations Through Dome
The Dome makes it incredibly simple to go from one location to another.
From the Dome tab, there is the Quick Visit List to the right with a Browse button next to each location. The most basic navigation from the top level (the Dome) down into your child location accounts is via these Browse buttons.

You can also click on your Dome name (e.g 'The Salon Groups' as per the screenshot above) on the top right, which will show you a drop-down list of your locations. You can also use this to browse down into each location.
This can also be done via the Locations tab as shown below:

- Green - Location is active: You can browse down into these accounts in the Dome, as well as log in directly into the account with login details.
- Yellow - Pending Suspension: You will be unable to browse down into an account that is pending suspension. It can still be accessed, however you will need to login directly into the child/location account and pay the fee to re-open.
- Red - Account Closed: It is possible to re-open a previously closed location, however you will need to contact Support.
Browsing down into an active location will give you the same view as if you were logging in directly to the location account. You can use these child accounts as if you were logged into the account, meaning it's not always necessary to log-out of the Dome into a child location unless you're paying a fee.

If you want to view another location, or you just want to go back into to the Dome, simply click the Dome tab.
Sharing Items into Location Accounts
When you have a Dome account, you have to add all services, products, operators, vouchers, packages etc into the Dome Admin page, then you can instantly share these items with any/all location accounts. All of this is done in just a couple of clicks, making it super efficient to have your data reflected through all locations.
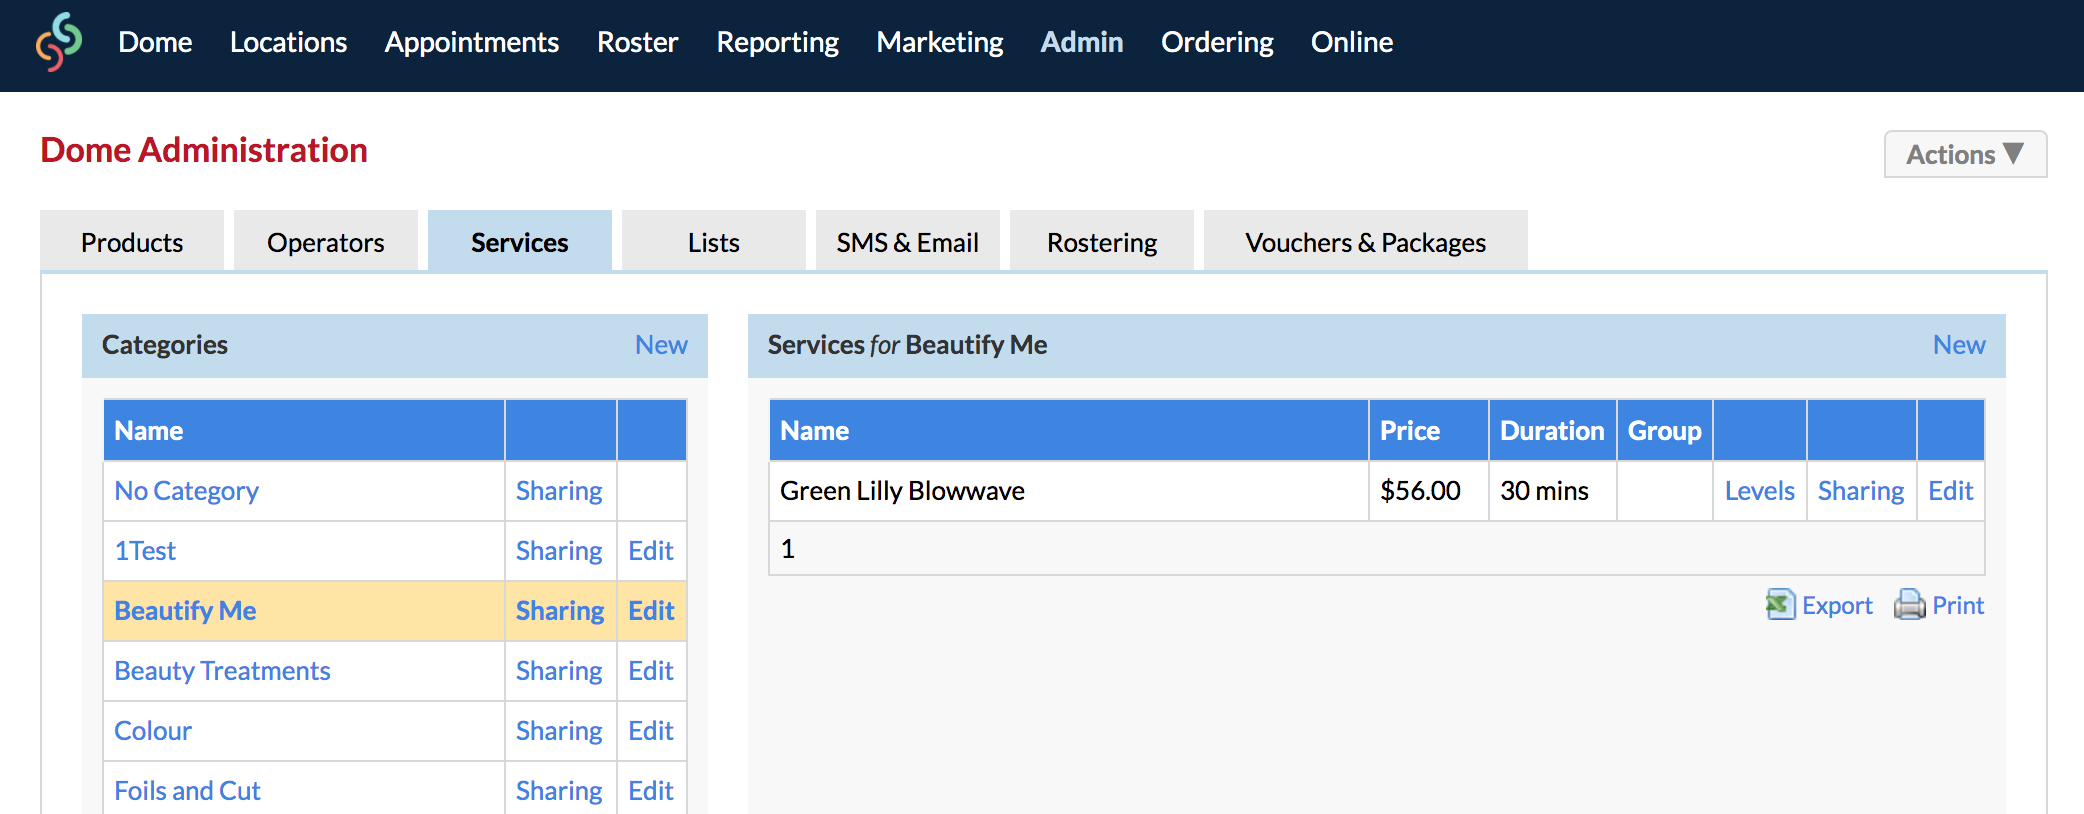
As you can see in the screenshot above, each Service Category and Individual Service has the "Sharing" option. Selecting this will allow you to share all items down to your selected child locations.
You control the sharing settings within the Dome, so each location doesn't necessarily need to have all the same data.
Once you've selected Save, these changes will be automatically updated across the chosen locations.
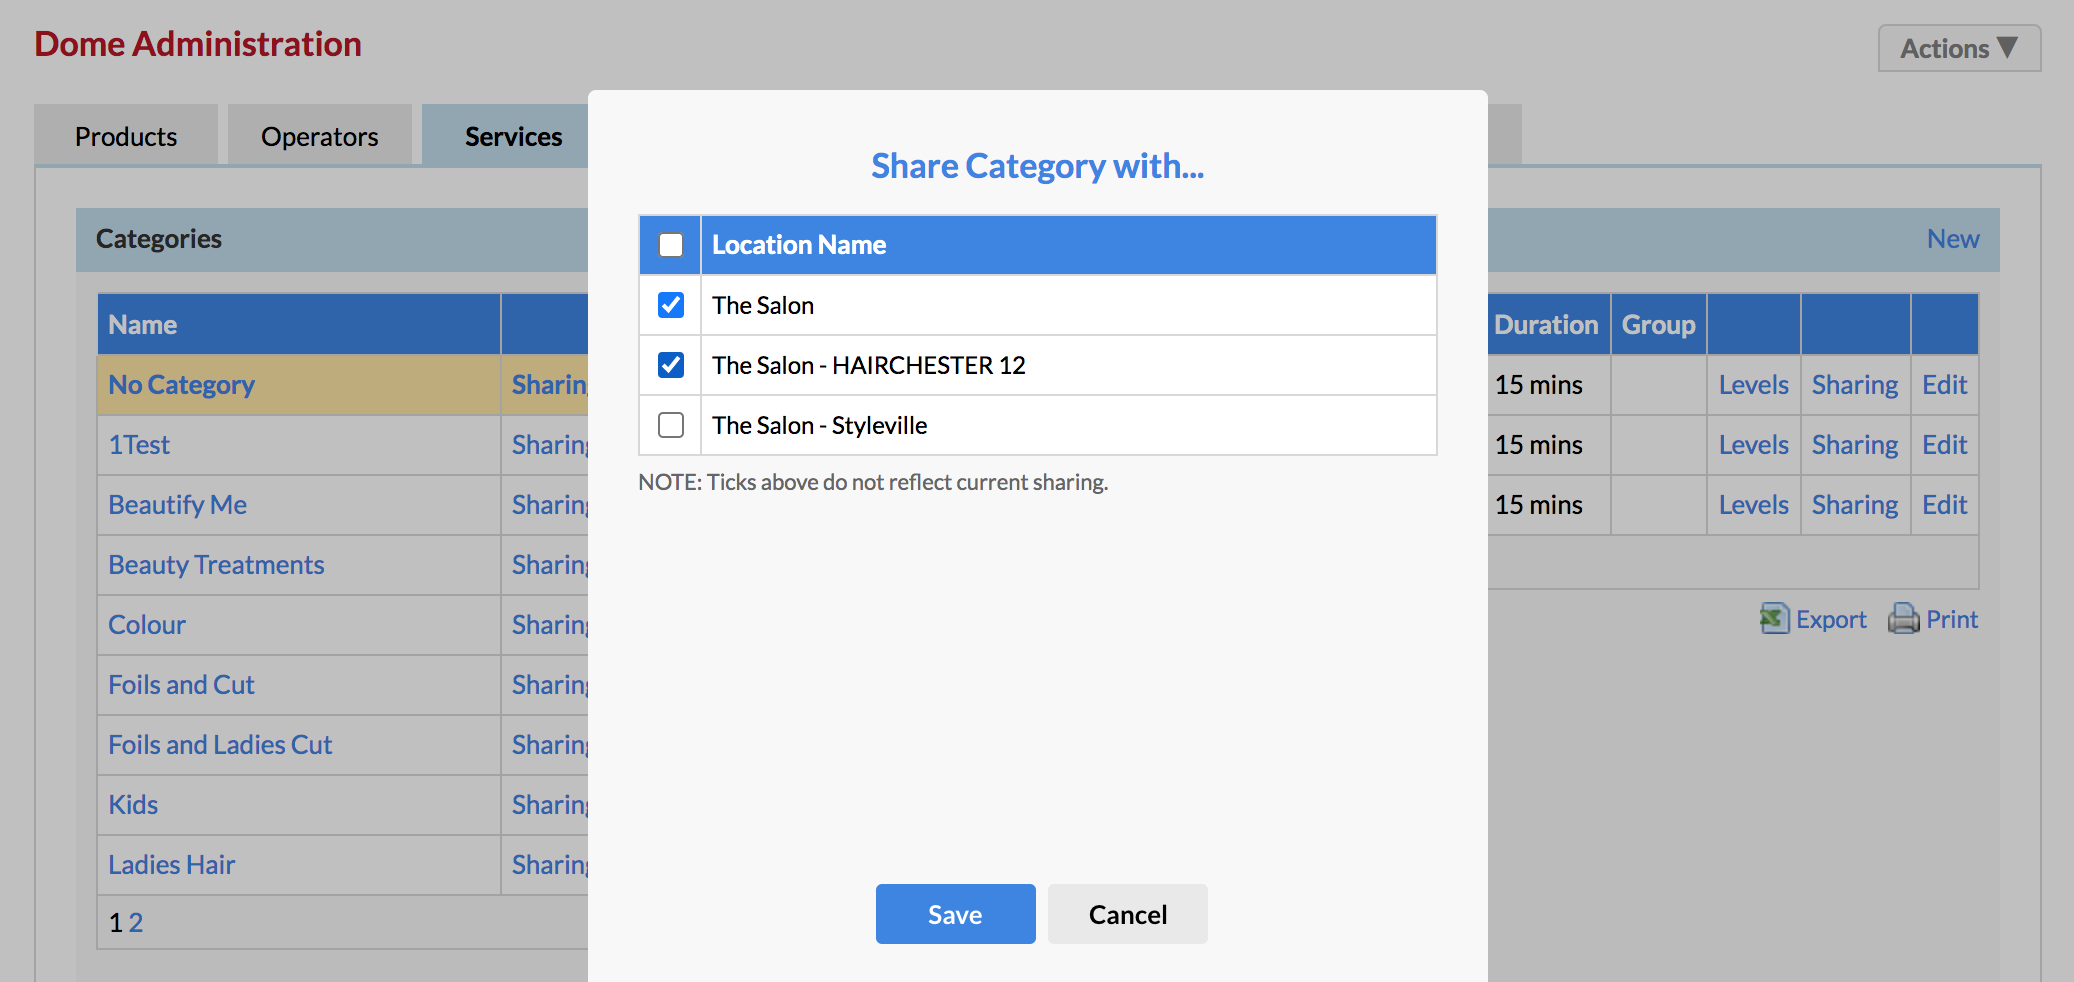
This means that you can't add anything to a location account without first adding it to the Dome, then sharing it down. You'll never need to worry about data being added or changed without it going through the Dome first.
Any staff or managers that require access to the Dome can be made their own login. Otherwise anyone without access can contact users with a Dome Admin if any changes need to be made or adjusted.
For a detailed guide on sharing items from the Dome to Location accounts, please checkout the following article:
Introduction to the Dome—Navigating to Locations & Sharing Items
Creating Rosters for All Locations Through the Dome
It is likely you have to manage rosters for more than one location—the Dome makes it convenient to do rostering for all locations in the one account.
There's no need to browse down or log directly into child locations, as all location's rosters can be accessed from the drop-down menu on the Dome Roster page:
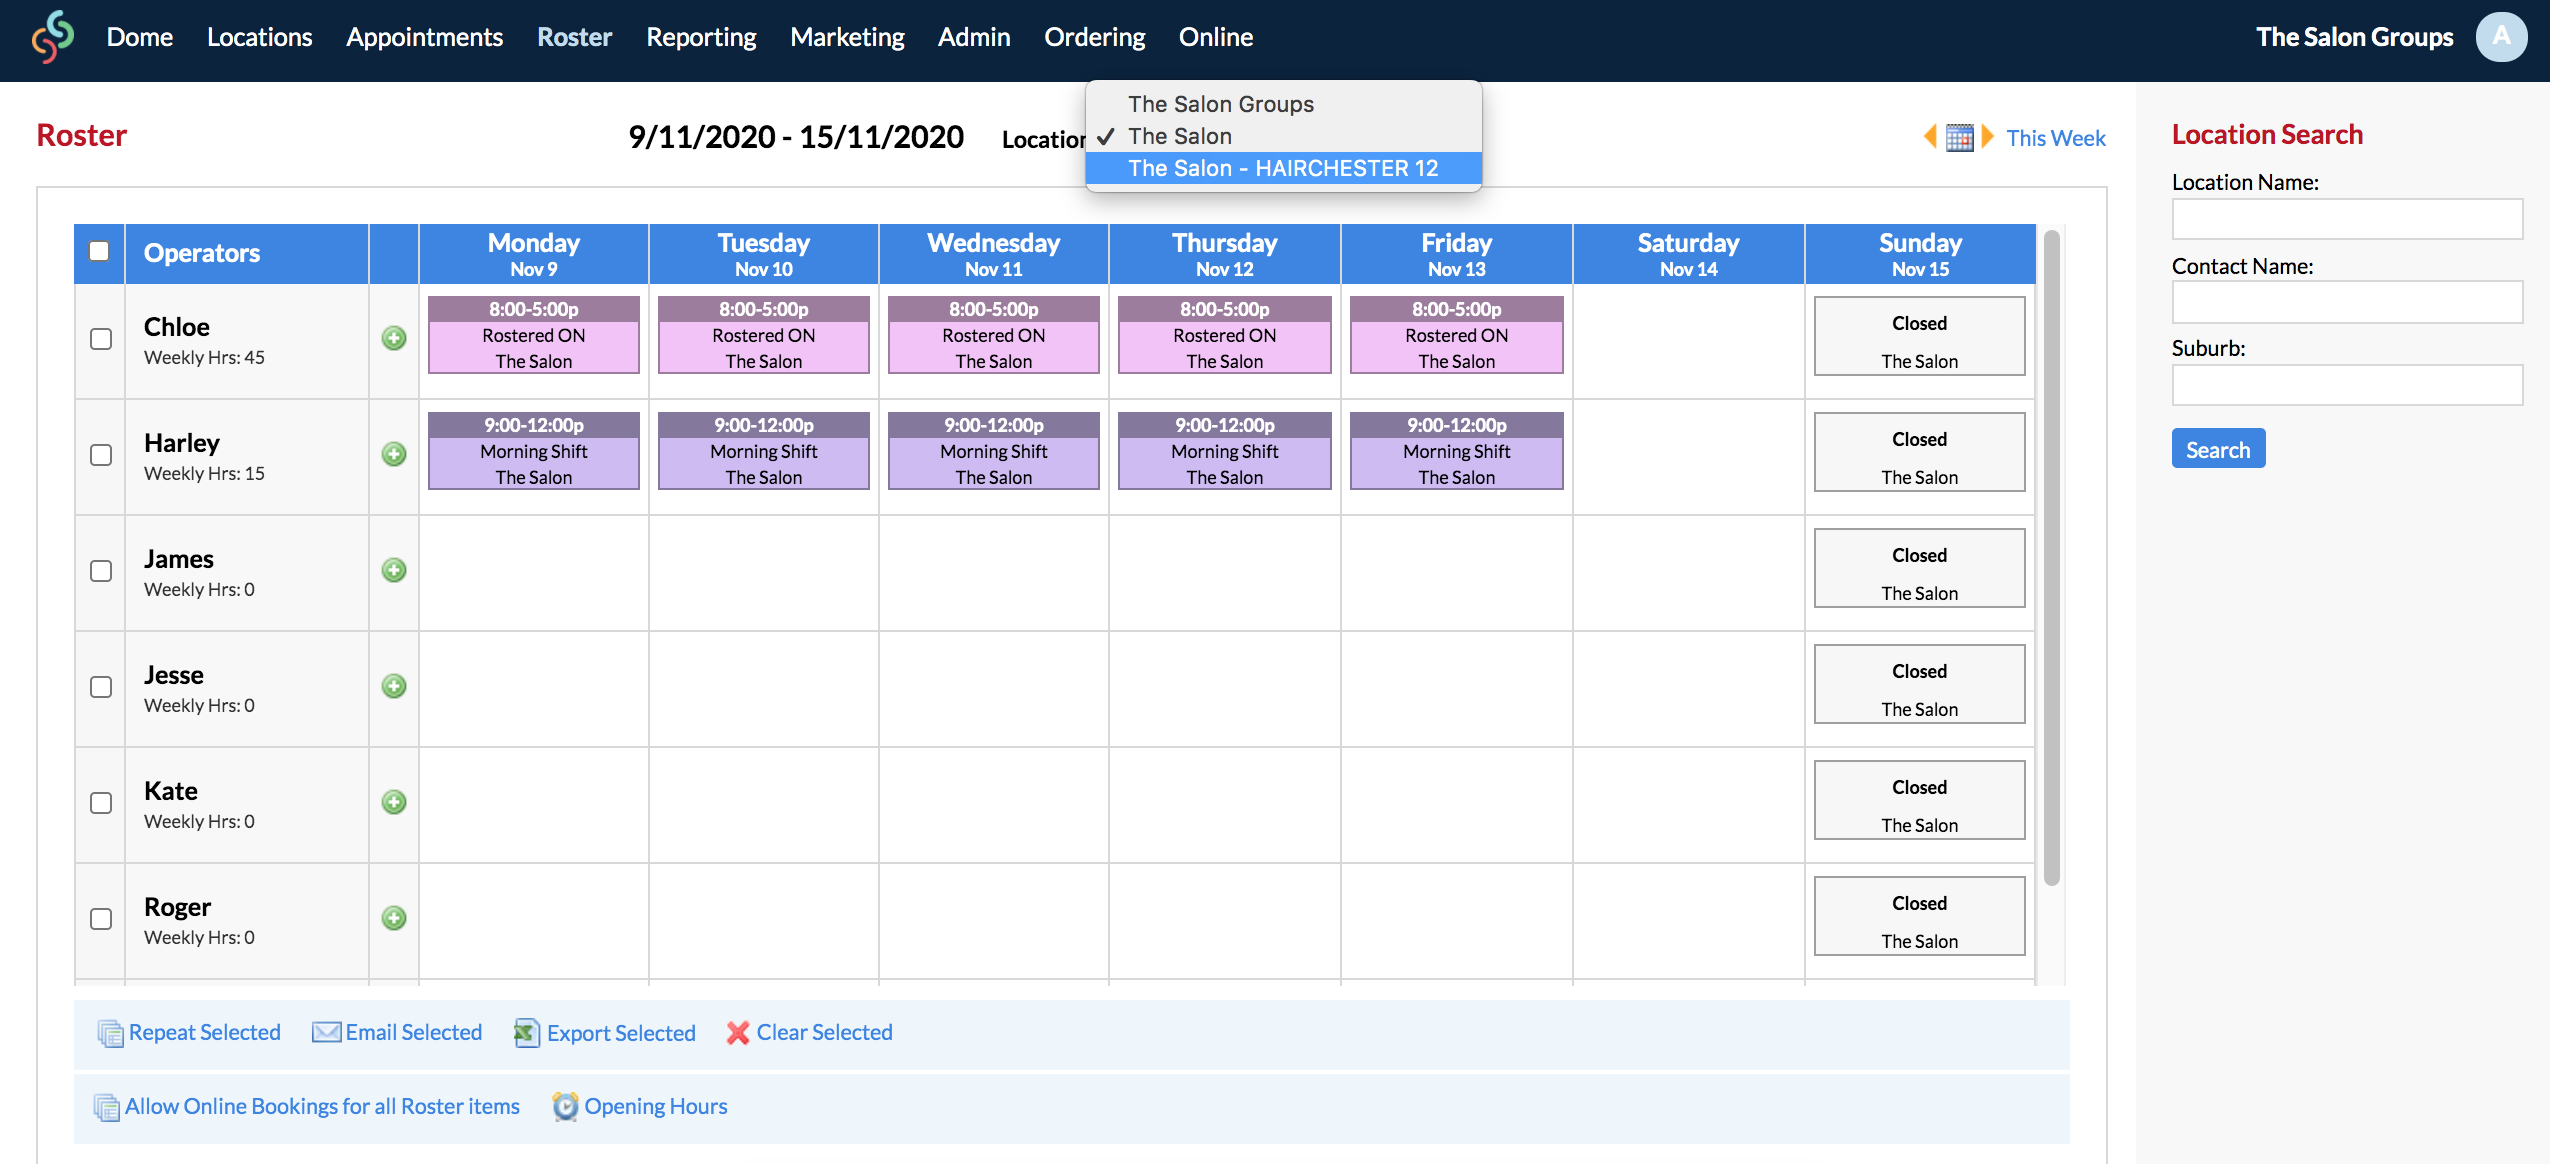
Rosters can still be updated from child locations, but all roster items need to first be created within the Dome then shared down. The following link will take you to a comprehensive set-up article for rostering within the Dome:
Global Appointments and Client Sharing in the Dome
Client Sharing
You have the ability to share clients between your salons. Due to each of your child location accounts being connected to your Dome, you can bring up the same client card for any client in any location.
Whether you're in the Dome or a child location, there will be a tower symbol next to the client's that have been created in another location. Hovering over the icon will show you which location they are originally from:
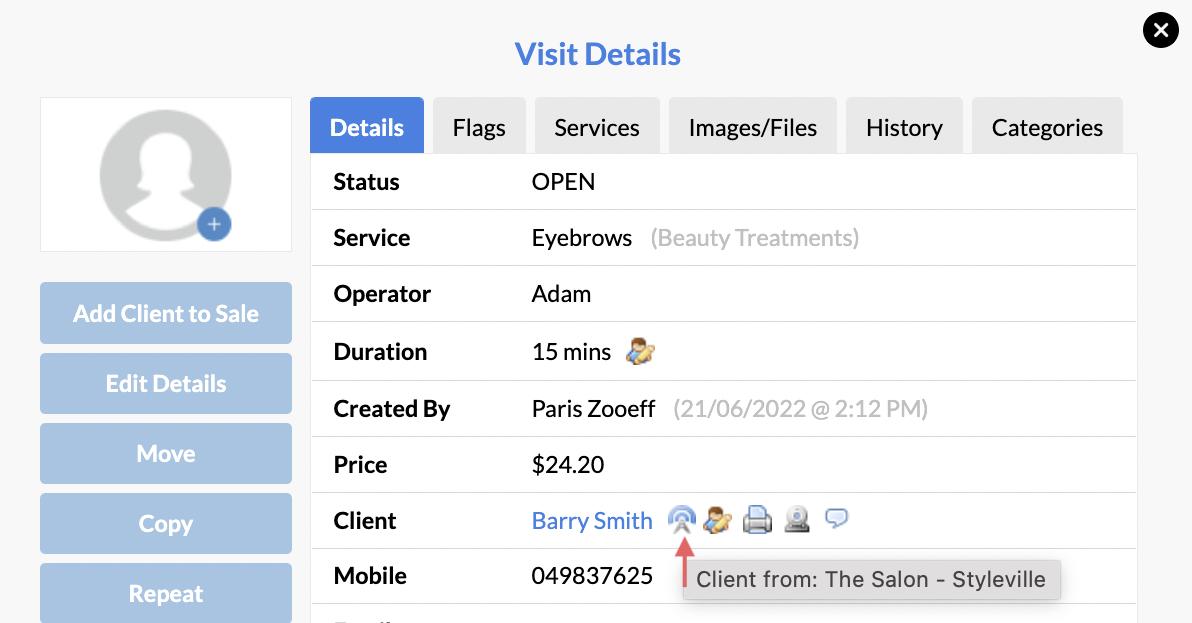
When searching for a client in a child location account, you can choose whether you want to search through the Dome, or just through your current location.
There will be no icon next to a client's name if you are logged into, or have browsed down into the location where the client was originally created:
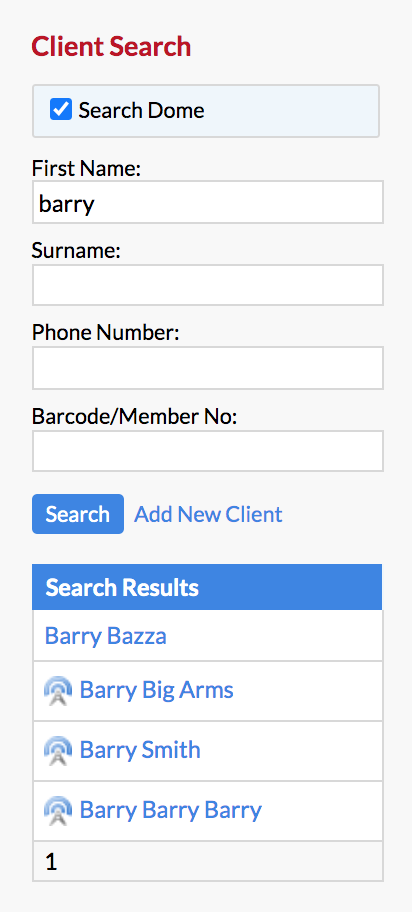
This gives your clients the flexibility to visit any location—the client can simply pick up from where they left off at the last location they visited. This makes it convenient for your clients, and easier for you to avoid multiple client accounts with information scattered around.
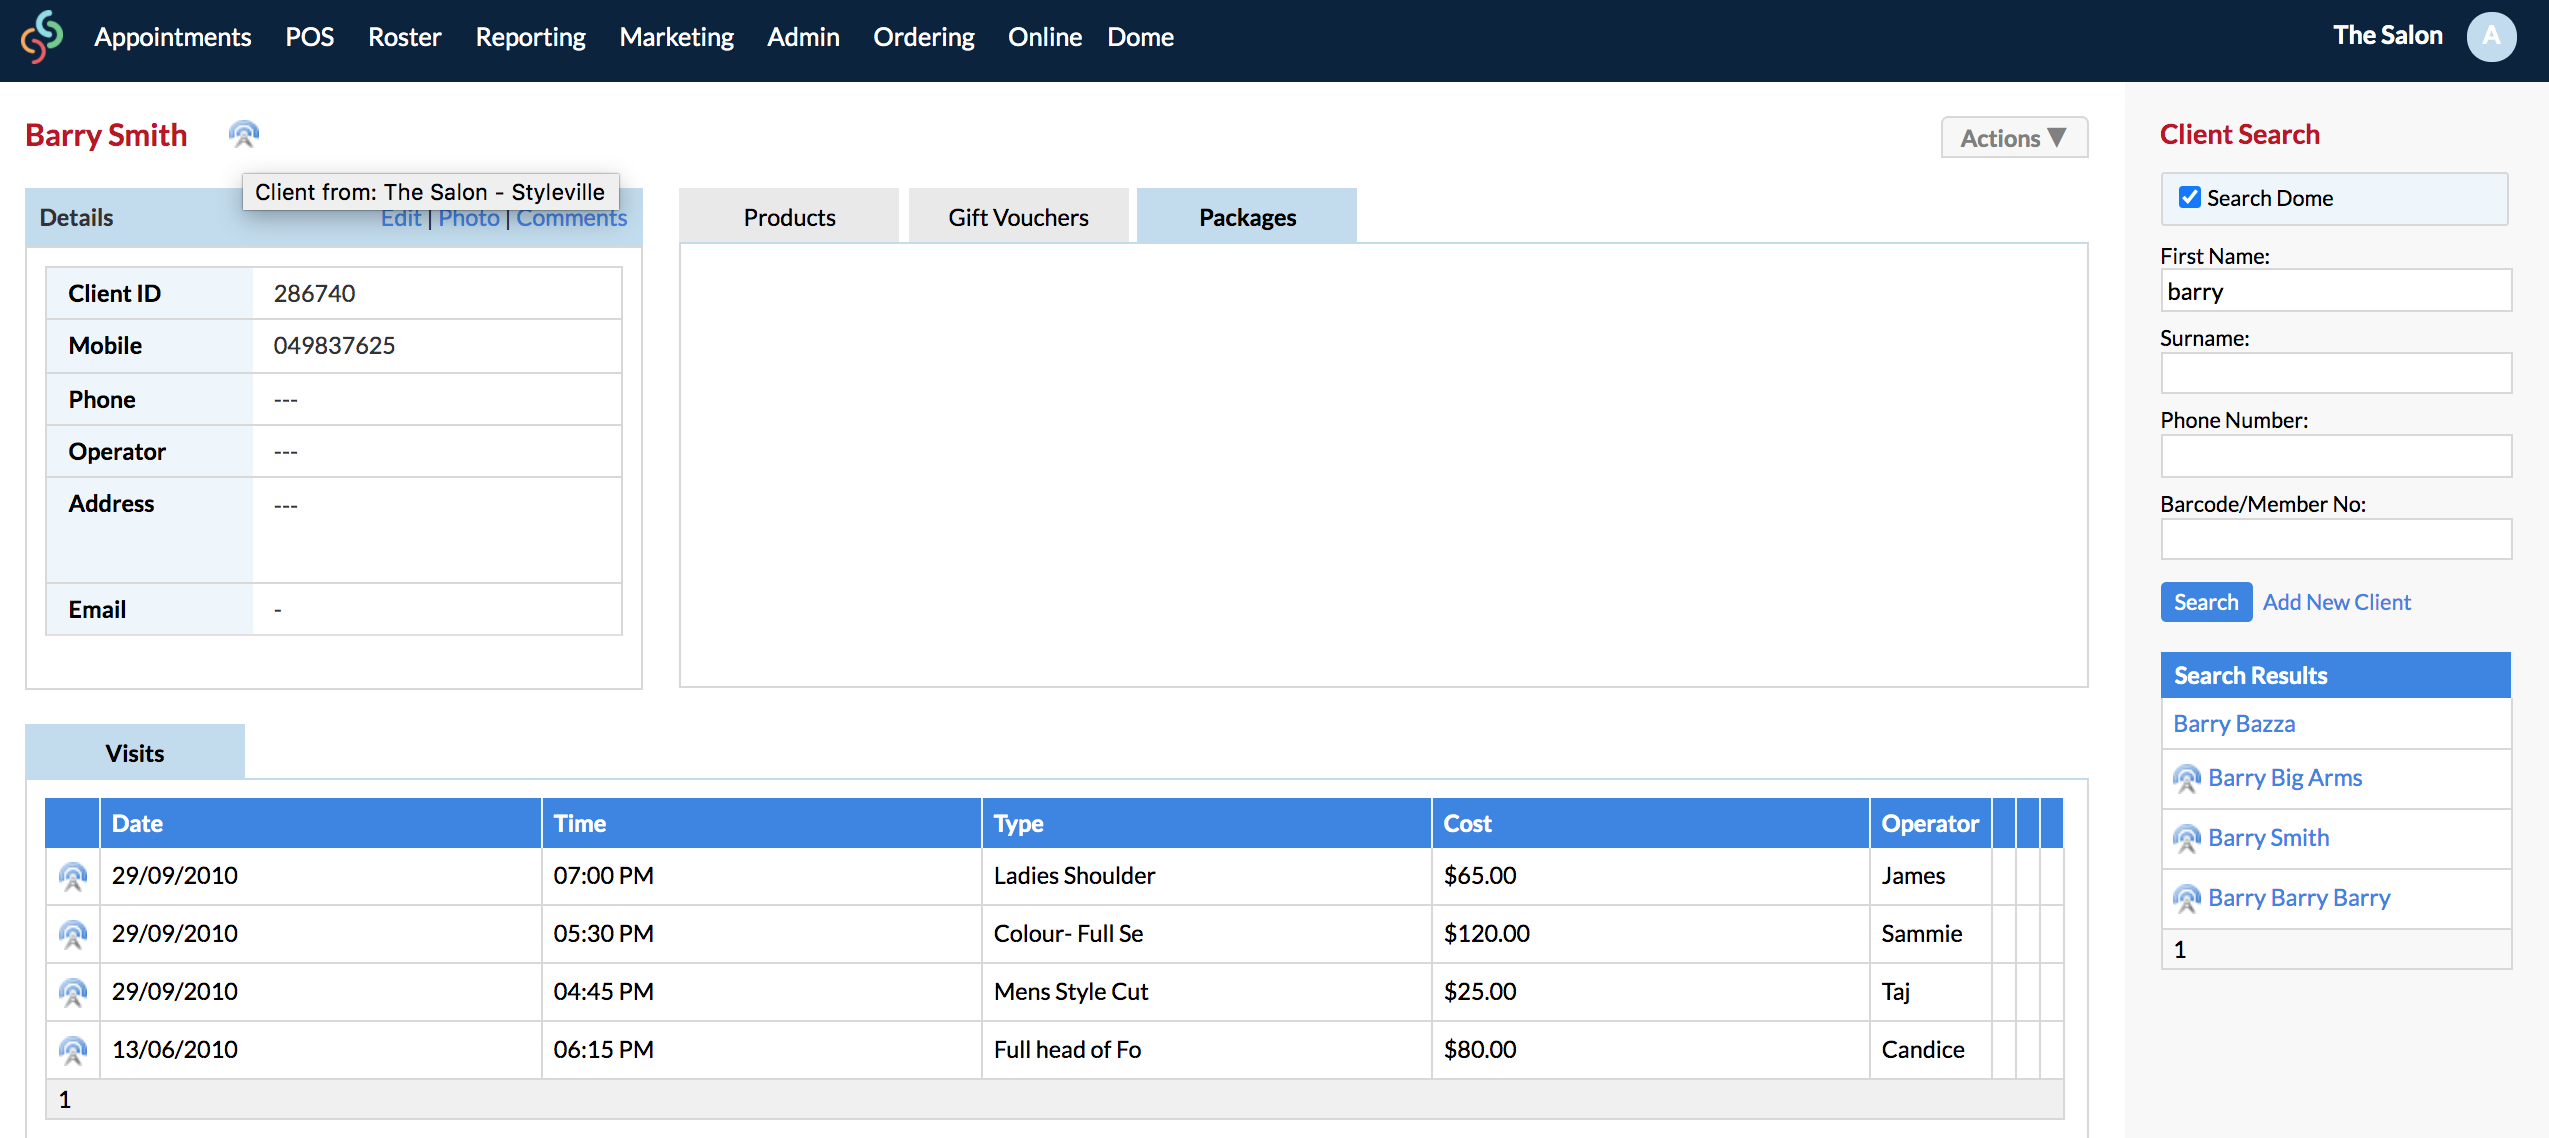
When navigating to a client's card, you'll notice the same tower icon next to their name if they were created in a different location. You'll also notice the tower icon under Visits next to the services they've received. This will show you at which location they received the particular service or package.
If you are on a client's card who has received a treatment or service in the same location that you are logged/browsed into, there will be no icon displayed:

Global Appointments
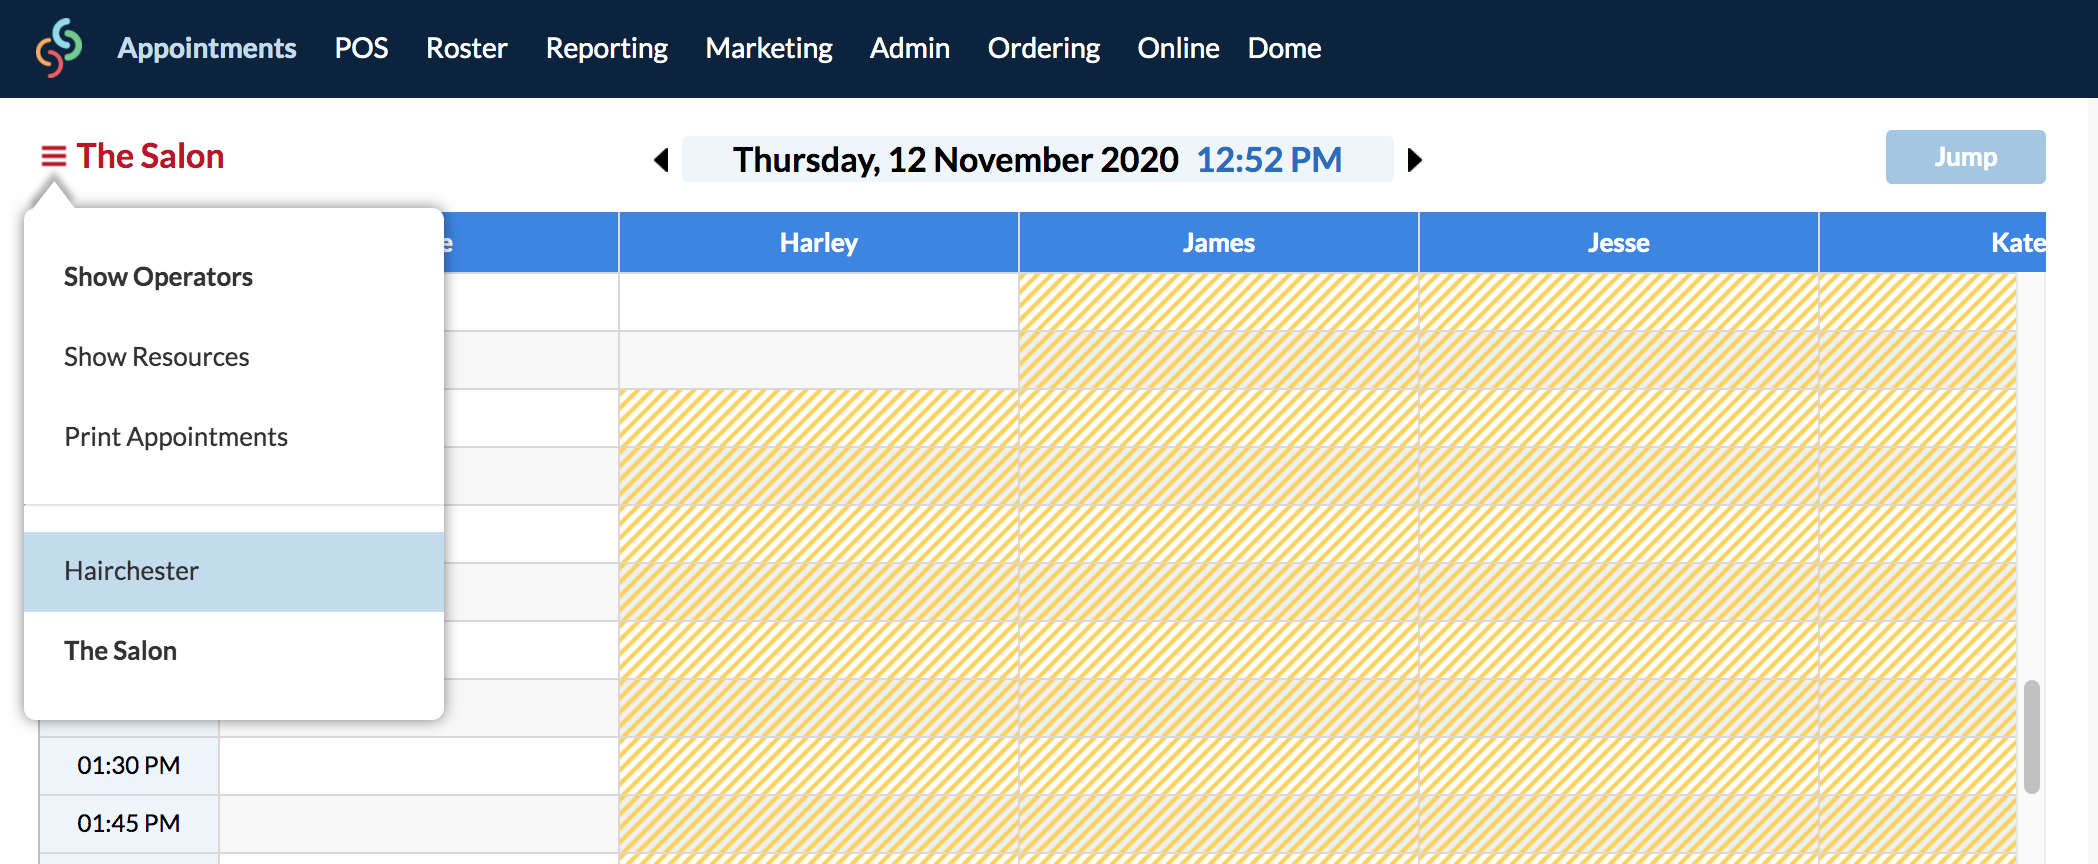
While on the Appointments page (either in the Dome or a child location), you can switch between different location appointment books, and make appointments for any other location. Simply click on the three lines as shown below:
- This makes it easy to use a centralised reception to take bookings across your entire chain of salons.
- Allows each individual salon location to make bookings across the network of salons quickly and easily.
In the below screenshot we are logged into The Salon—however as you can see we are on Hairchester's Appointments page, and are about to book-in an appointment for the Hairchester:
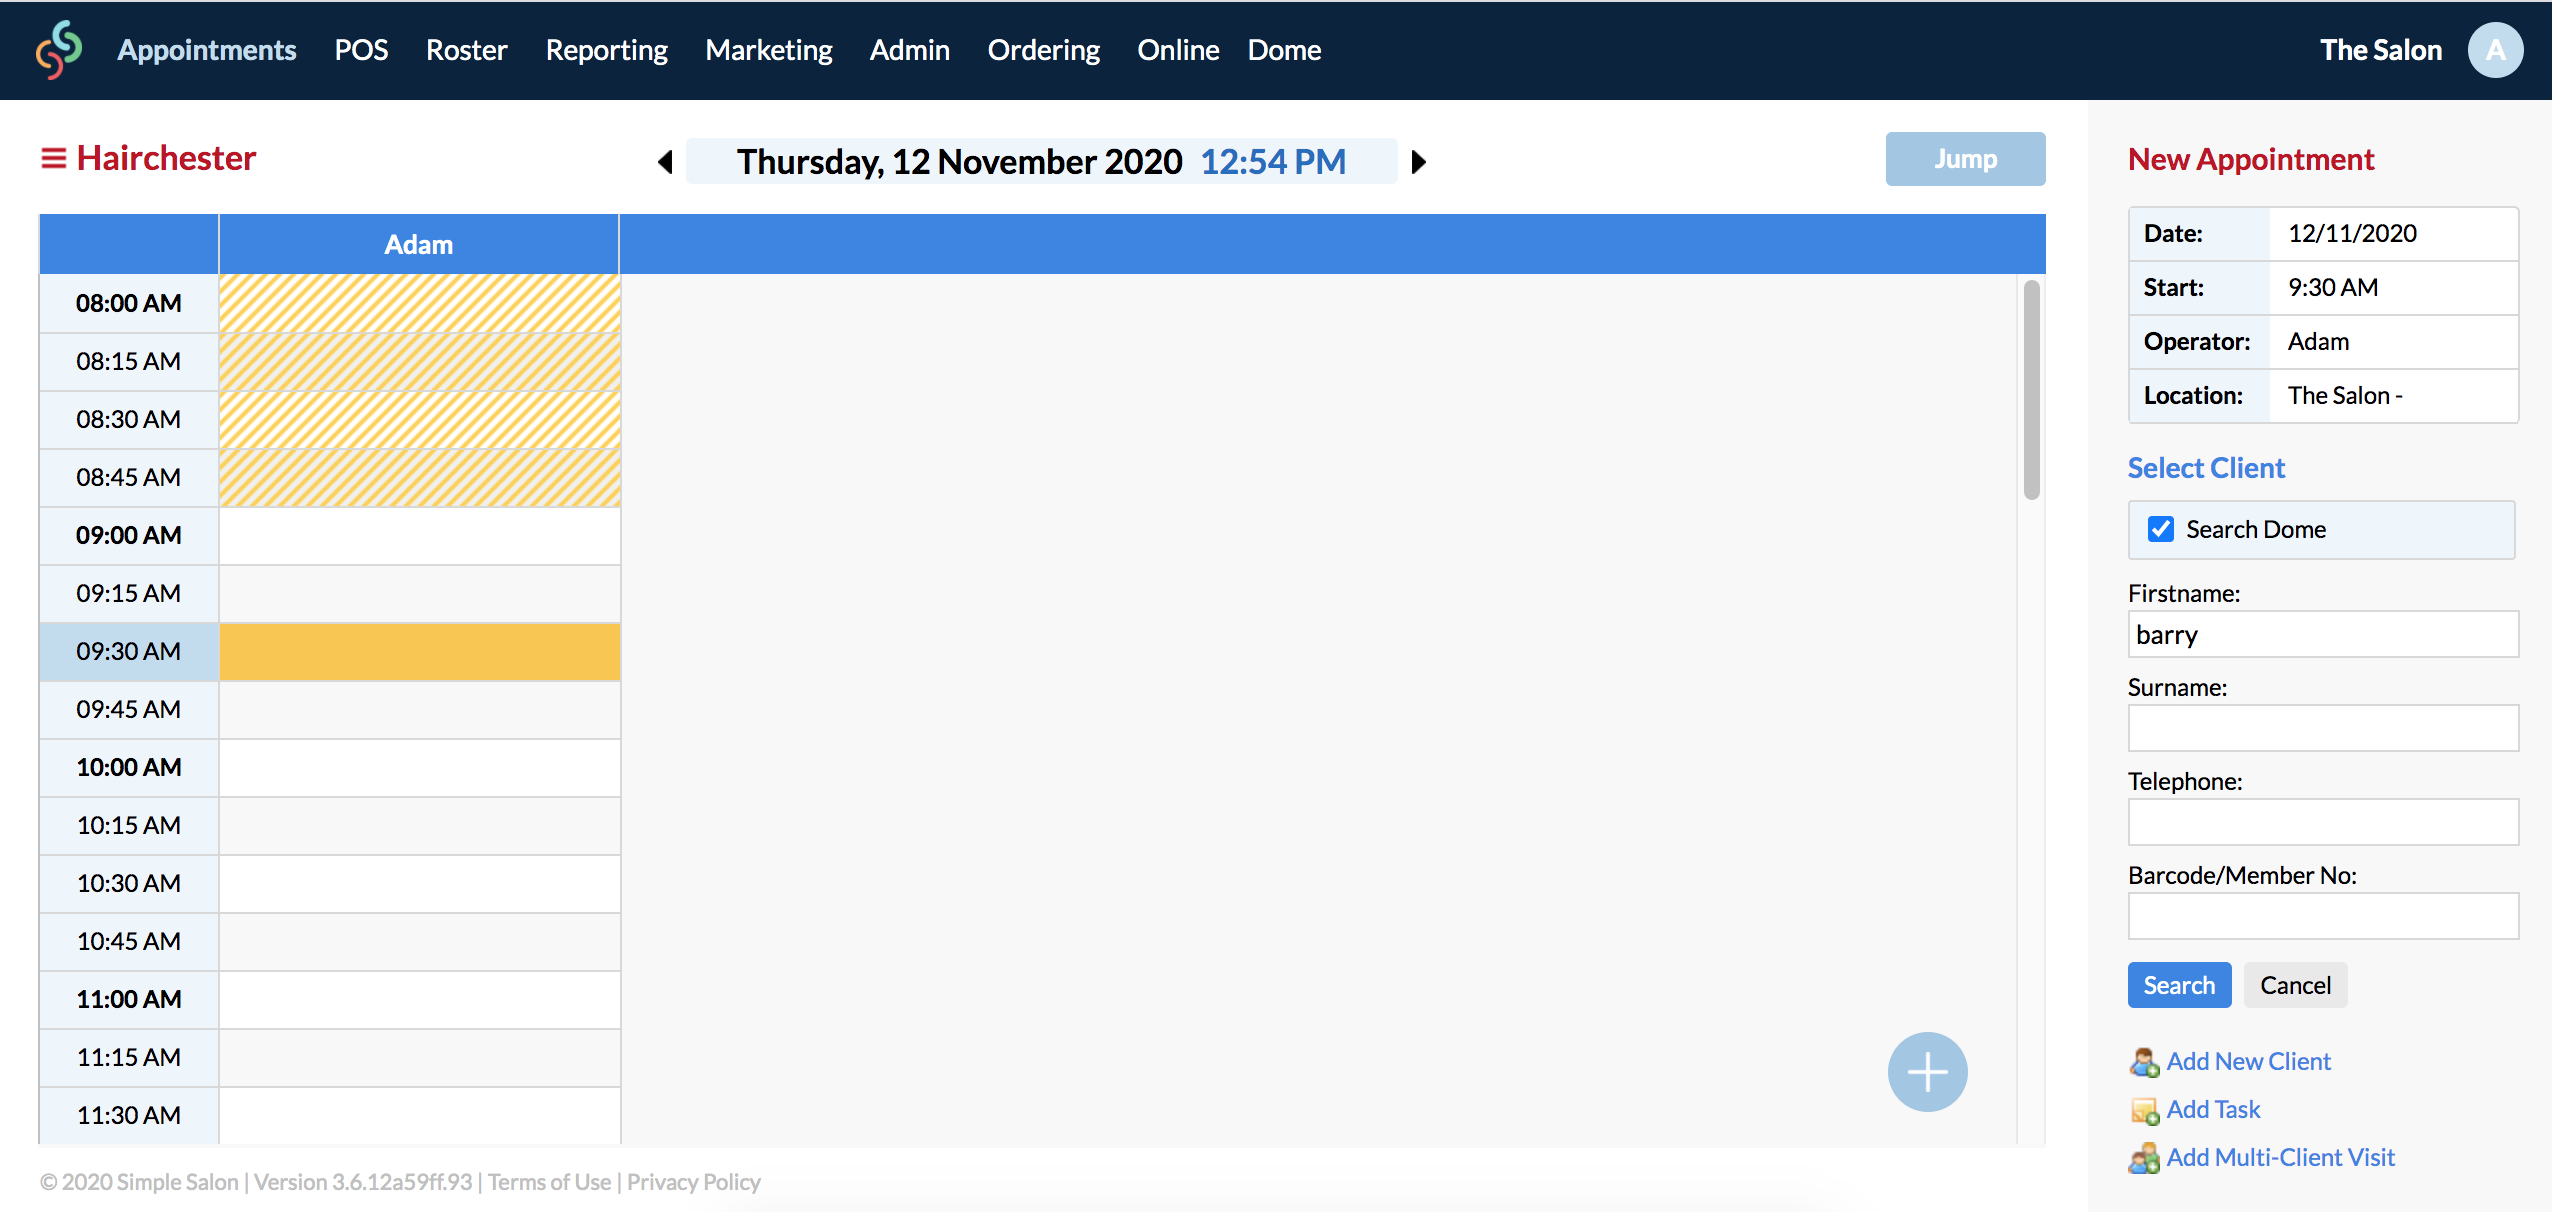
For an added level of security and flexibility, individual locations can opt in or out of the Dome Global Appointments process making it perfect for a single owner chain of salons or a chain of salon franchises.
For further information on Global Appointments, please checkout the following article:
Global Appointments in the Simple Salon Dome
Packages & Gift Vouchers—Redeeming Across All Locations
Packages
If your clients purchase a salon package in one location, they can then make an appointment at a different location and redeem any of these pre-paid items.
Although this process can be disabled in Cash Register Settings (in the Dome) if you would prefer packages to only be redeemed at the location in which they were processed.
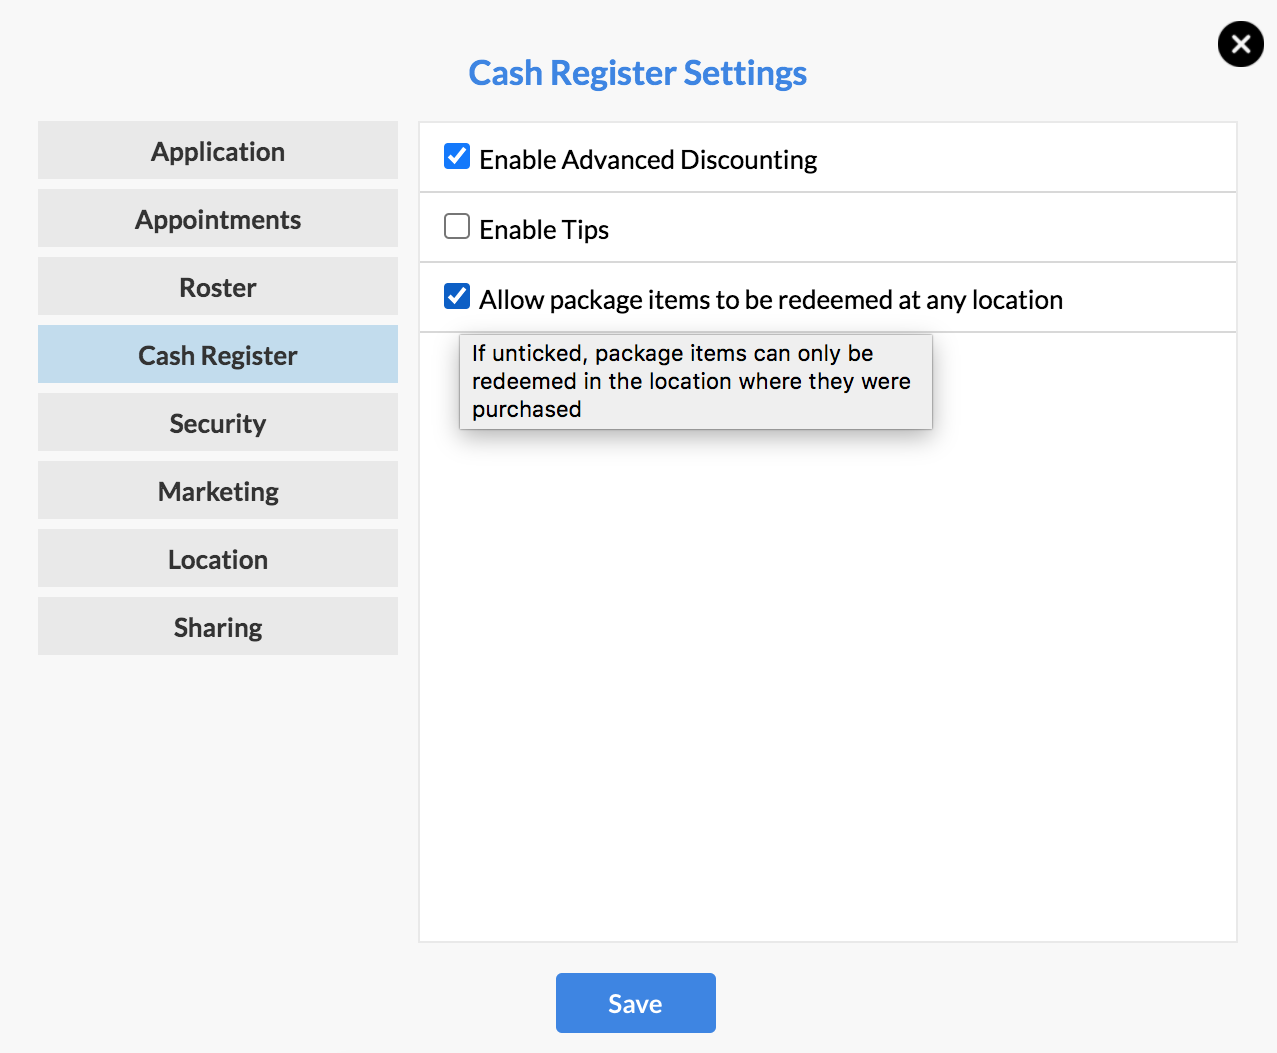
As mentioned earlier, packages must be first created in the Dome (Admin > Vouchers & Packages), then shared down into your child locations.
In the below screenshot, we are logged/browsed into "Hairchester 12". We're currently on Barry's page who has pre-paid packages that were purchased at another location. We know this because of the icon next to the pending package.
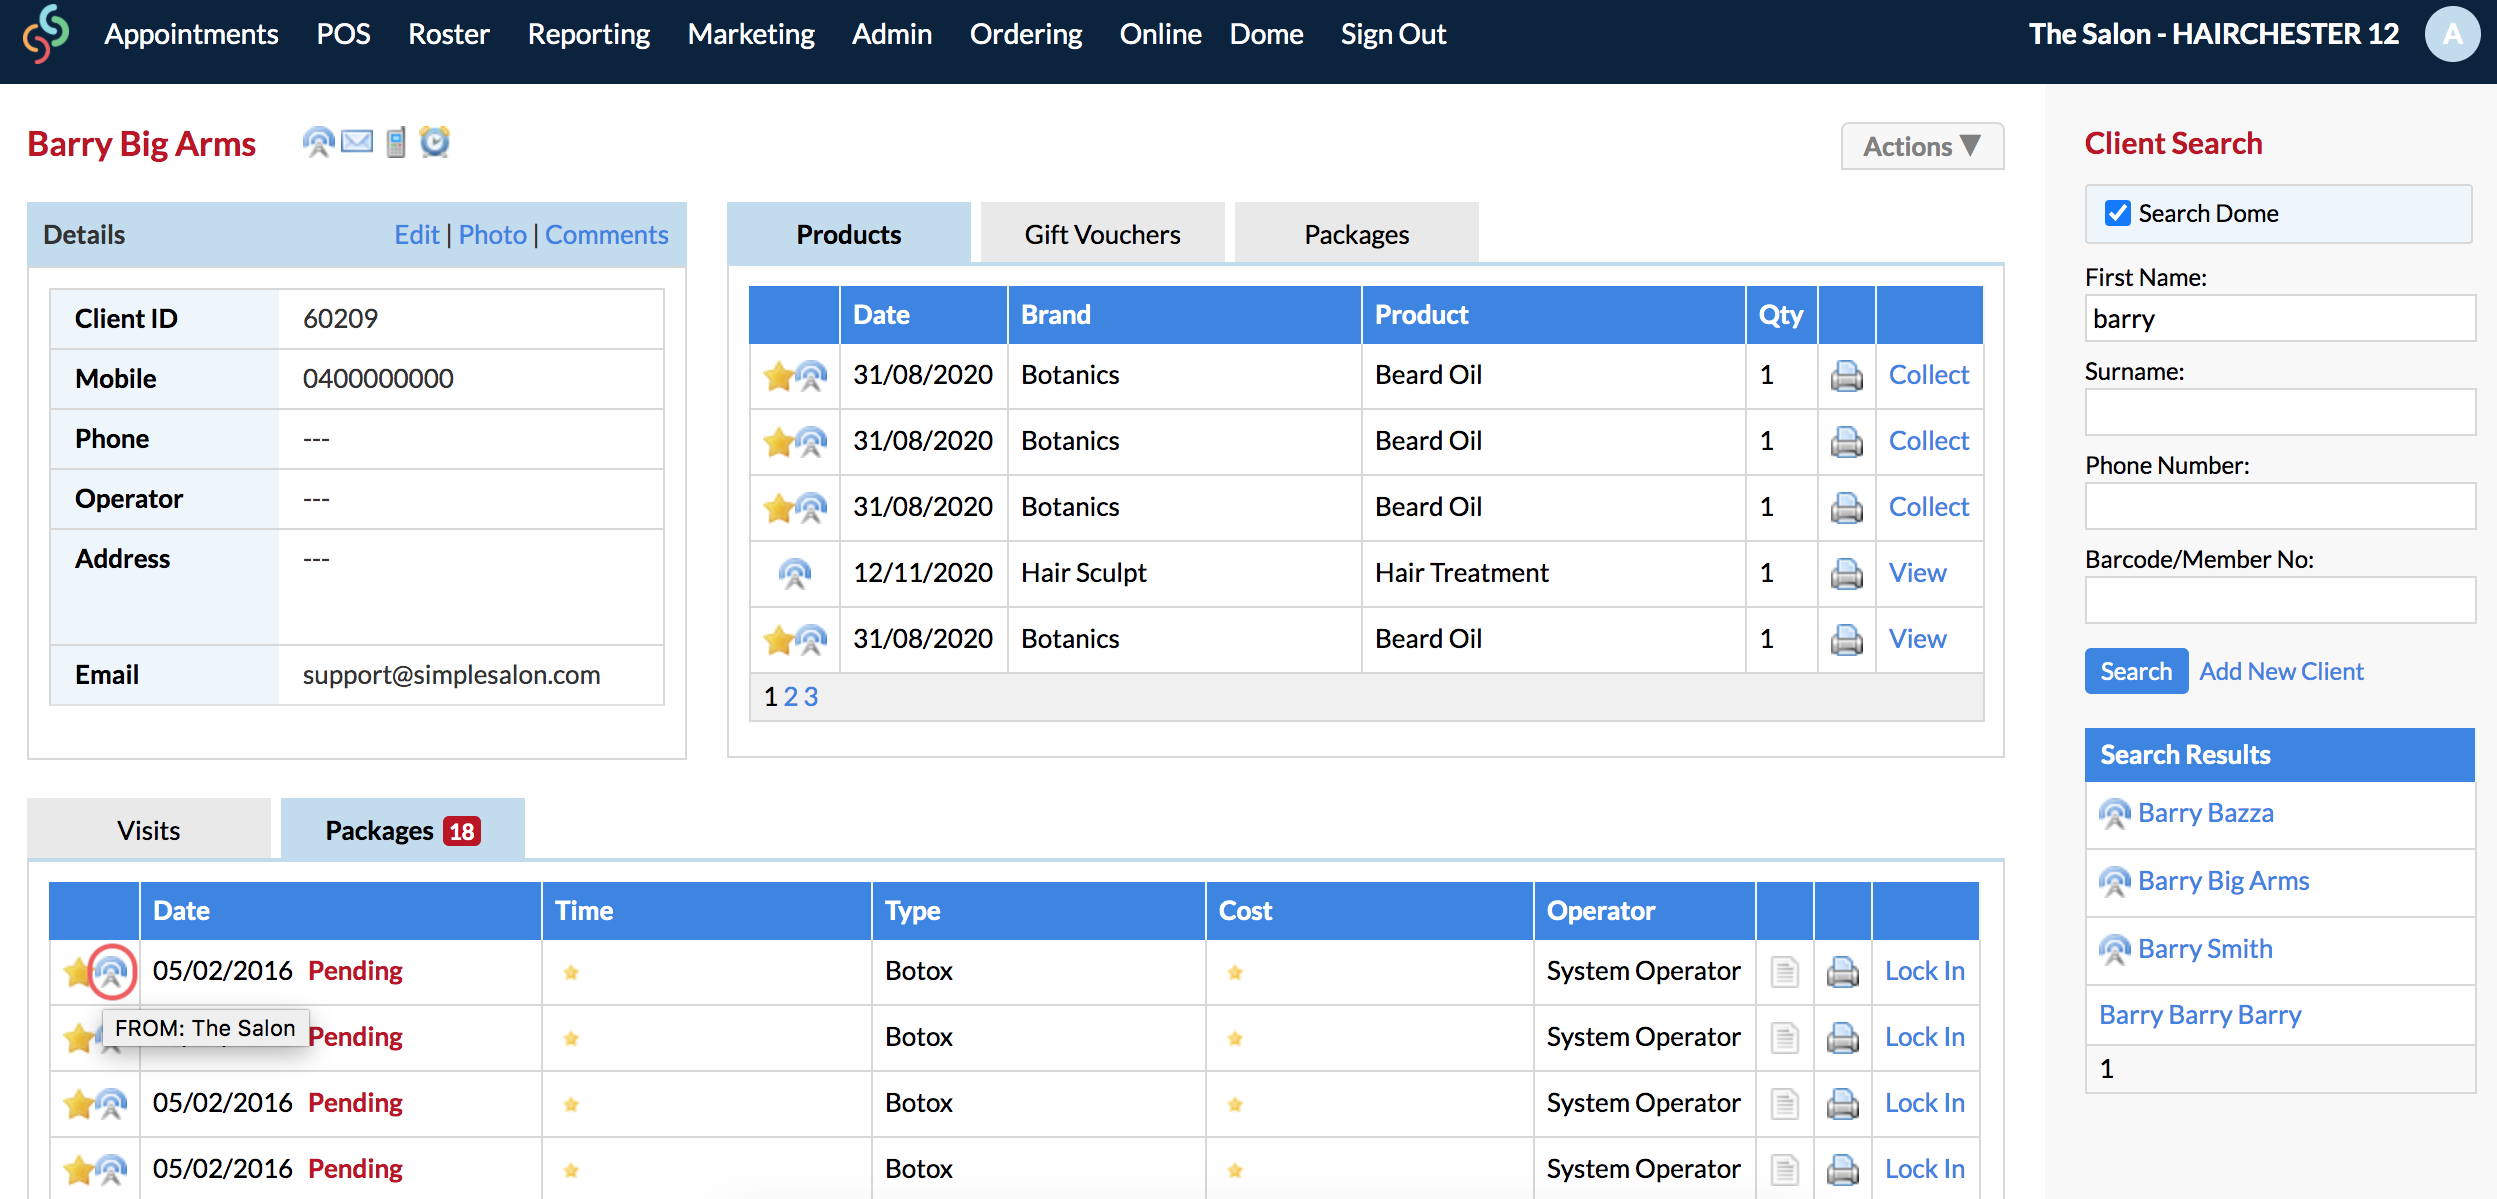
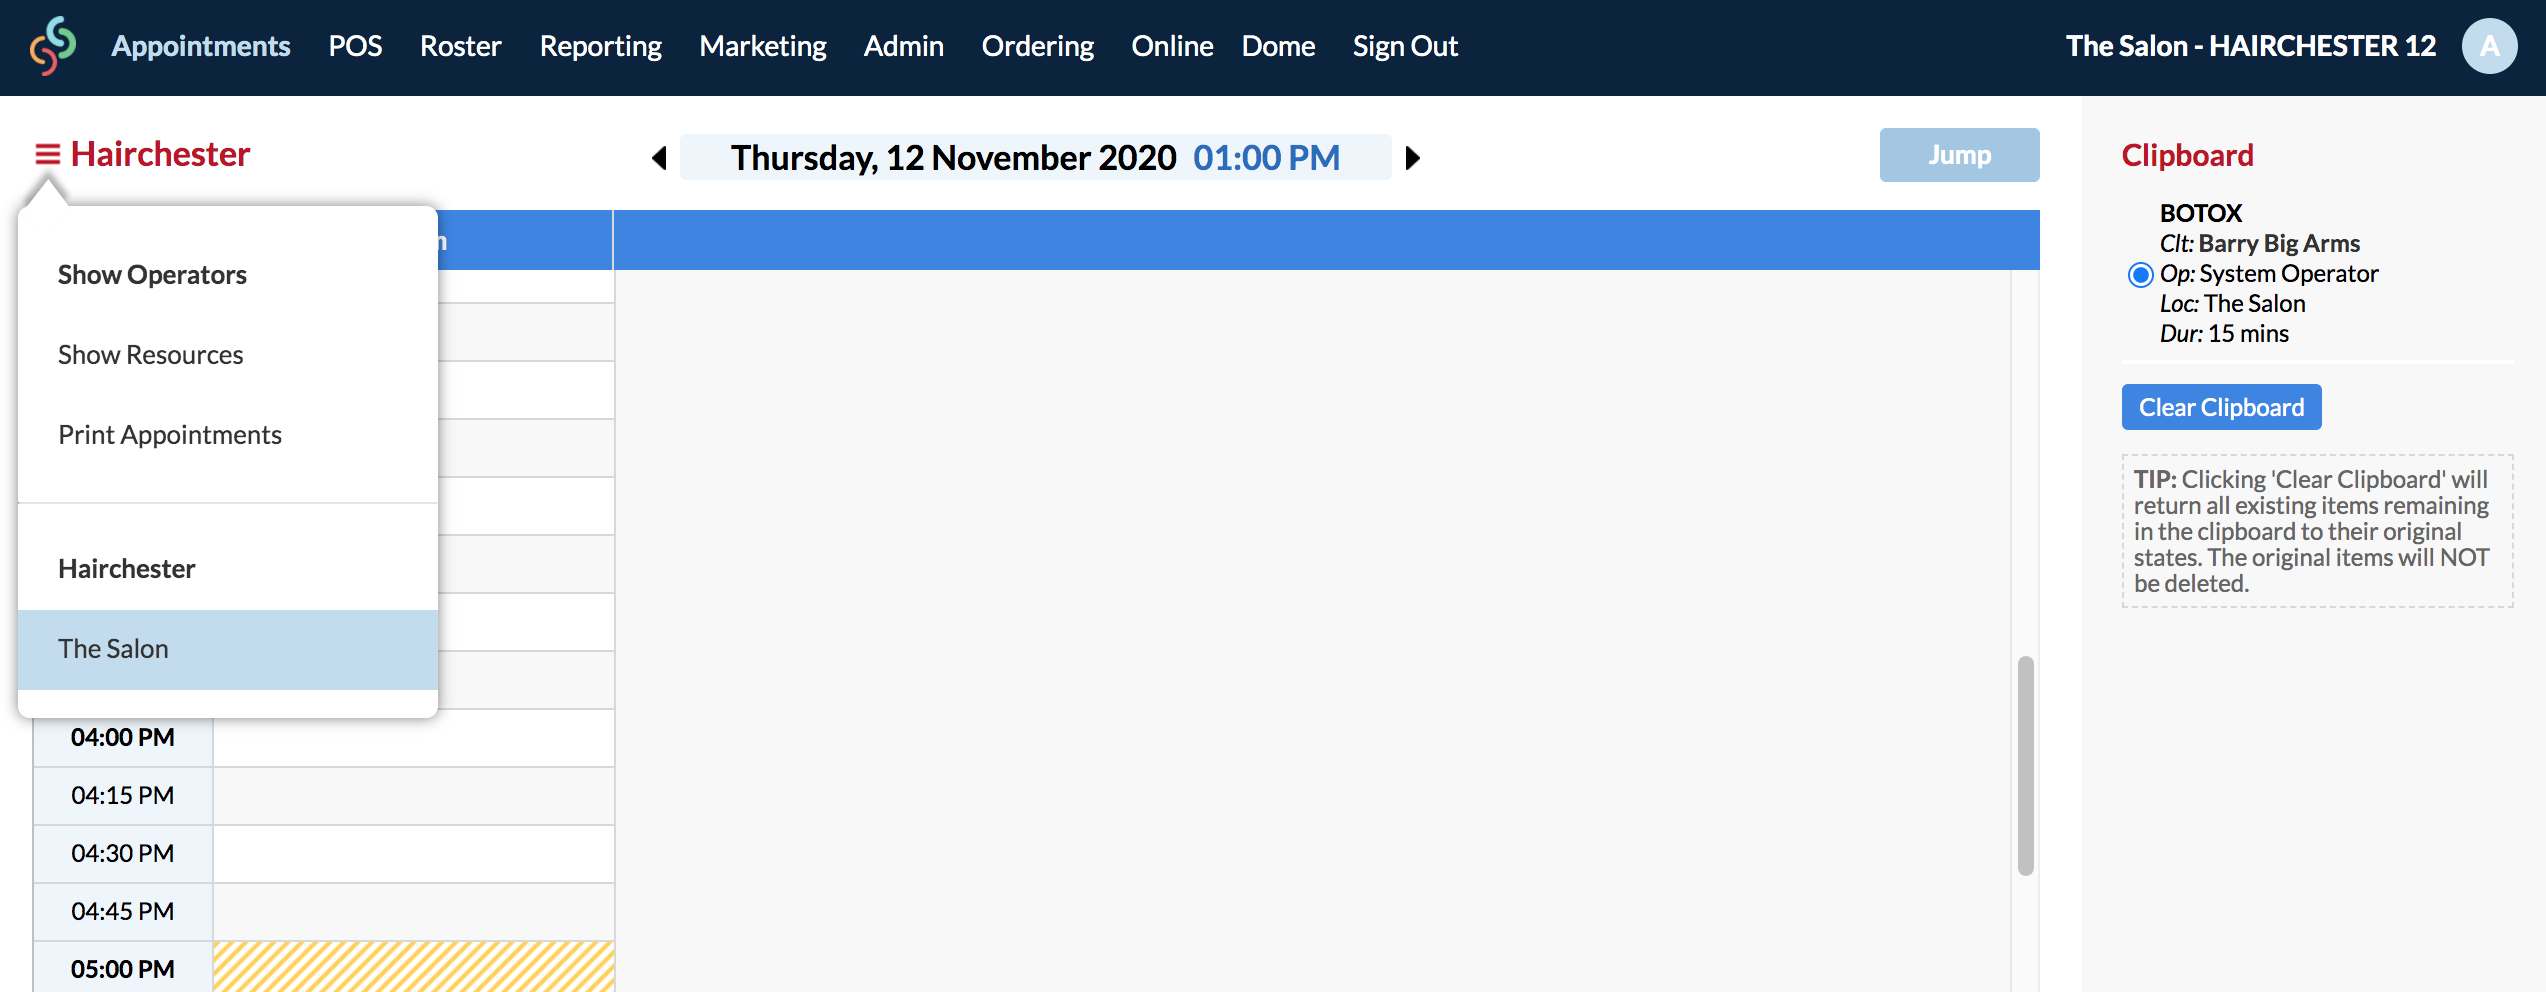
Because the "allow package items to be redeemed" setting is enabled in the Dome, we can lock-in Barry at any other location. Selecting Lock in next to the package will bring you to the appointments clipboard, where you can either place it in the current location, or a different location of your client's choice:
Gift Vouchers
As with packages, Gift Vouchers can be purchased then redeemed at any location. You'll first need to set them up within the Dome, then share them down to relevant locations:
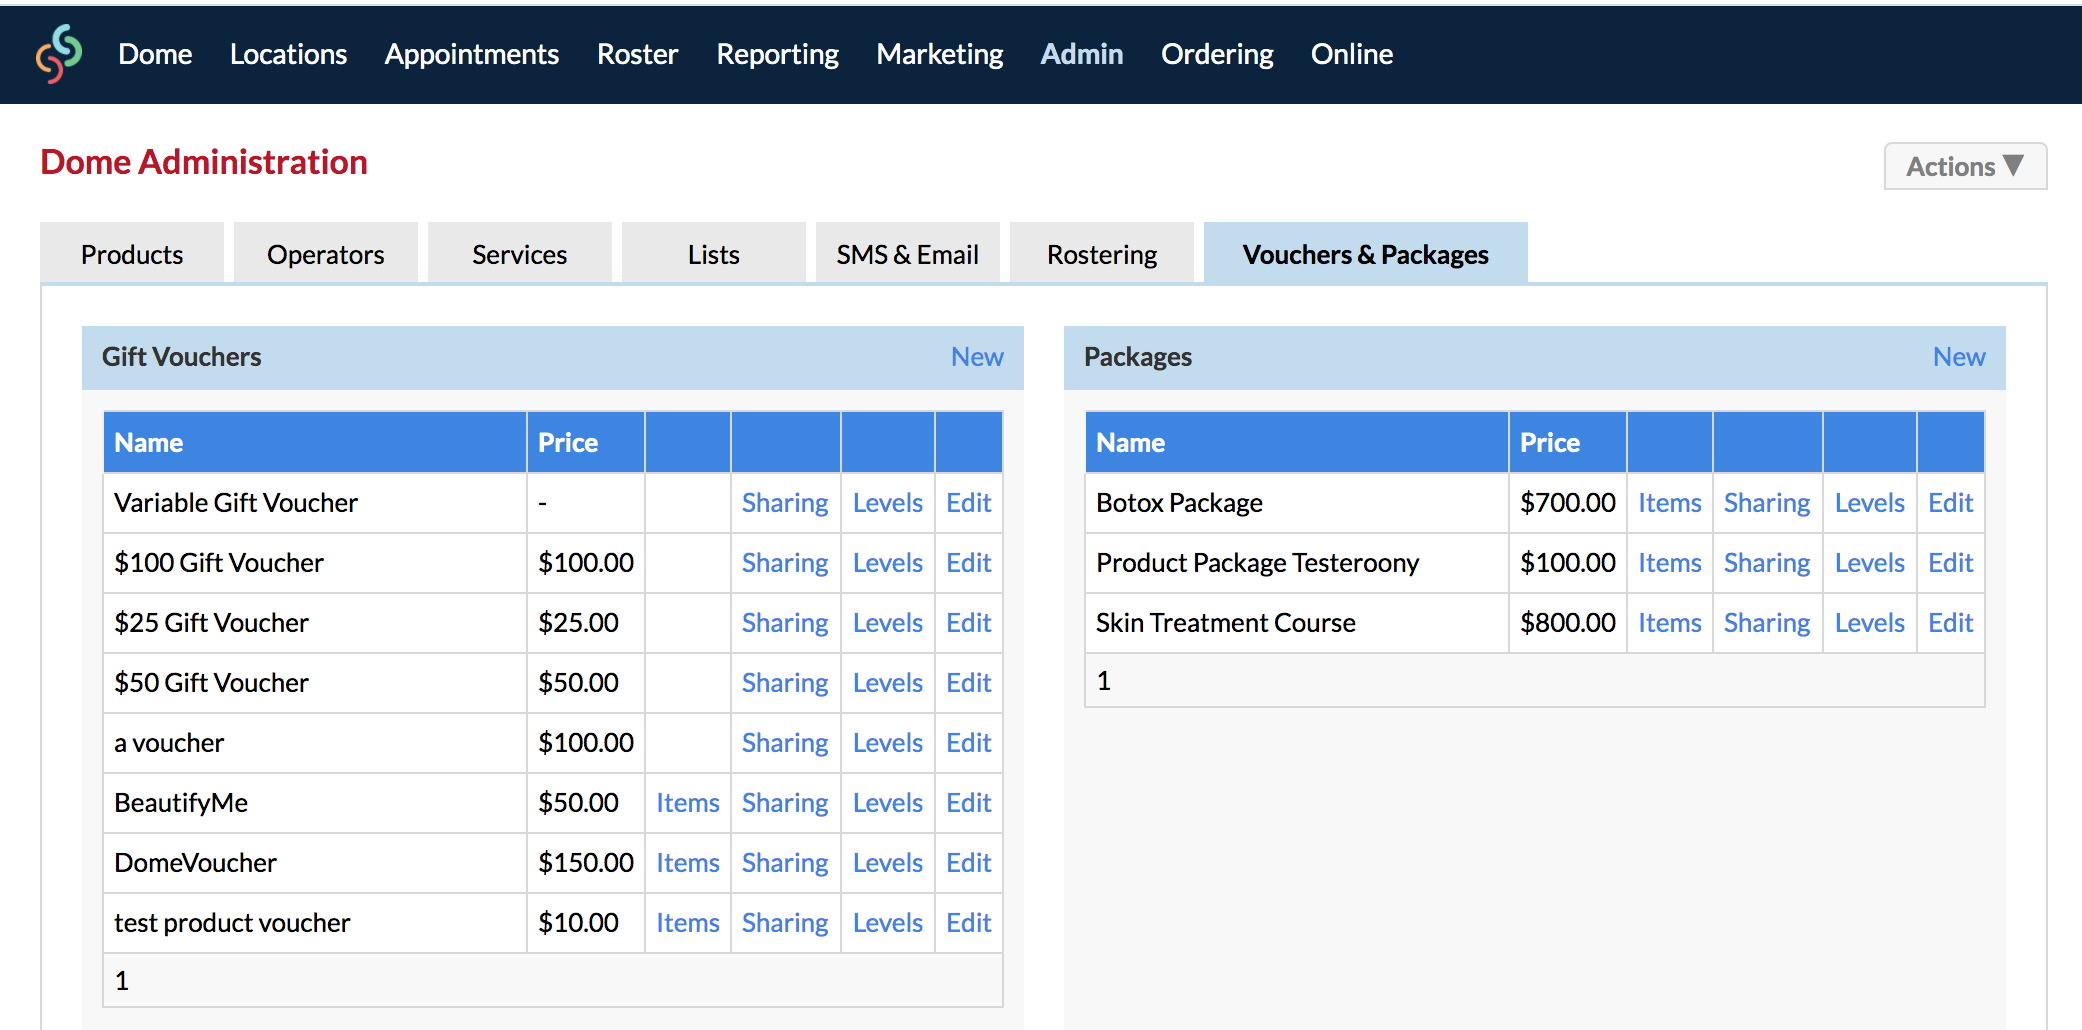
With a Dome account, the processing of a Gift Voucher follows the same process of a regular account, even if it was purchased at another location. As long as the client has their Voucher ID, the sale can be processed via POS as normal.
You can view all gift vouchers purchased by any client within the Dome via their client card:
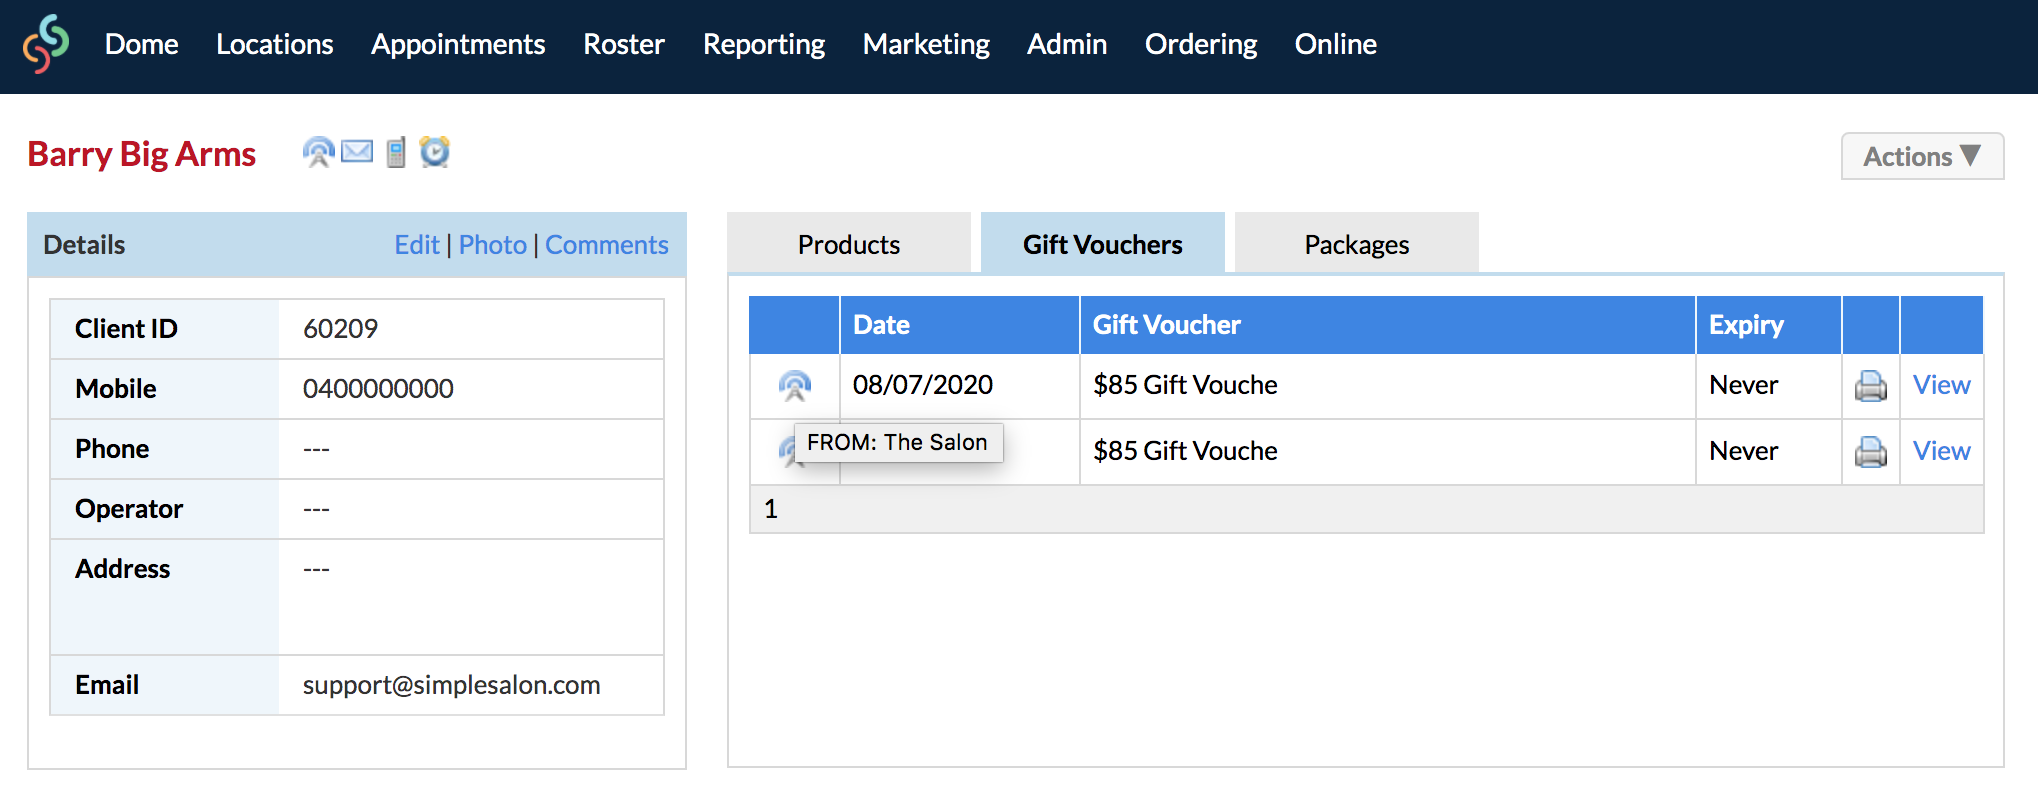
For a comprehensive look at our Gift Voucher system, please click here.
Online Booking with Dome
Having a Dome account allows you to centralise your online bookings for all of your locations, and makes it easy for clients to book in with any of your businesses.
If a client is booking directly with one of your child locations, they can seamlessly change locations to book in with any of your other businesses:
For more info on Online Bookings within the Dome, please check out the following article:
Otherwise, if you would prefer an overview of Online Bookings as a whole, click here.
Transferring Stock Through Locations with Dome
With the Dome, you are given the ability to efficiently transfer stock between locations.
The Dome essentially acts like a warehouse with it's own stock quantities. Then, products can be transferred from the warehouse to any salon location, with quantities updating everywhere accordingly.
This can be accessed via the Ordering page:
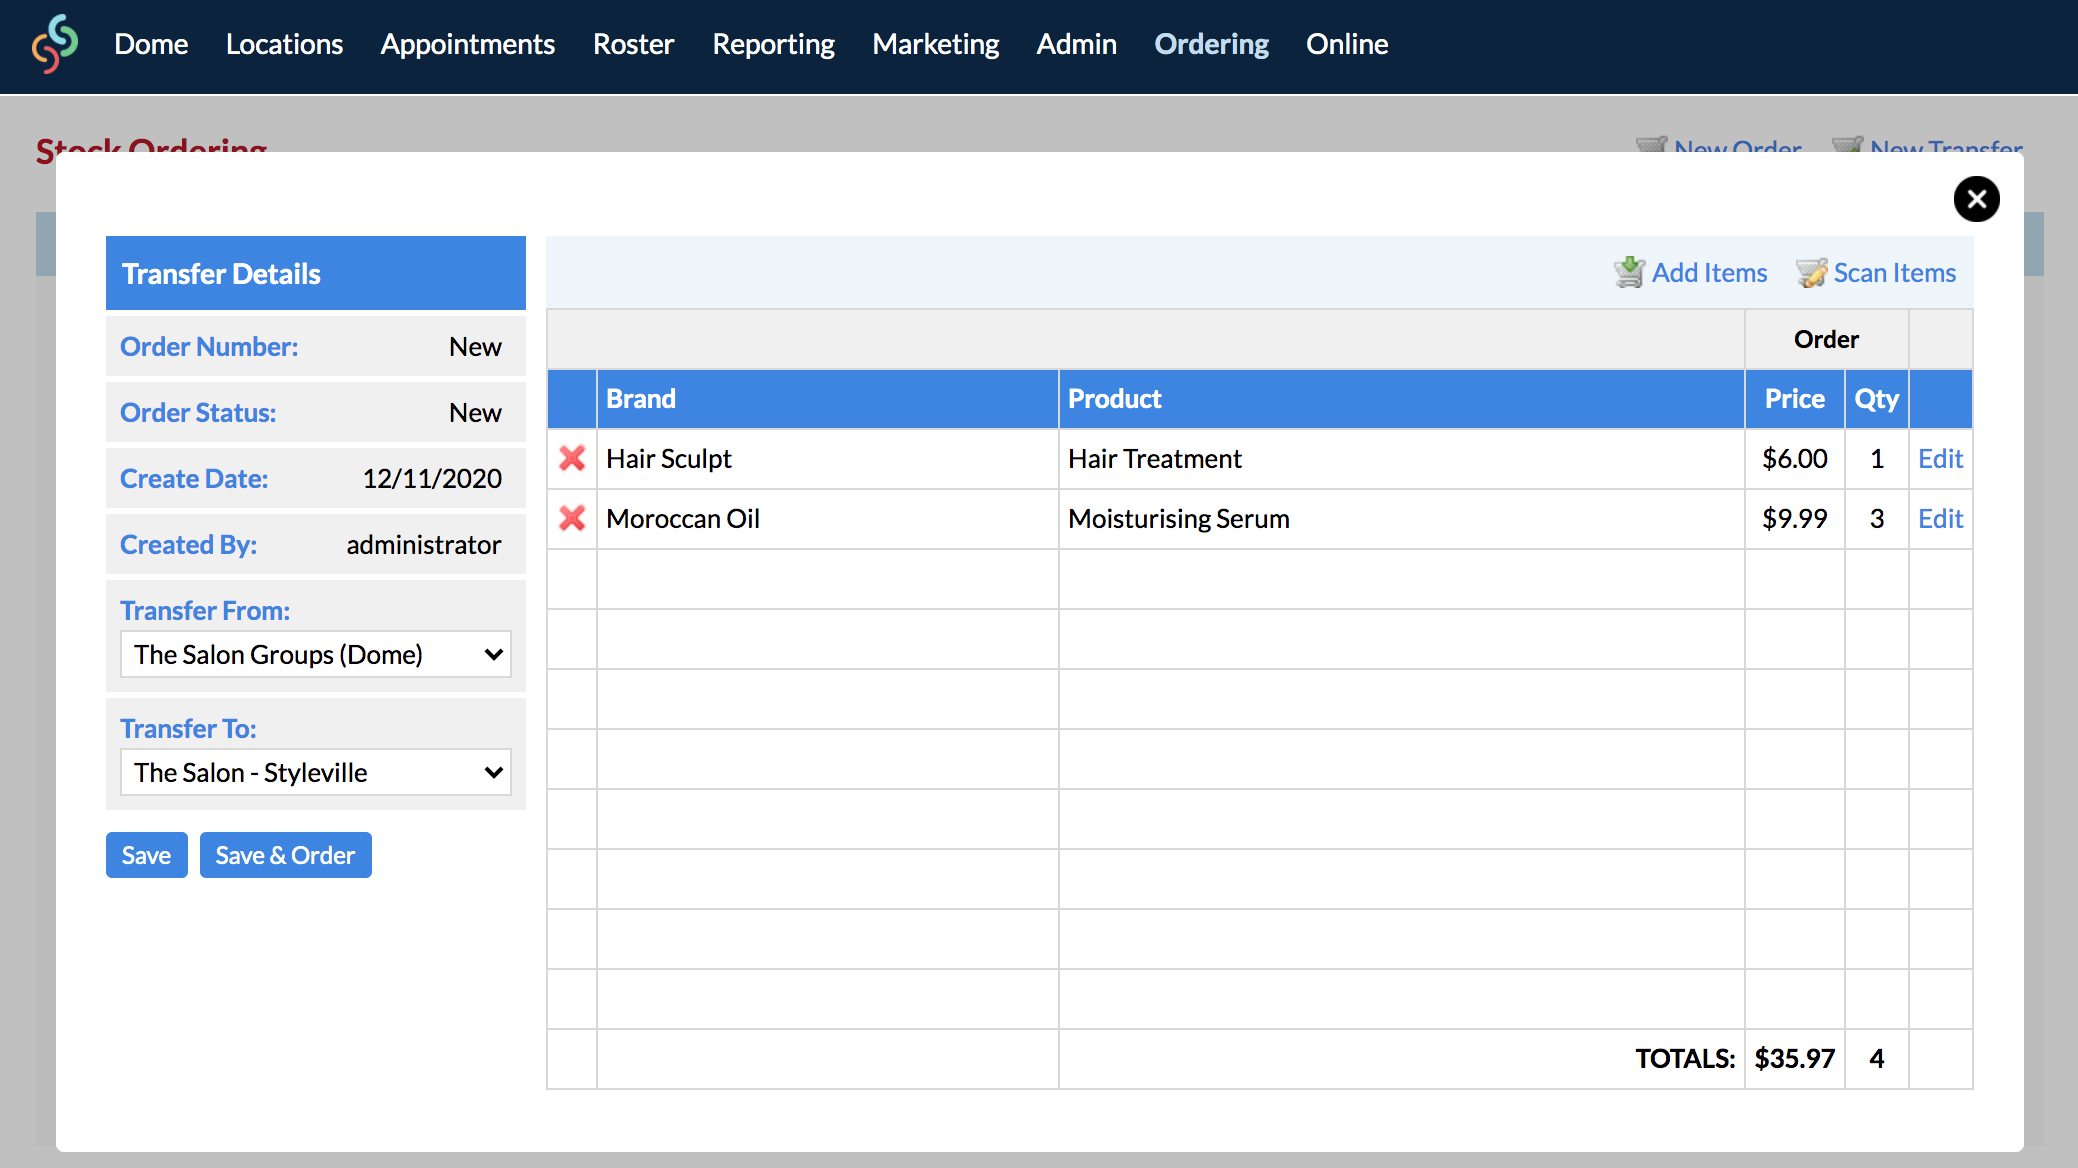
To learn how to transfer stock between your locations, please click here.
Otherwise, if you would like to learn about the Ordering system as a whole, click here.
Sharing Dome SMS Account with Child Locations
With a Dome account, you have the option to share your SMS account with your child locations. This means that you only need to purchase SMS credits in the Dome Simple Salon Messaging account, and each child location uses the same SSM account and pre-purchased SMS credits.
This is a convenient option, but you also have the ability of each child location using their own messaging account.
For a further look into sharing an SMS Account, please checkout the following article:
Child Location Accounts to Use Dome Simple Salon Messaging Account
Adding a New Location
Adding a new location to your Dome is a very simple process. Avoid having to manually add data into each new account, as within a couple of clicks you can have all service and product data shared into the new account:
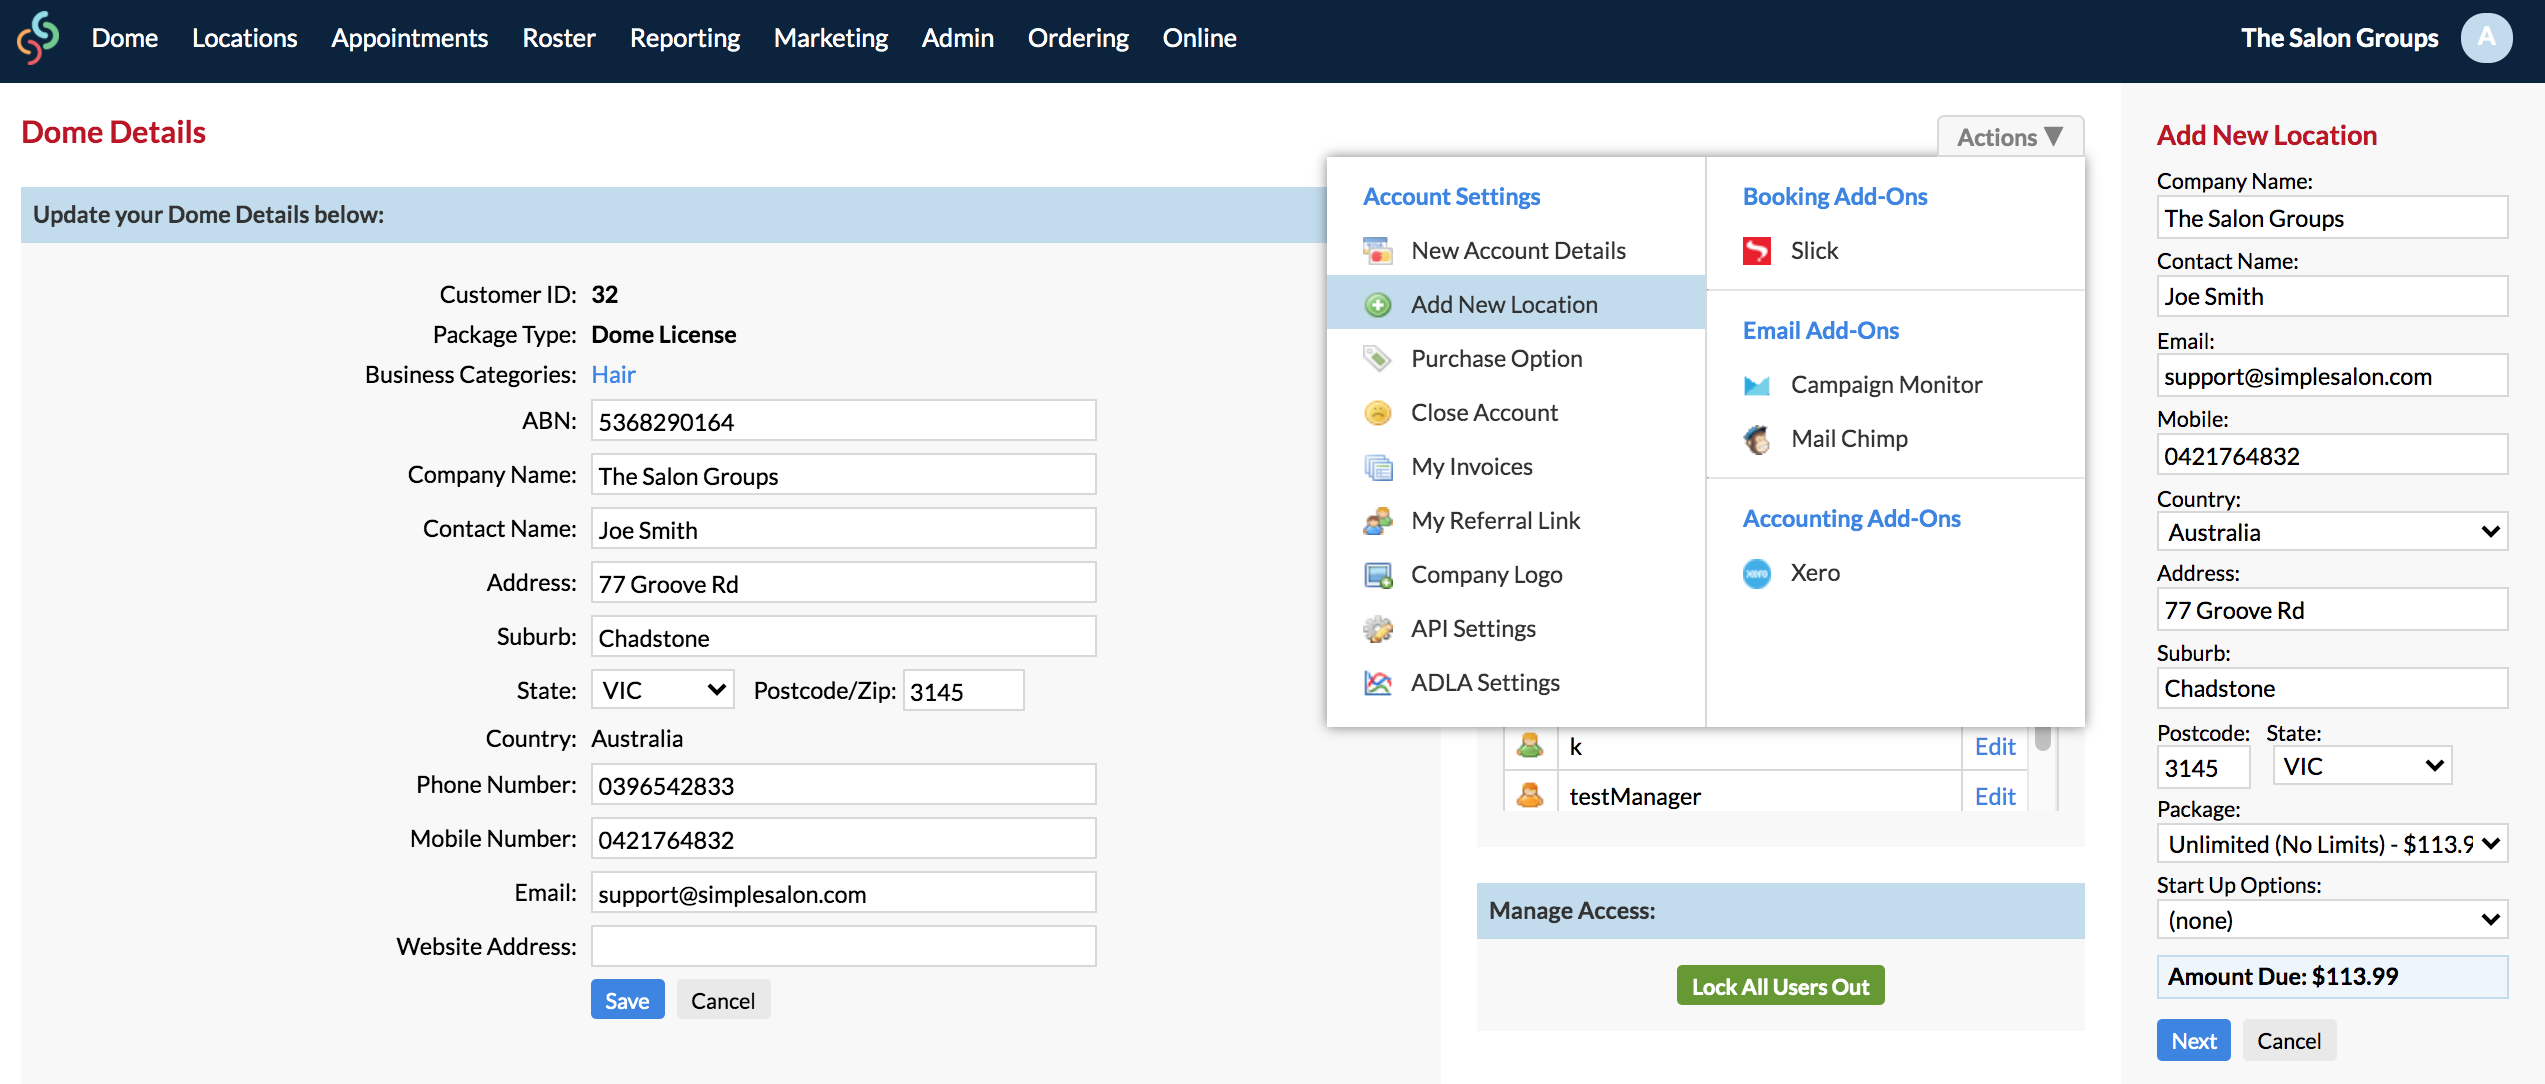
This can be accessed from Account > Actions > Add New Location.
Once you have followed through the prompts and successfully activated your new account, your new location account will appear in the Locations section of your Dome.
If you need further help with adding a new location, please click here.
Marketing & Reporting Across All Locations Within the Dome
Marketing
Within the Dome, most Marketing categories give you the option of selecting a location.
This allows you to do all marketing from the Dome page, without having to browse down into each individual location.
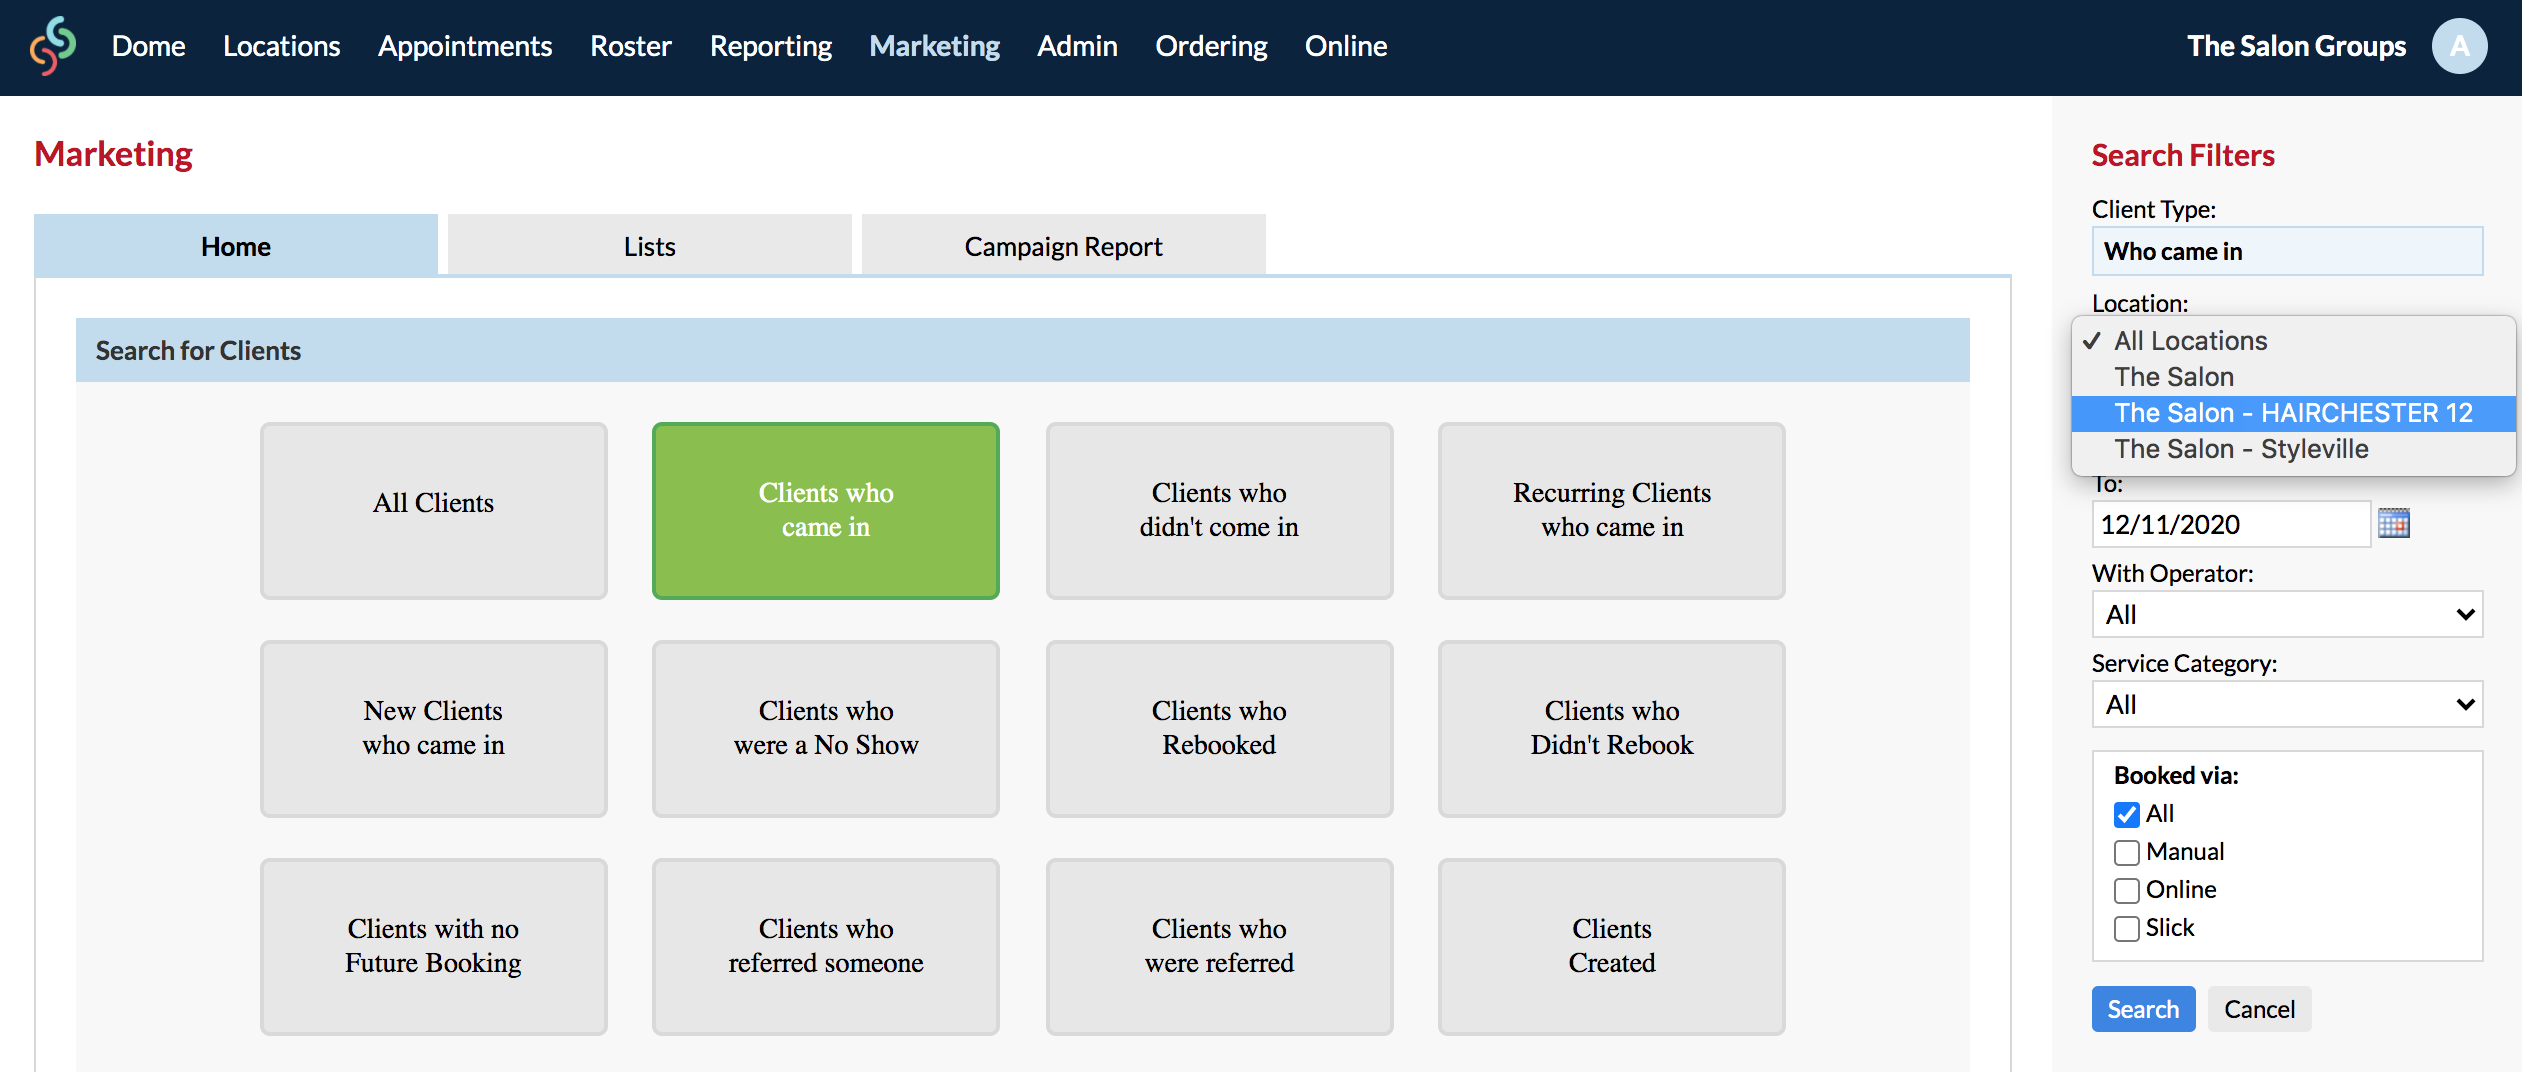
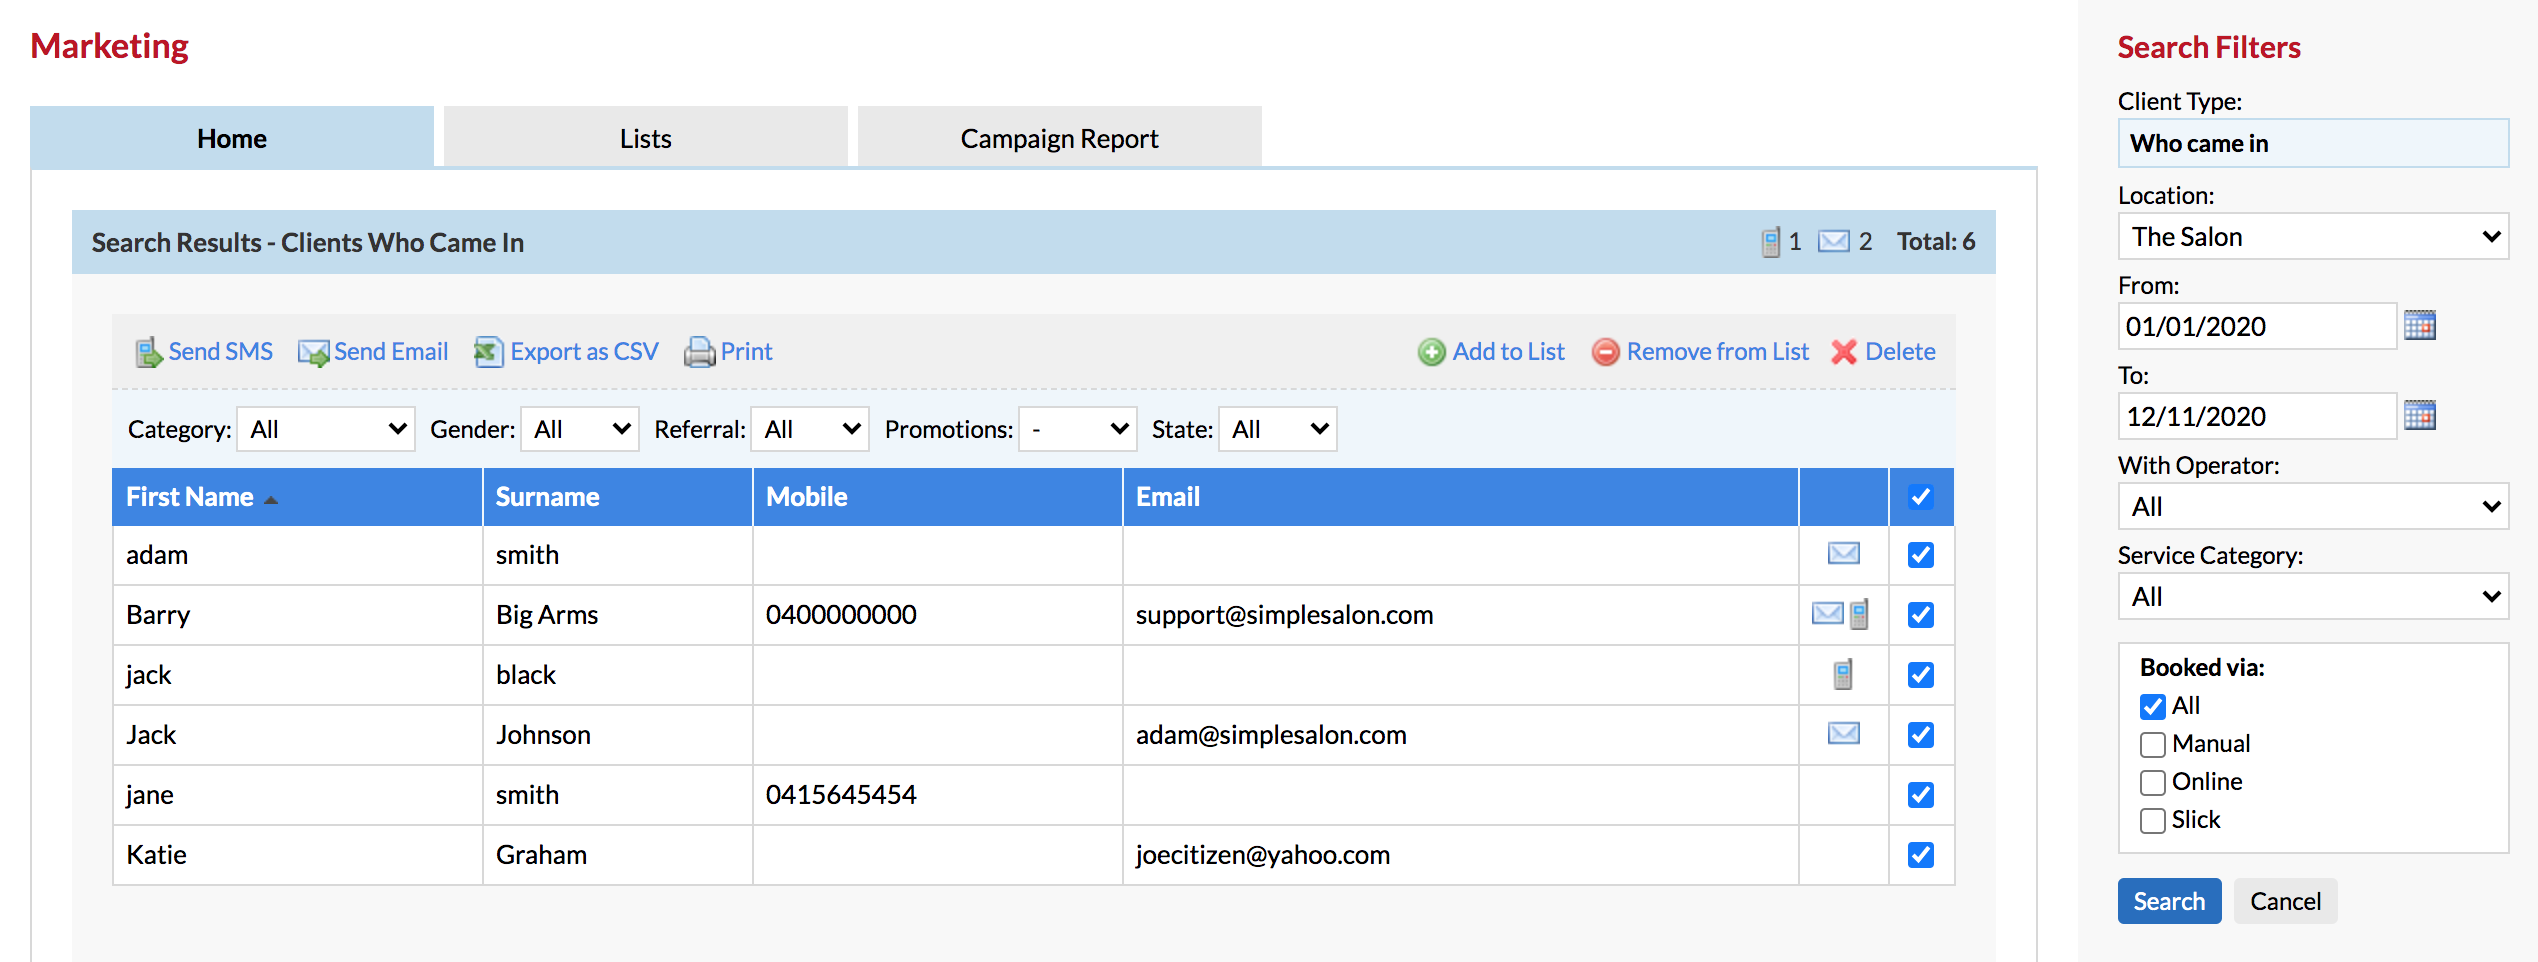
Clients who appear in these results, will be clients who have visited the chosen location within the chosen date range. Because of Dome Client Sharing, this will include clients who were created at other locations, if they visited within the selected time.
Reporting
As with Marketing, most Reporting options for each location can be accessed directly through the Dome:
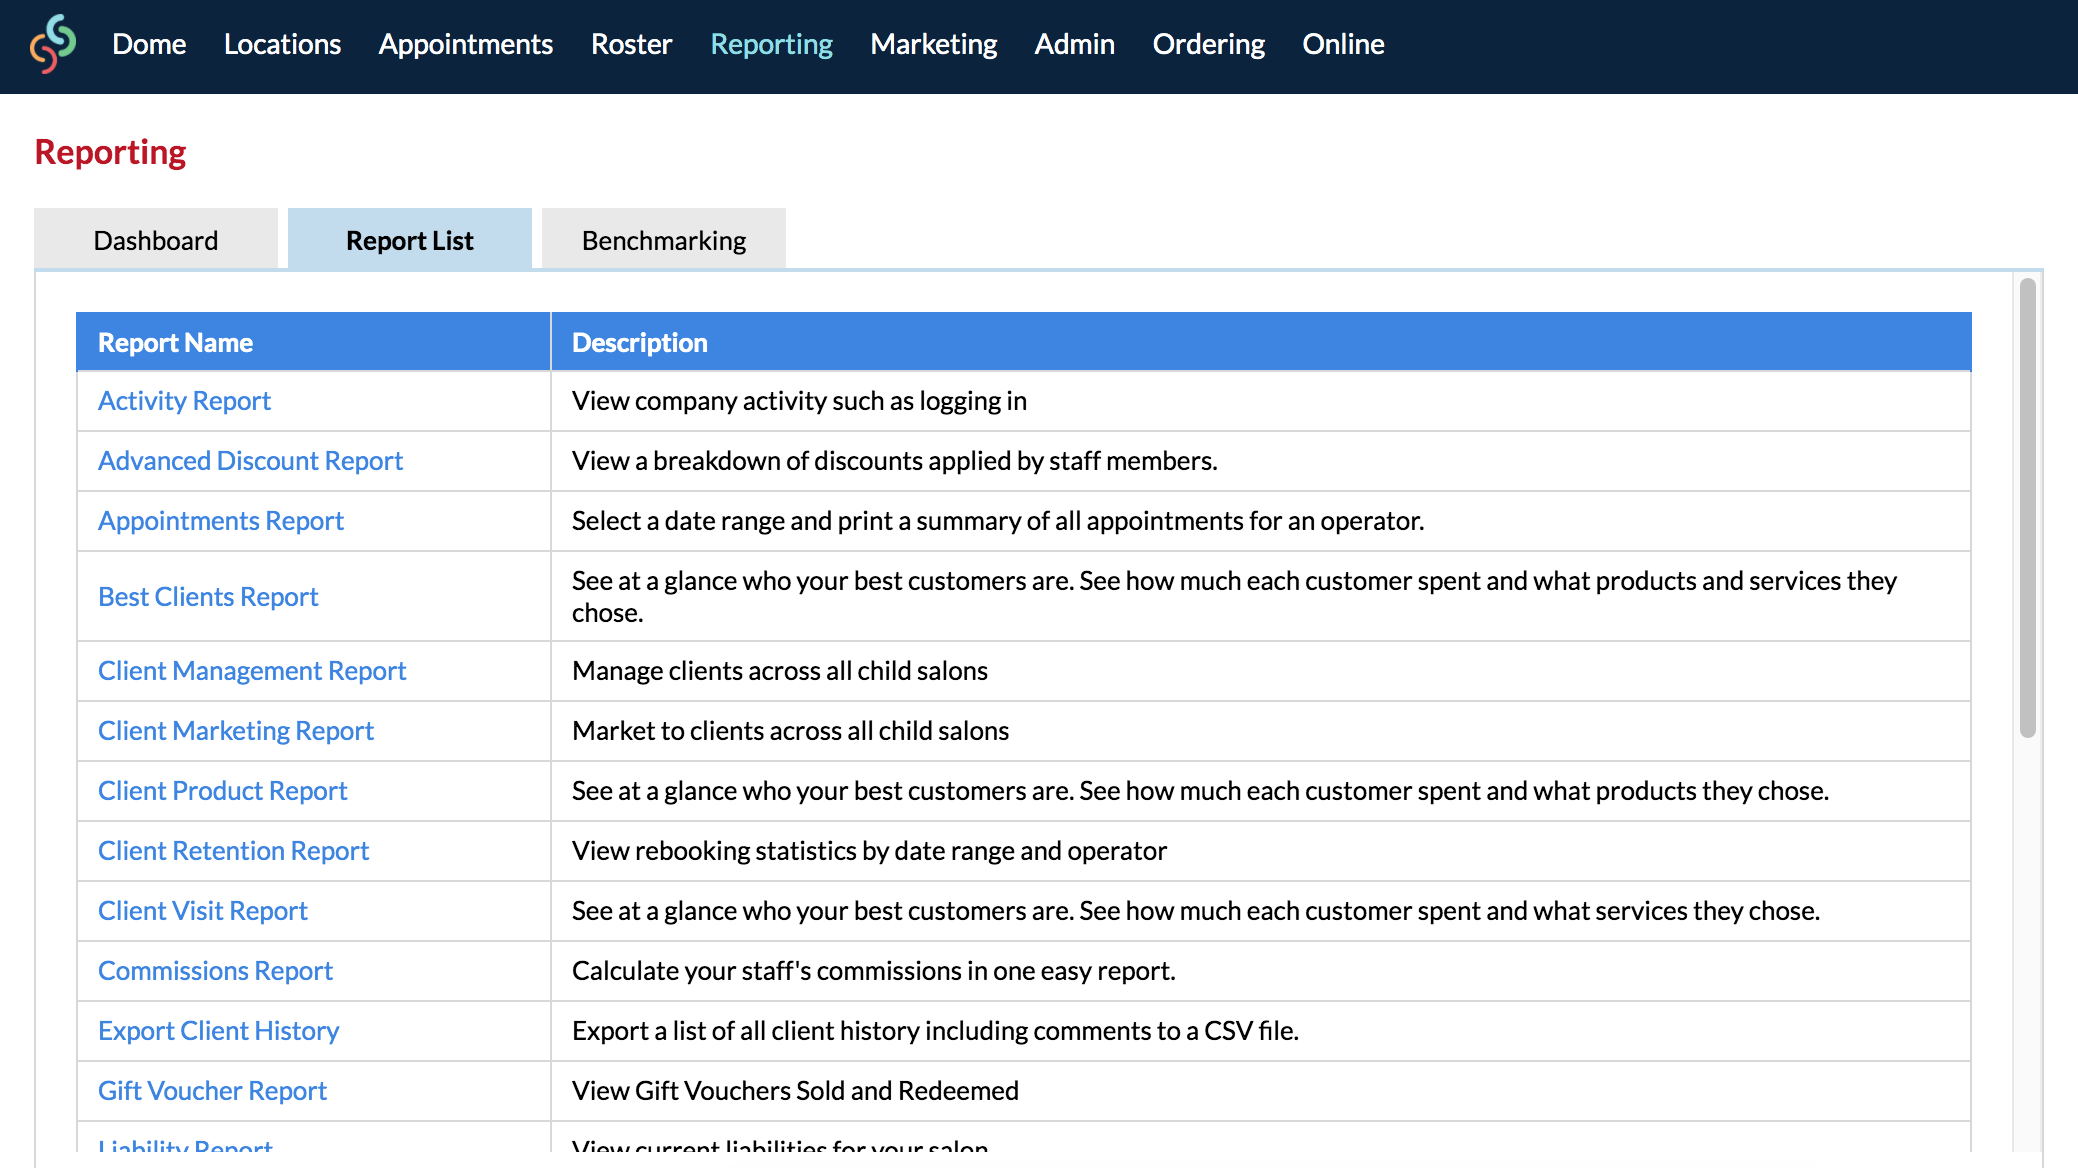
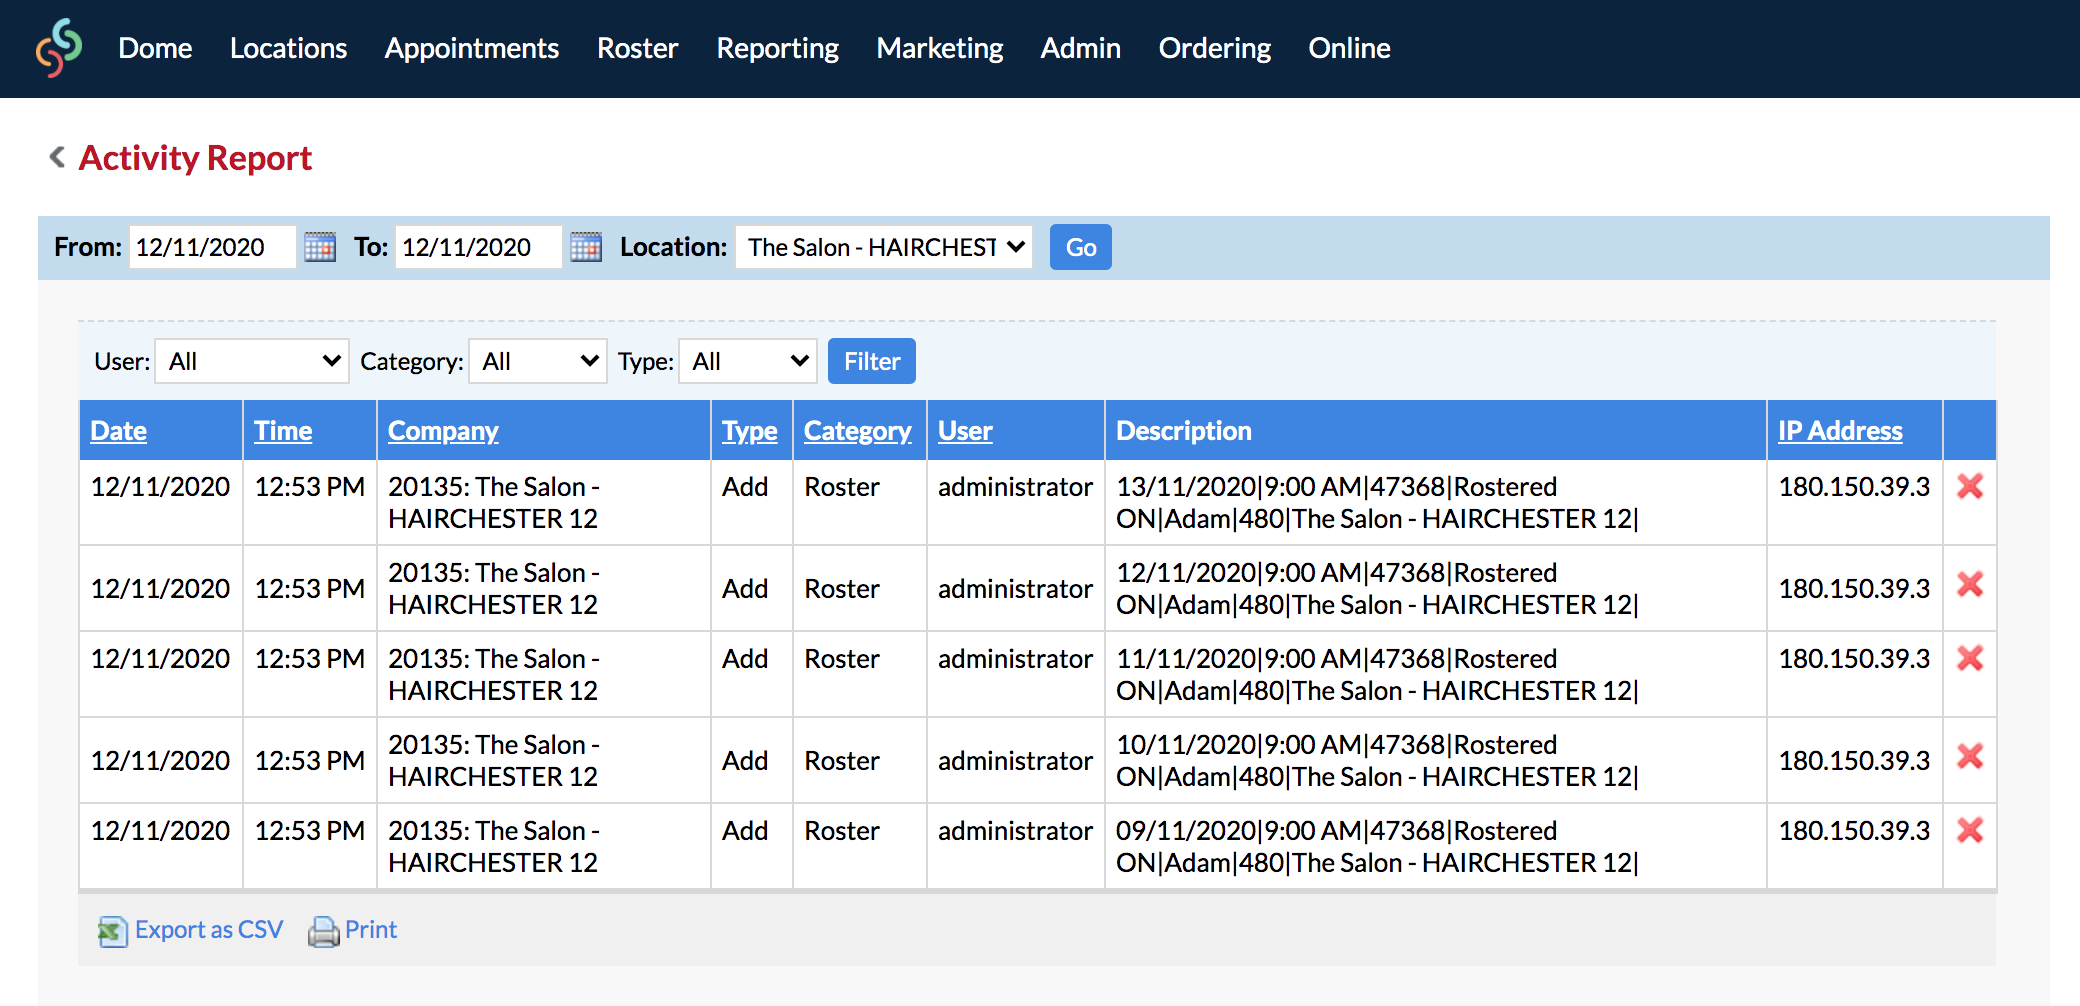
Lets say for example you wanted to view the Activity Report (Reporting > Report List) of a certain location. Rather than browsing down into the location—you can simply access the Activity Report in the Dome, then choose the location you would like to view:
The following Reporting options can only be accessed by browsing/logging into the child locations, and not via the Dome:
- Accounts Report
- Client Birthday Report
- End of Day Report
- Loyalty Points Report
- Operator KPI Report
- Pending Bookings Report
- Summary Report
- Transaction Report
- Wages Report
If you have any questions, please send them to us via the Submit a Request option in your Help & Support page—we're here to help.