If you've upgraded to the Dome then you likely have the additional task of managing rosters for more than one of your locations. Your Dome account allows you to set up Rostering for all locations efficiently in one spot.
Before you begin this process, ensure that you are logged into the Dome rather than at one of your salon locations.
You'll know that you're logged into the Dome account as there is a Locations link between Appointments and Reporting. The Dome link will also be located at the start of the list:

This article also assumes that you've already setup your Operators at each location. If you haven't setup your operators, please click here to learn how.
To enable Advanced Rostering for all of your locations within the Dome:
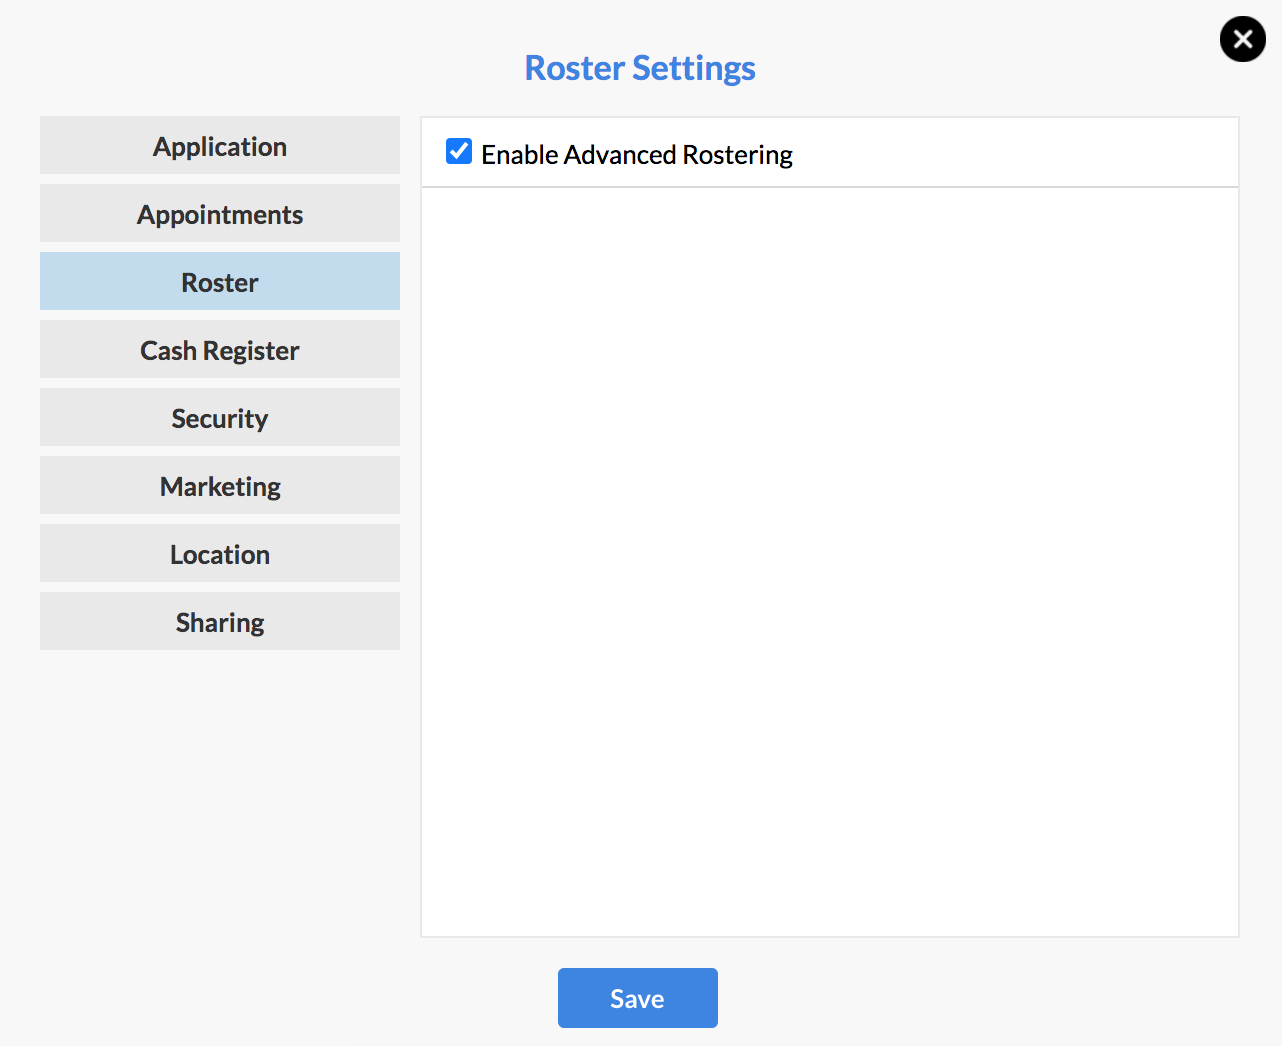
- Click on Settings > Roster Settings.
- Tick Enable Advanced Rostering then click Save.
Create your Roster Types
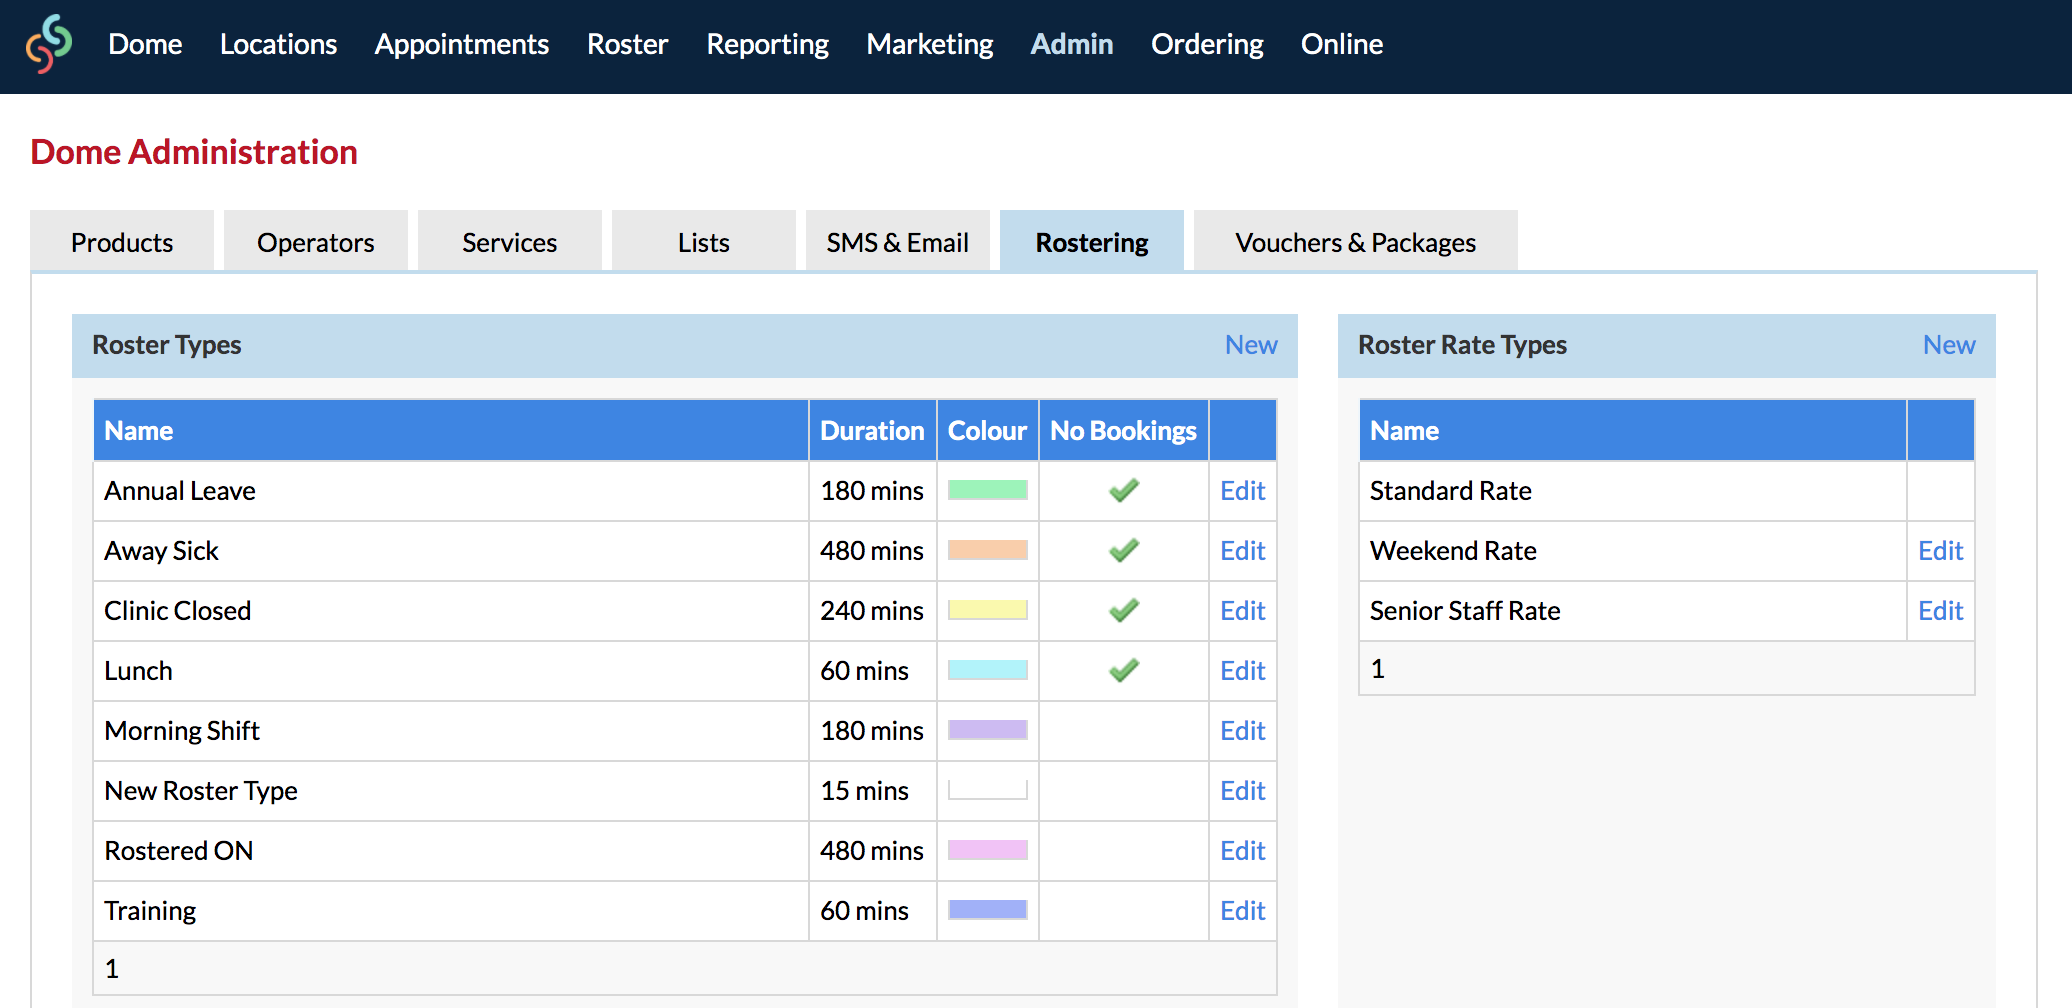
Before you start rostering, you first need to create your Roster Types. Roster Types are what you apply to your Roster i.e. Annual Leave, Sick Day, Rostered On, Rostered Off, Salon Closed etc.
Go to your Rostering tab in Admin. Below are some examples of various Roster Types. You can create your own by clicking the New option in your Roster Types section. Once you have created these here, you're ready to use the Roster.
When creating the Roster Types you'll have the No Bookings Allowed and Do Not Overwrite options
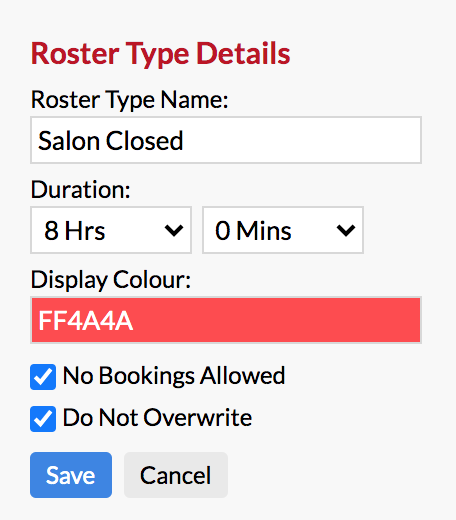
- No Bookings Allowed: when creating roster types like Annual Leave, Sick Day, Day Off - this will ensure that when you use these roster types in the Roster, no bookings can be made with the operator.
- Do Not Overwrite: This means that this particular Roster Type will not be deleted/overwritten if you change an operator's roster times and clear the roster into the future. The clear will remove all other roster items, but will not delete any that have Do Not Overwrite selected e.g. Annual Leave.
Once your Roster Types have been created in the Dome, Rosters can also be edited and updated at the child account level as well.
Setting up Your First Location
The Dome allows you to setup the roster for each location directly within the Dome account. To begin setting up the roster click on the Roster link.
The Roster will load. Please make note of the date range and drop down at the top of the Roster page.
The drop down is currently showing you the name of your Dome account. Click on the drop down and select one of your salon locations.
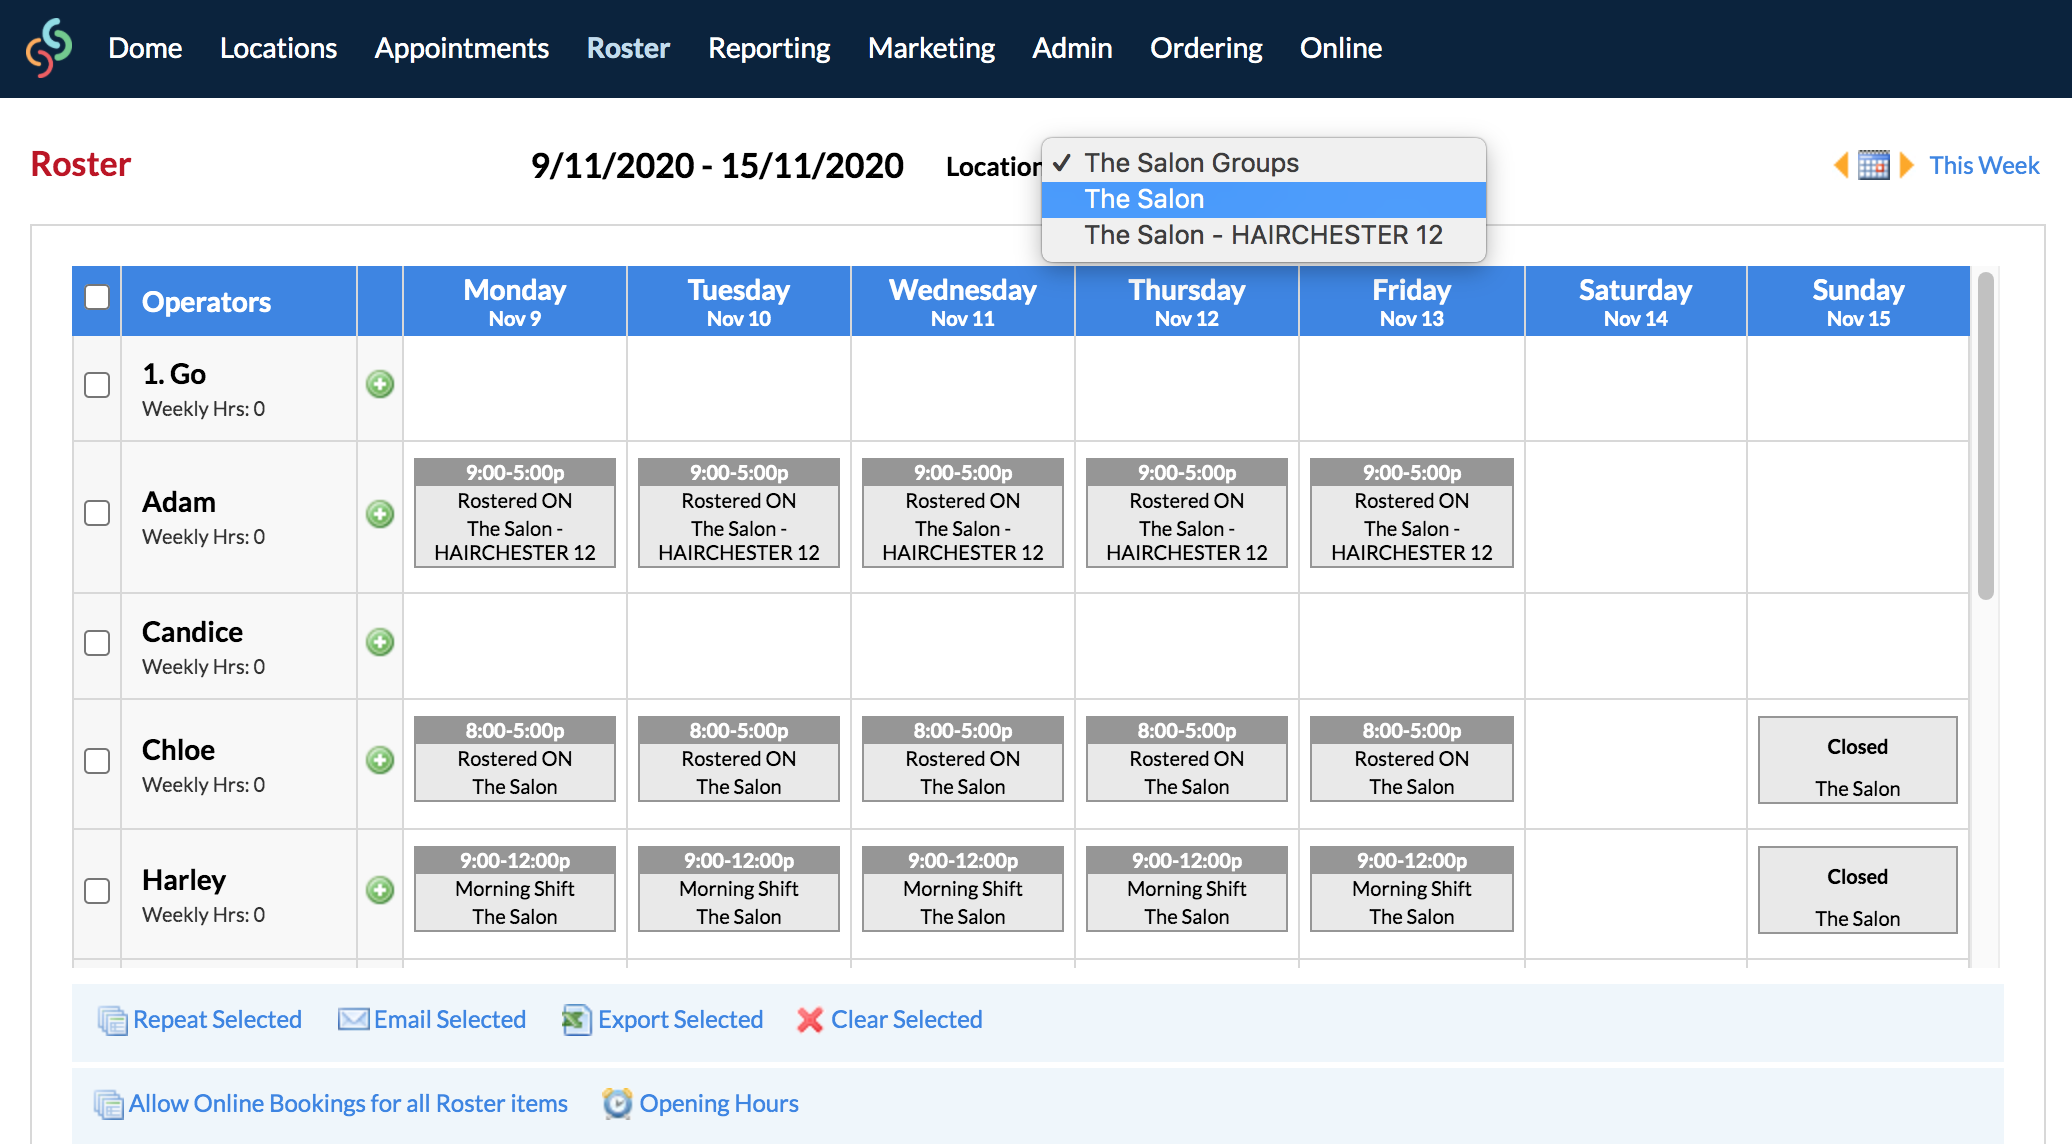
Please note that:
- The "The Salon" and "The Salon - Hairchester 12" are example 'child' locations. These represent physical locations.
- The "The Salon Group" option is the name of our Dome location, and doesn't represent a physical location to take appointments (although your Dome might represent.
At this stage, please ignore the first option so you only setup the roster for your salon locations

We've now selected the "The Salon" location and our roster has loaded for the location.
Set Opening Hours for the Location
You can adjust your opening hours for the location you've selected by clicking on the Opening Hours link at the bottom of the page.
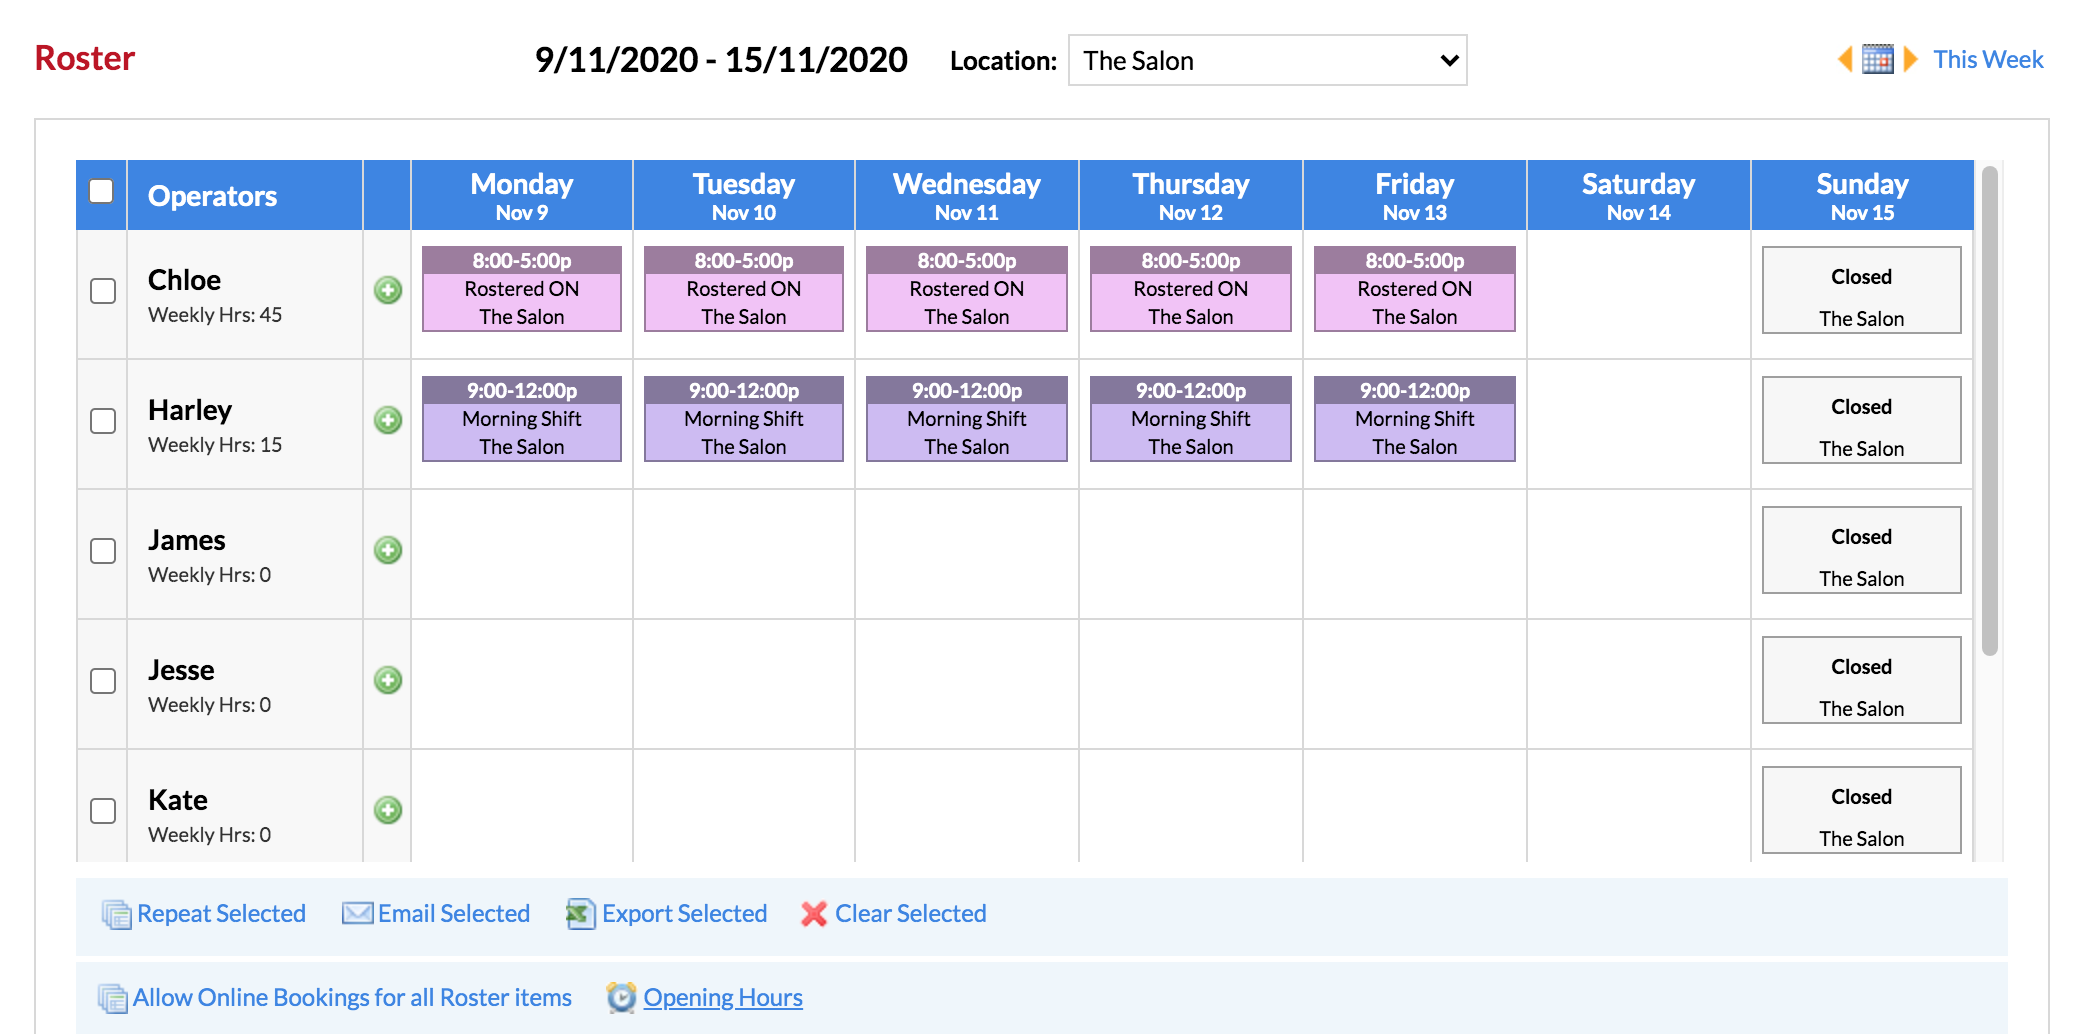
Adjust the Opening Hours as you need for the location:
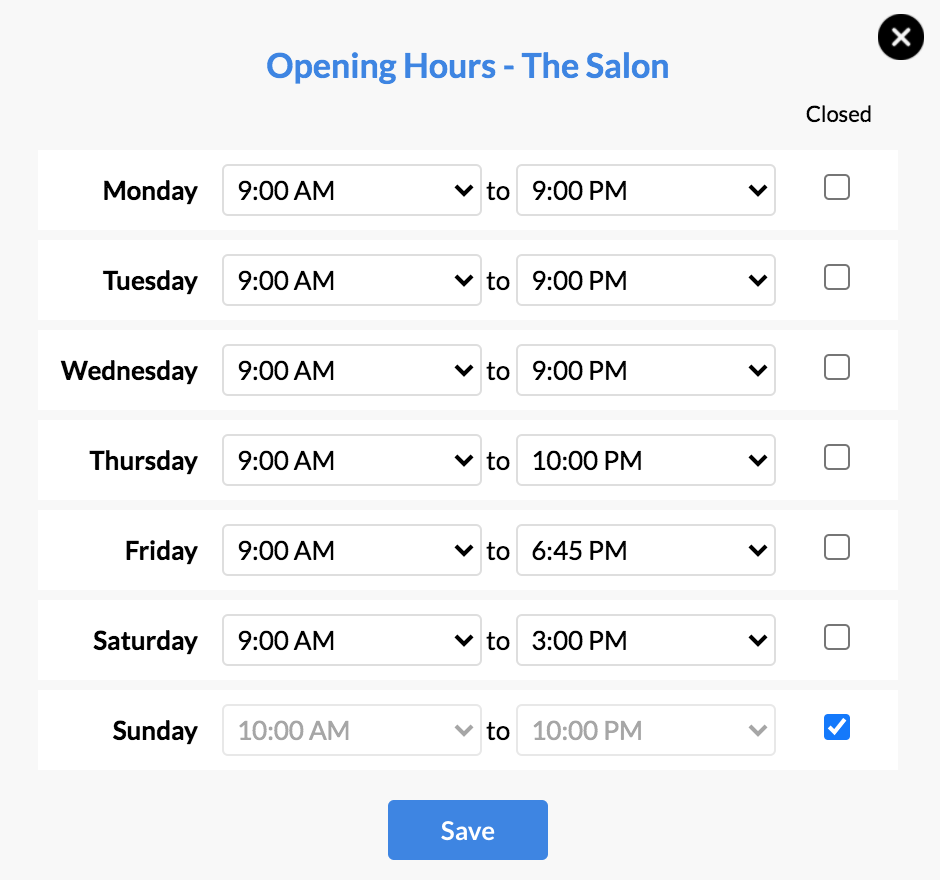
Remember to click Save to update the changes.
Now that Opening Hours are adjusted and we've loaded into our 'The Salon' child location, we can setup the roster for this location:
Click the + icon next to one of your operators (e.g. James). On the right side, fill out the roster item details:
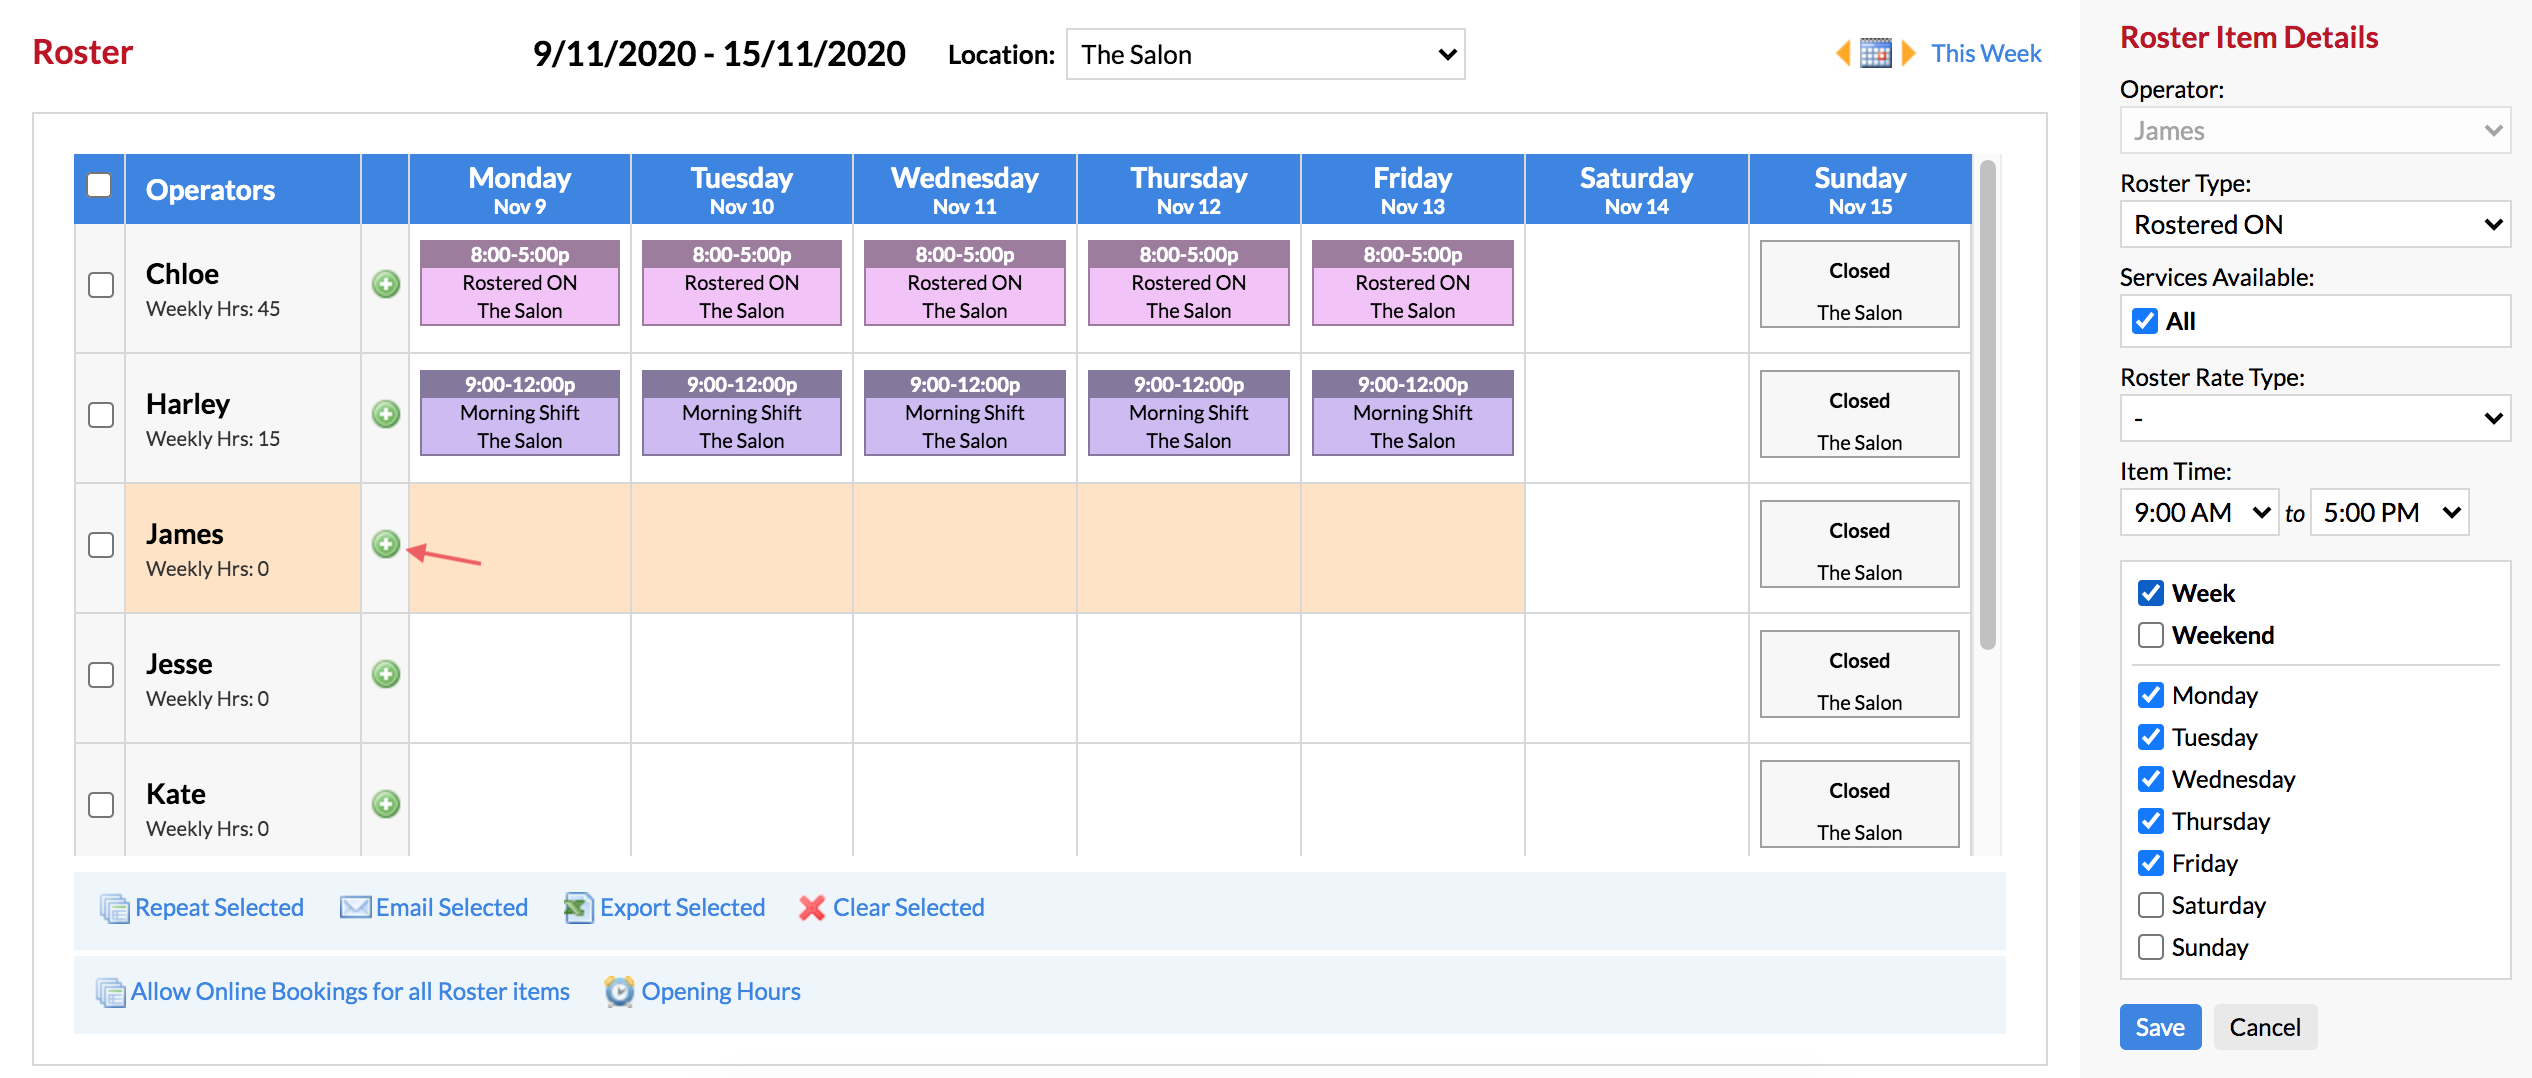
- Roster Type: Rostered ON - This is the roster item we've selected. Always make sure you're keeping an eye on what Roster Type is selected. You don't want to accidentally roster someone as "Annual Leave" if they are actually working.
- Services Available: All is ticked—the operator is allowed to perform all services they have been assigned
- Roster Rate Type: This is optional, but if you're using Advanced Rostering to track wages this is where you will select it. Click here for more info on Roster Rates.
Click Save to go ahead with the roster. We can now see that the roster has been updated to reflect the change:
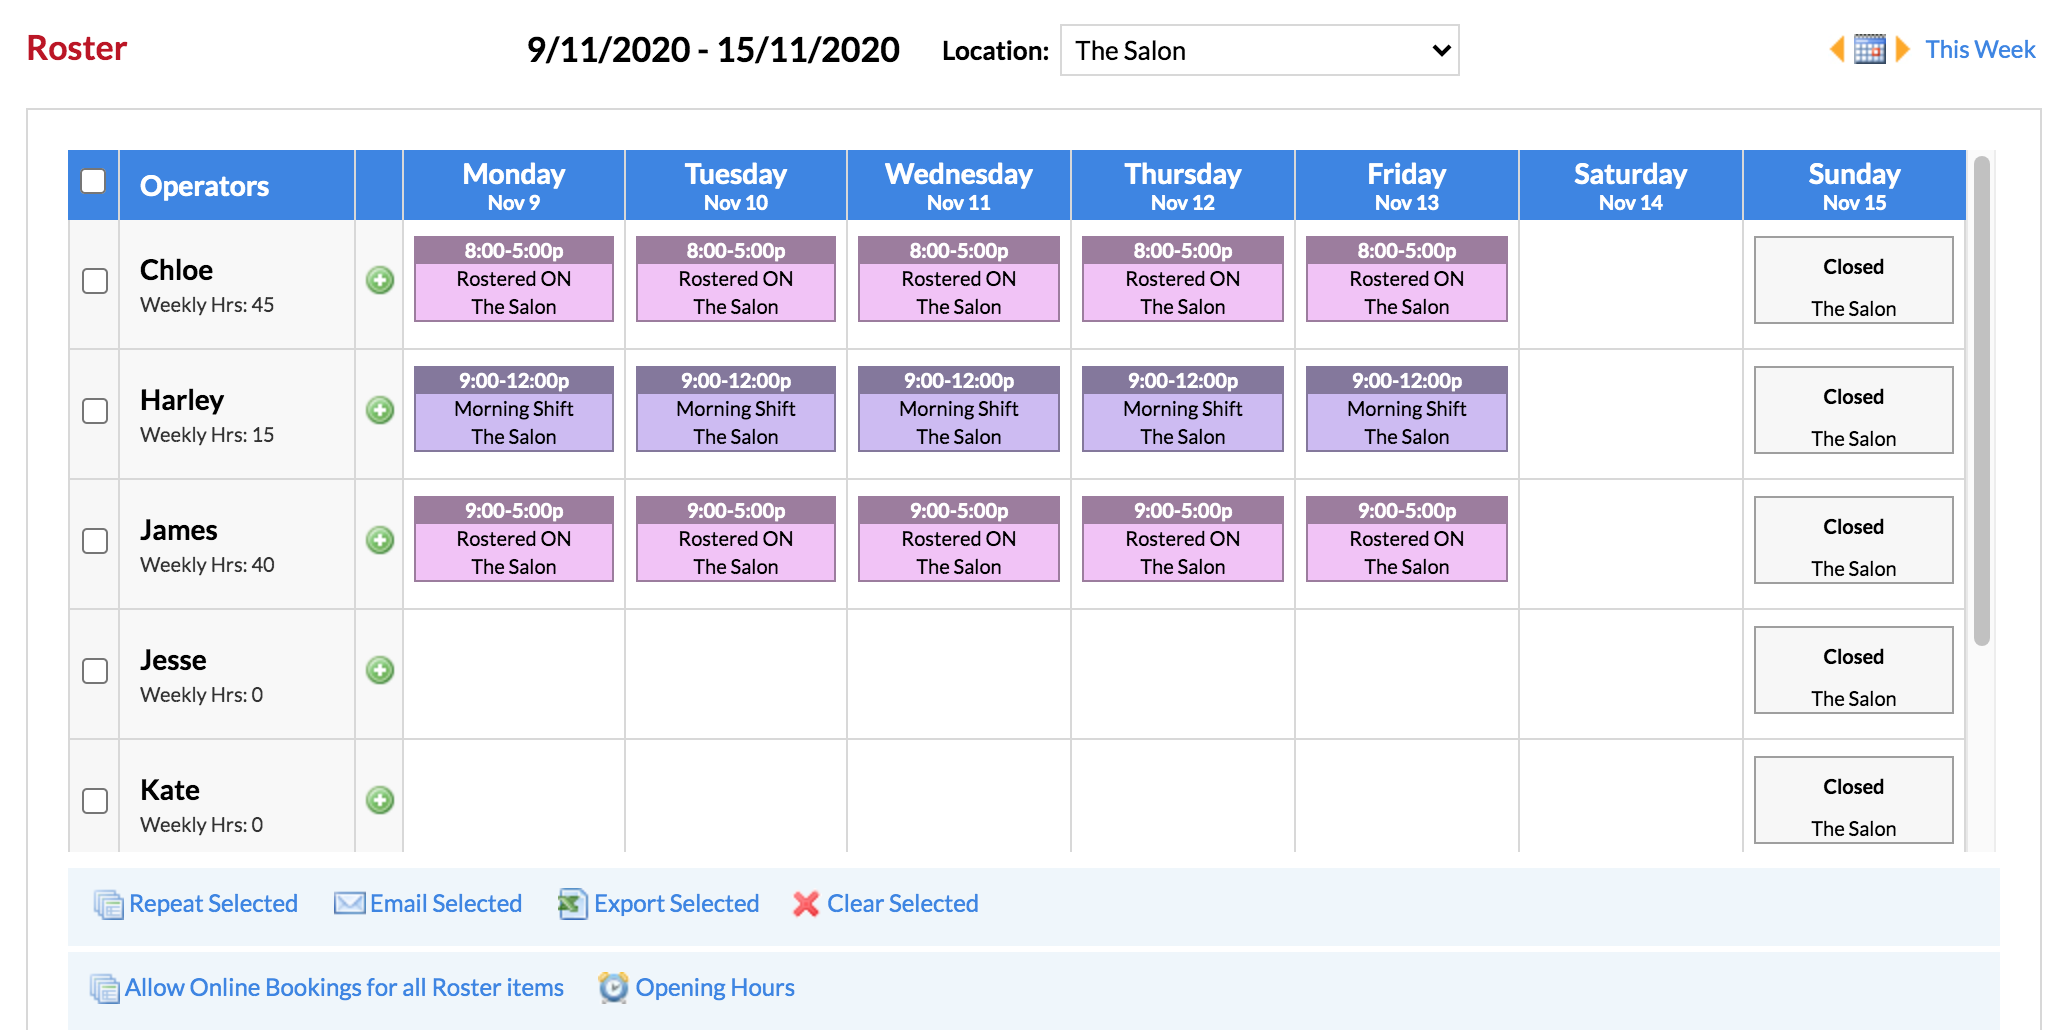
When you click on the Roster link again—notice how we've loaded back into the "The Salon Group" location (the Dome) and the items are now grey:
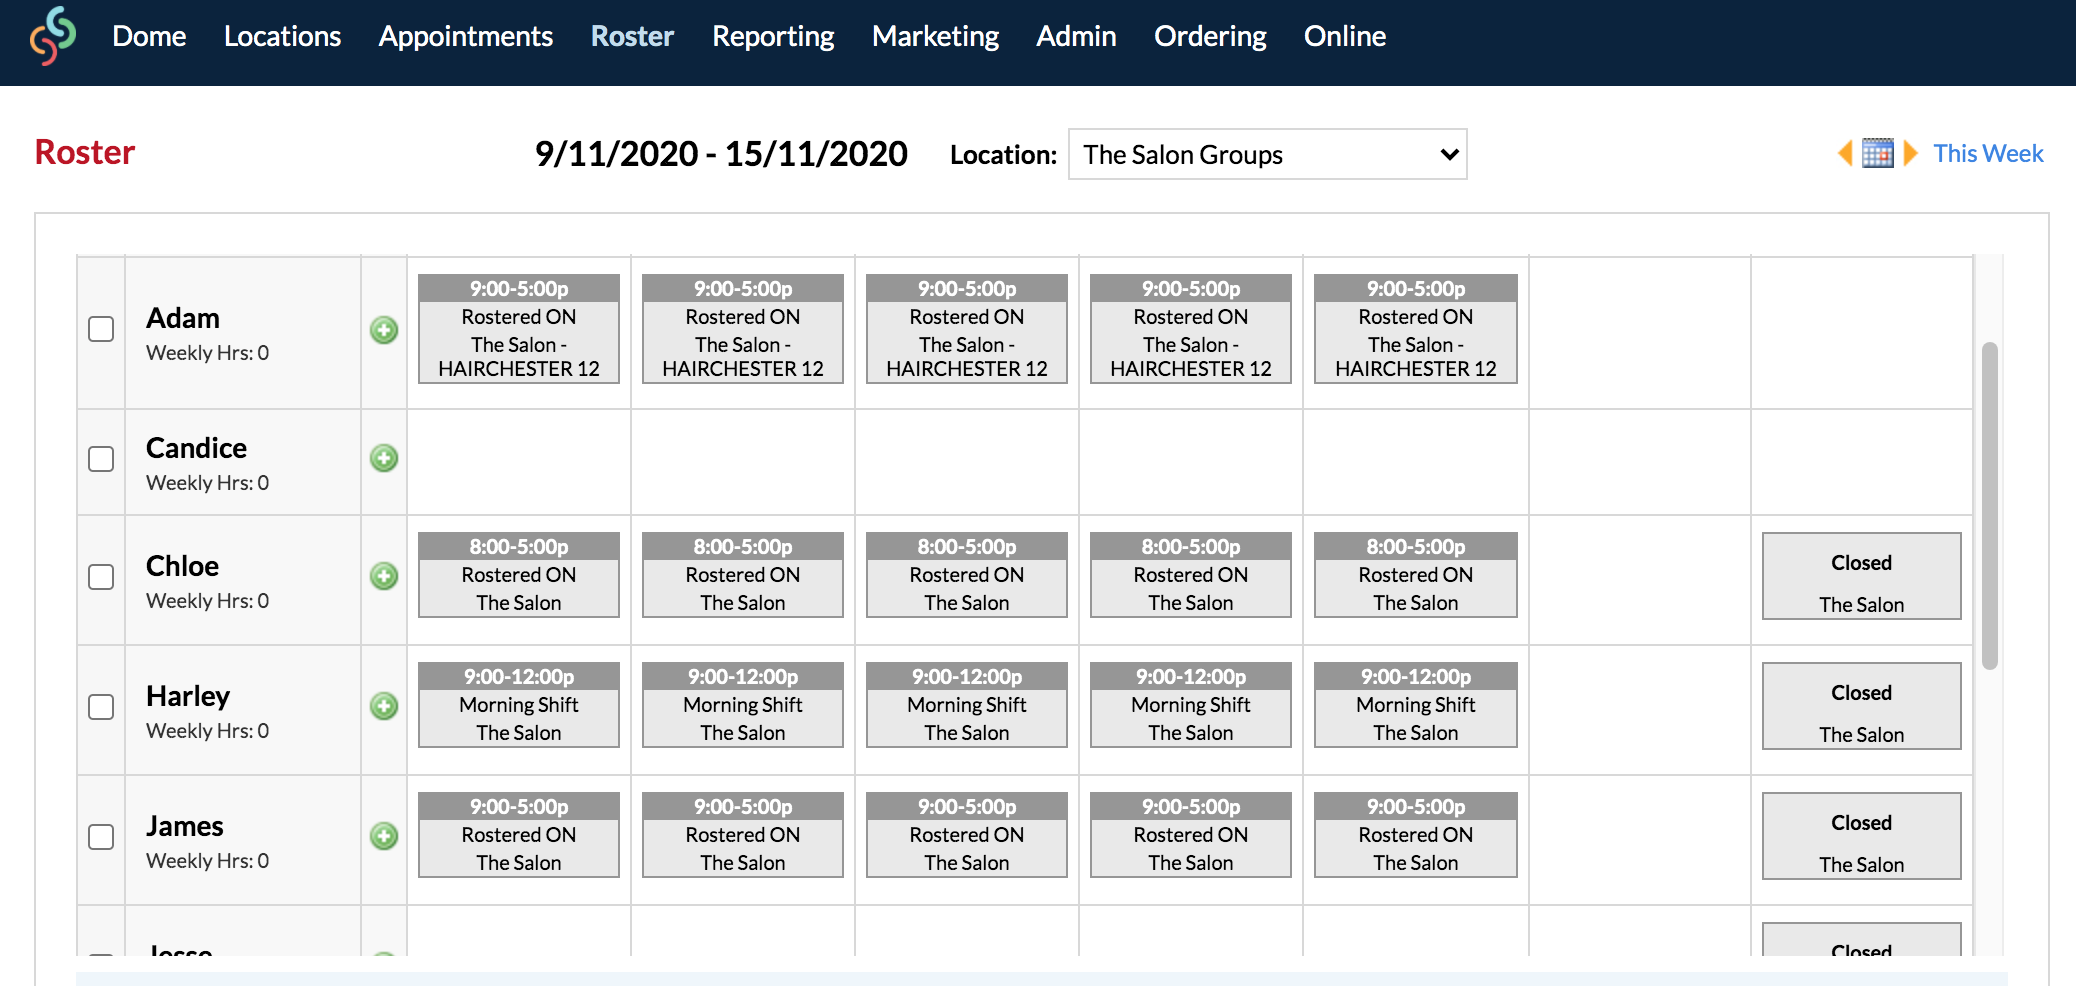
Items that are greyed out are informing you that the items are not at the current location. Notice how "The Salon" sits within each Rostered ON item we created at The Salon location. This is how you'll be able to tell the difference between where the operator is rostered when viewing the Roster.
Did you make a mistake or need to make some changes?
If you need to move an existing Roster Item to another day or another Operator, you can click on the actual Roster Item, and drag & drop it into the correct spot:

Once you've dragged & dropped the Roster Item, it will be shifted into the new day and/or operator:

Otherwise if you need to delete Roster Items, you can tick each operator who's items need to be deleted (from the tick boxes to the left)—or you can tick the very top tick box to select all operators. Then at the bottom of the roster table click the Clear Selected link, and choose the selection required to go ahead with the process:
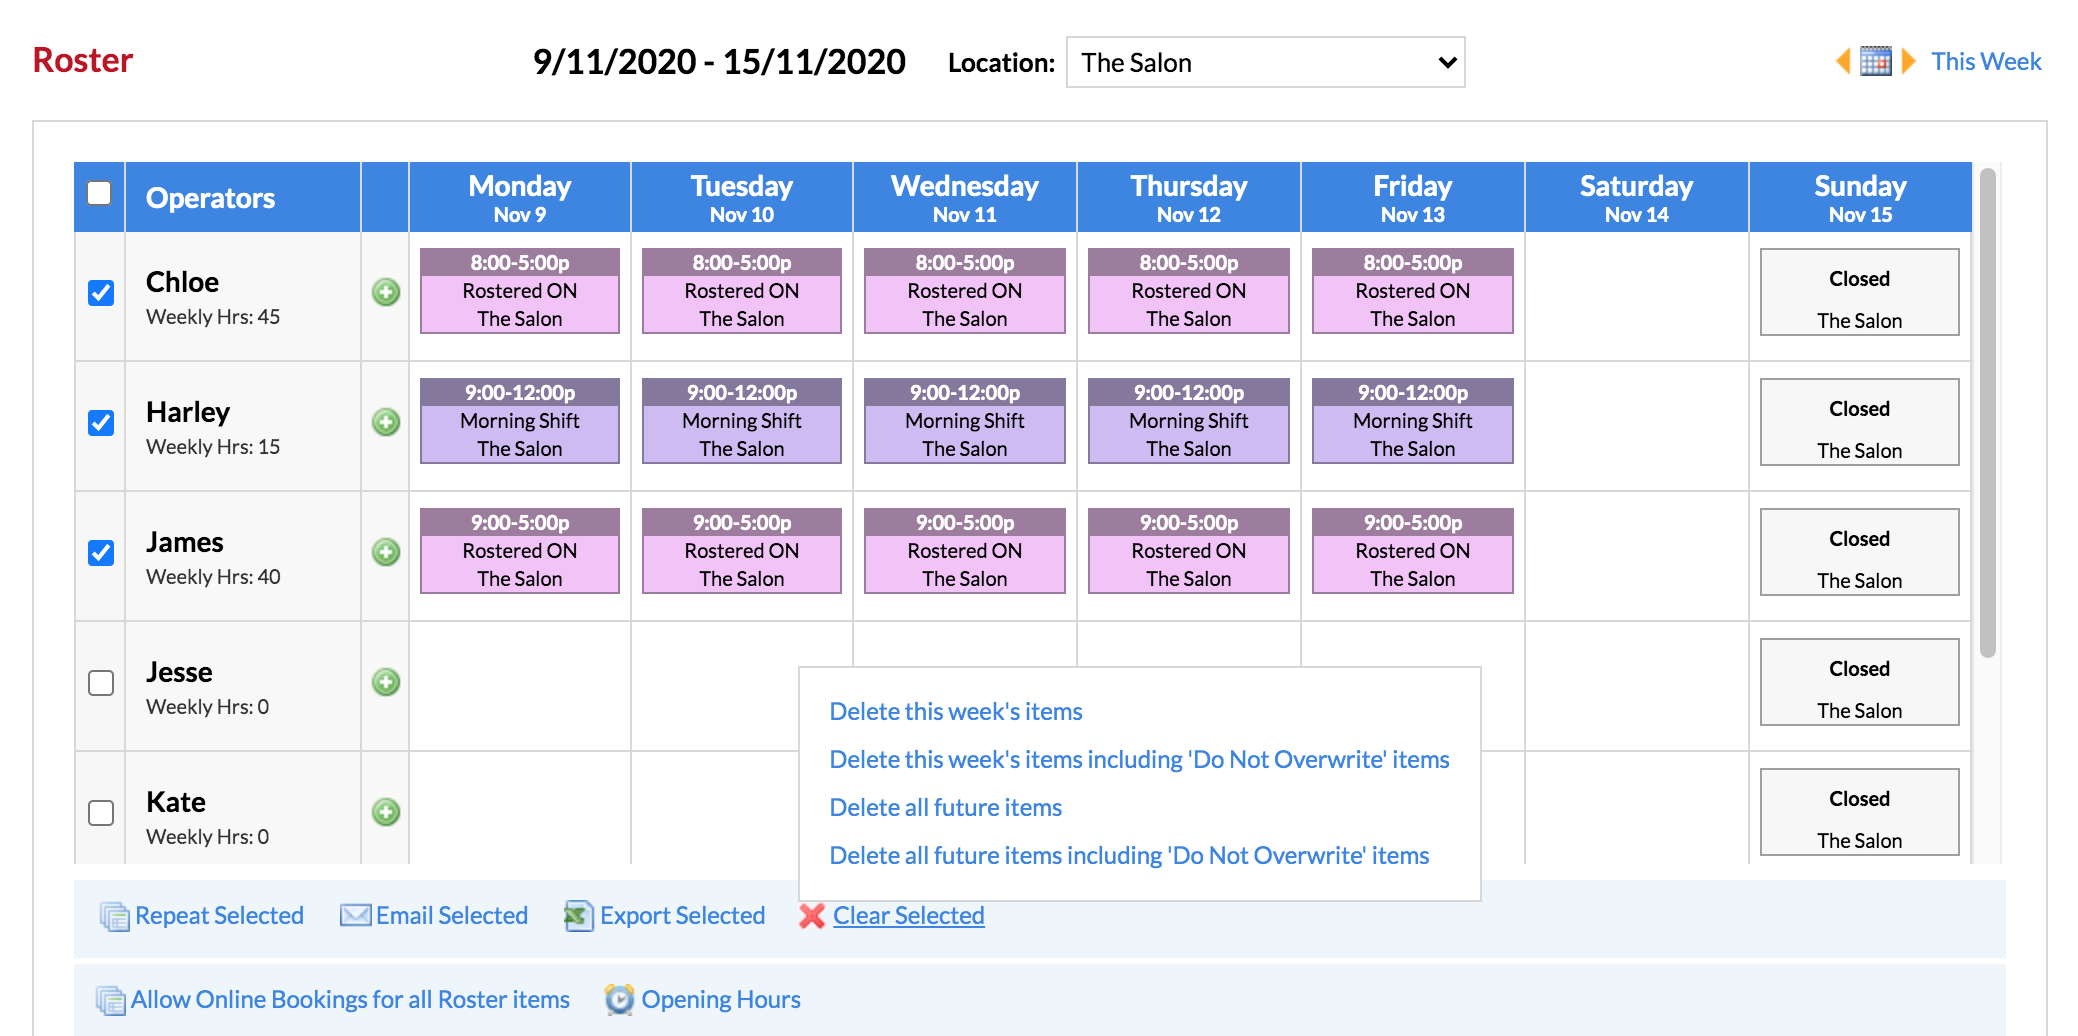
Note: If you've tried to delete this weeks items, or future items—and noticed that the items weren't deleted—it's likely that these roster items are marked as 'Do Not Overwrite'. If that's the case, make sure you're selecting the option that includes 'Do Not Overwrite' items (or you can edit the Roster Type to remove the 'Do Not Overwrite' setting).
Great! If you've gone through this article, you'll now know the basics of Advanced Rostering at the Dome level.
If you have any further questions, please send them to us via your Help & Support page by clicking the Submit a Request option—we're here to help.