In just a few simple clicks you can add extra services to your clients' already made appointments.
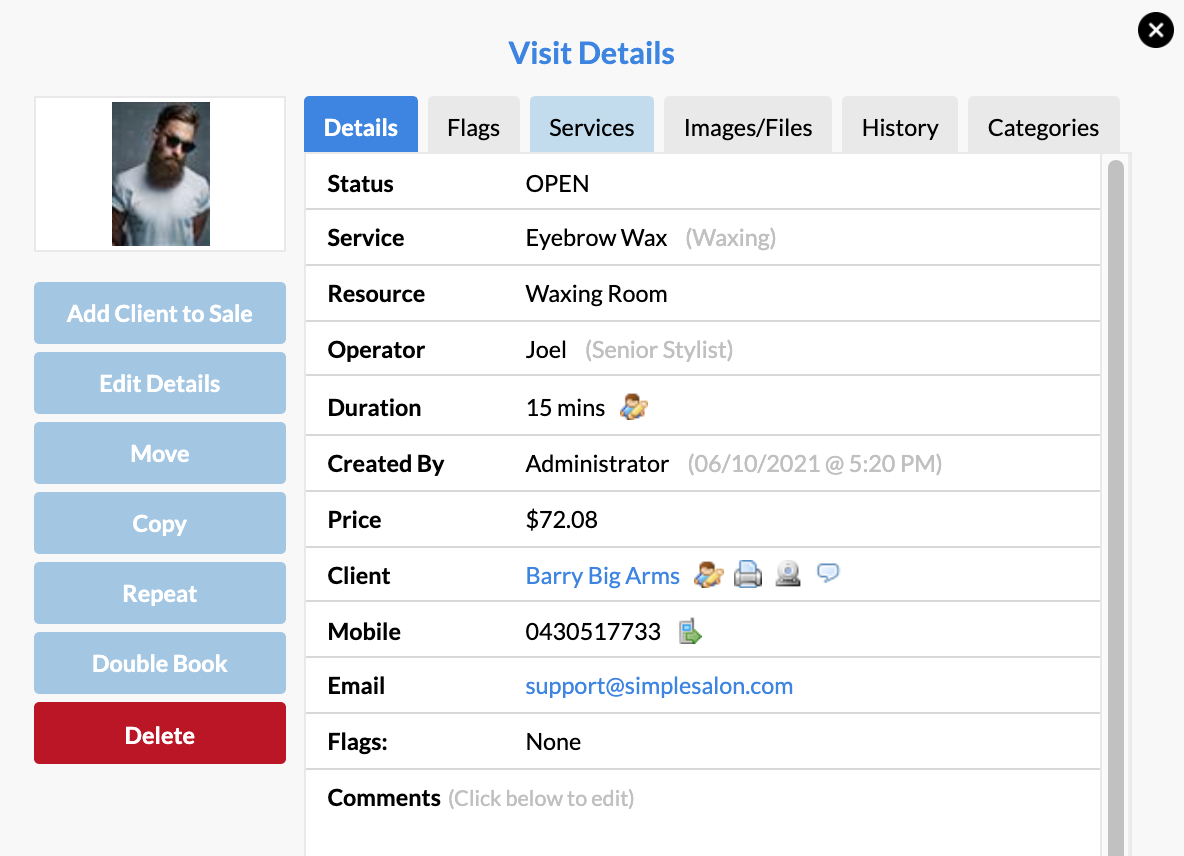
First, navigate to the Appointments page and click the client's name on their existing appointment.
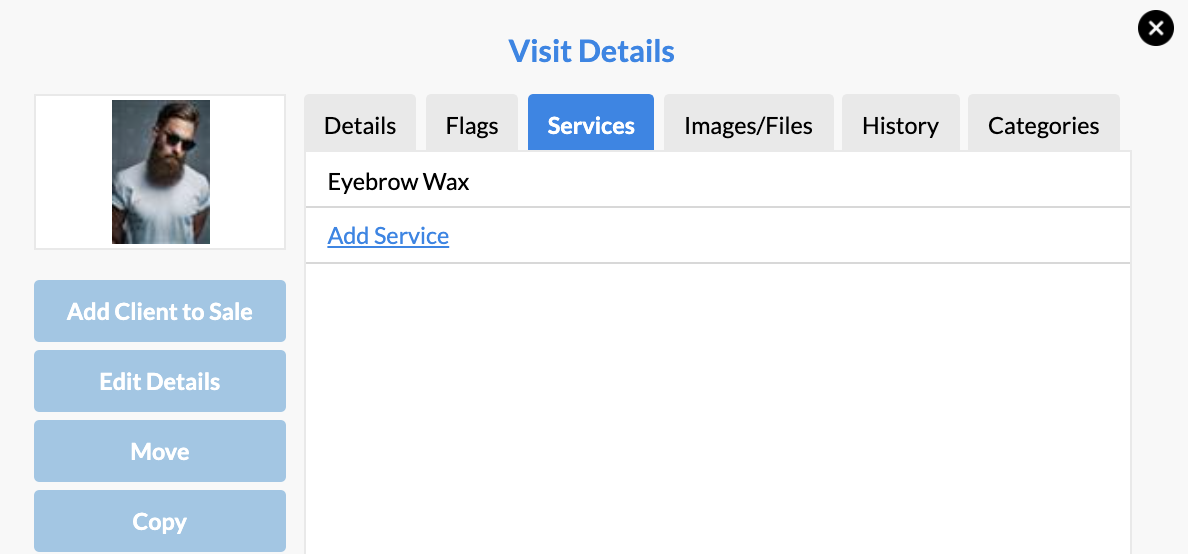
In the Visit Details pop-up window, click the Services tab.

Then select the Add Service button:

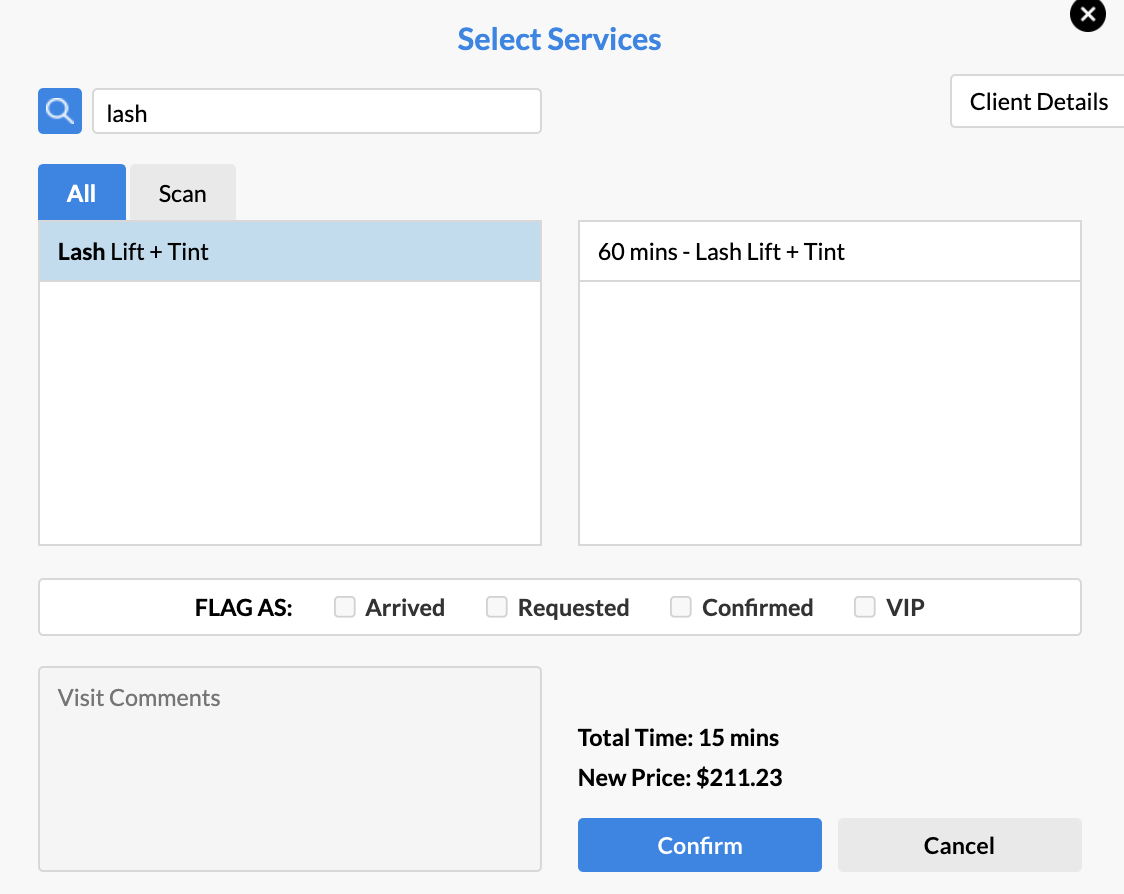
Click each extra service(s), which is to be added to the appointment, from your service list in the Select Services pop up window. Once you've chosen all additional services, they will all be waiting in the little window on the right, so click Confirm.

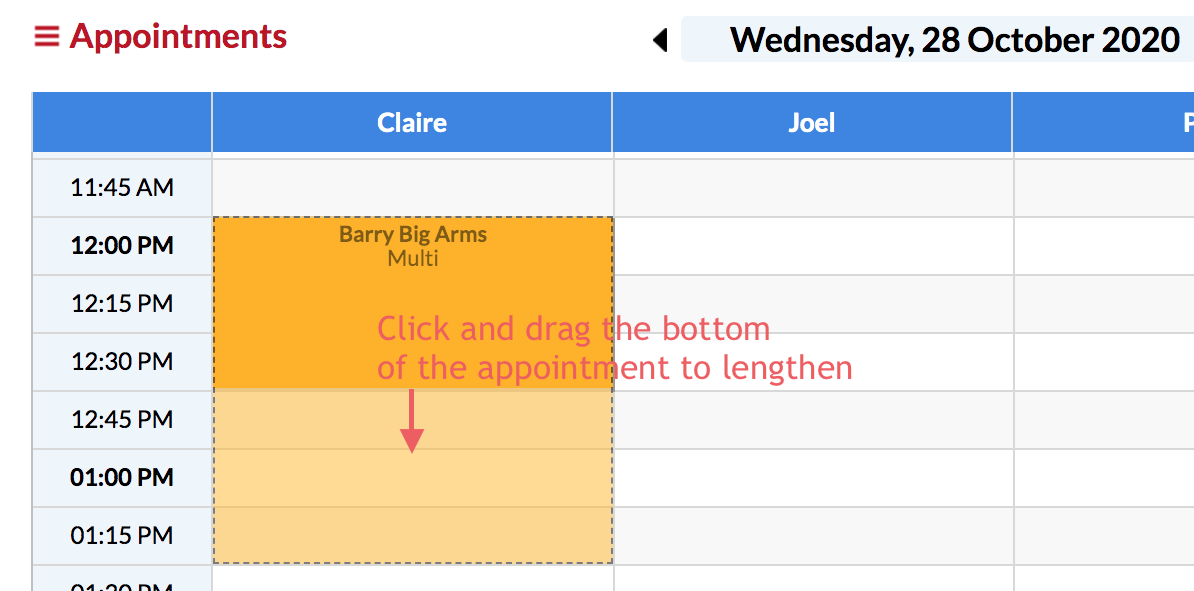
The appointment you added the services to will turn into a Multi appointment, as it now includes the extra services you have added to it. It is up to you whether you would like to also extend the appointment out to take up more time. To do this, hover your mouse over the bottom line of the Multi appointment and drag it longer.

Click the client's name on the appointment to see the services, which are included in this Multi appointment. Now click Items in the Visit Details section (or simply click the Service tab again).

The services which are included in this Multi appointment will be displayed. If you need to remove any, click the red cross next to them.

When the client has had their appointment and they're ready to pay, add the client to sale by clicking the client's name on either of their appointments, then choose Add Client To Sale.
The client and all of their services from today will be added to POS.

Click Receive Payment, choose the payment type and Finish Sale just like you normally would.
Note: If you want extra time added without dragging the appointment (without it turning into a Multi), you'll need to instead click a new time slot under the already created appointment, search for the client, and select their new service to add to it. Essentially, you will make a new appointment under the existing one.
If you have any questions please feel free to send them to us via your Help & Support page by clicking Submit a Request—we're here to help.