With your Simple Salon account, you get an in-built Wait List on your Appointments page! We know that there's nothing more annoying than a last minute cancellation. Utilising the Wait List feature ensures you can fill up your Appointments in the event another client cancels.
There are a few things you can do with the Wait List that we'll be covering in this article—but feel free to jump ahead using the following links:
- How to Add a Client into the Wait List
- Moving a Wait List Appointment to a Different Day
- Viewing All Wait List Clients for the Week
- Changing the Wait List Column Name
- Viewing Past Wait List Clients in the Appointment Report
- Hiding the Wait List Column
- Disabling the Wait List Column
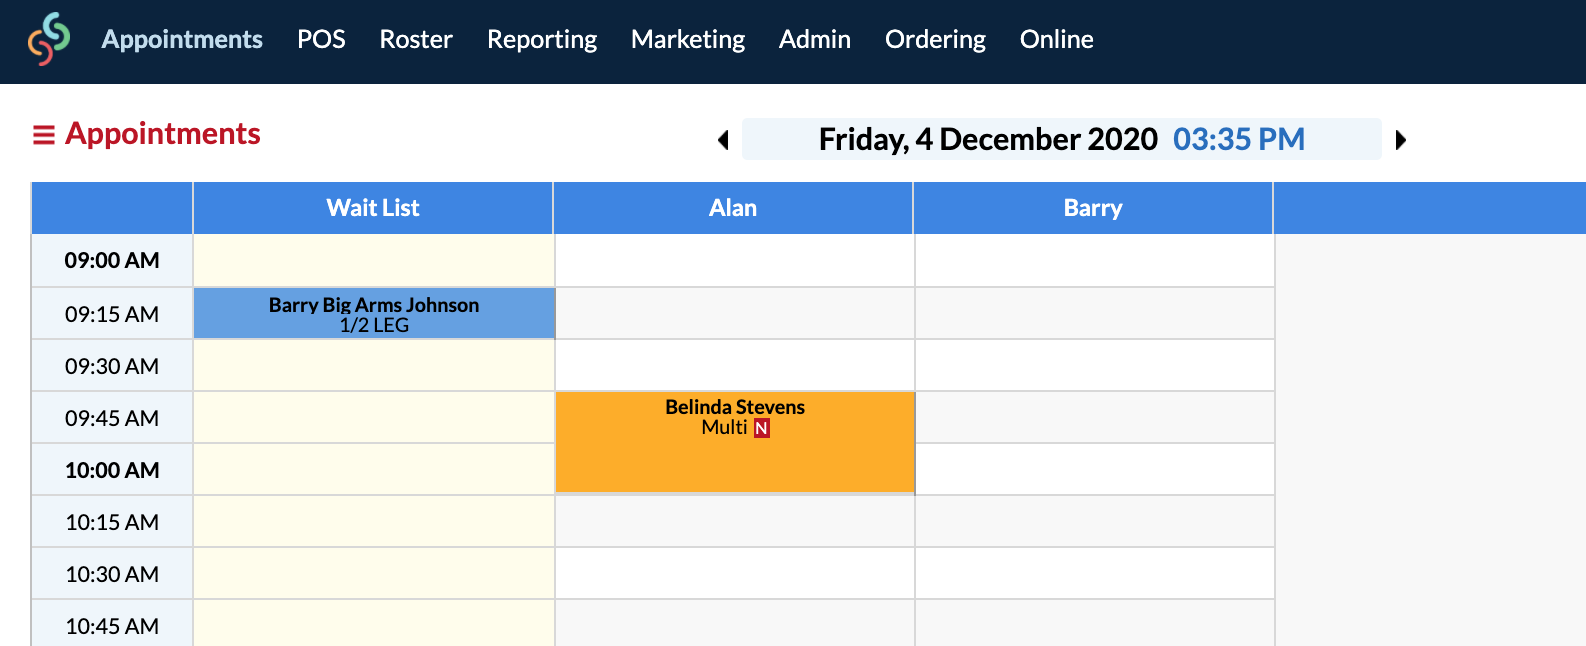
The Wait List is displayed as the first column on your Appointments page, as shown below:
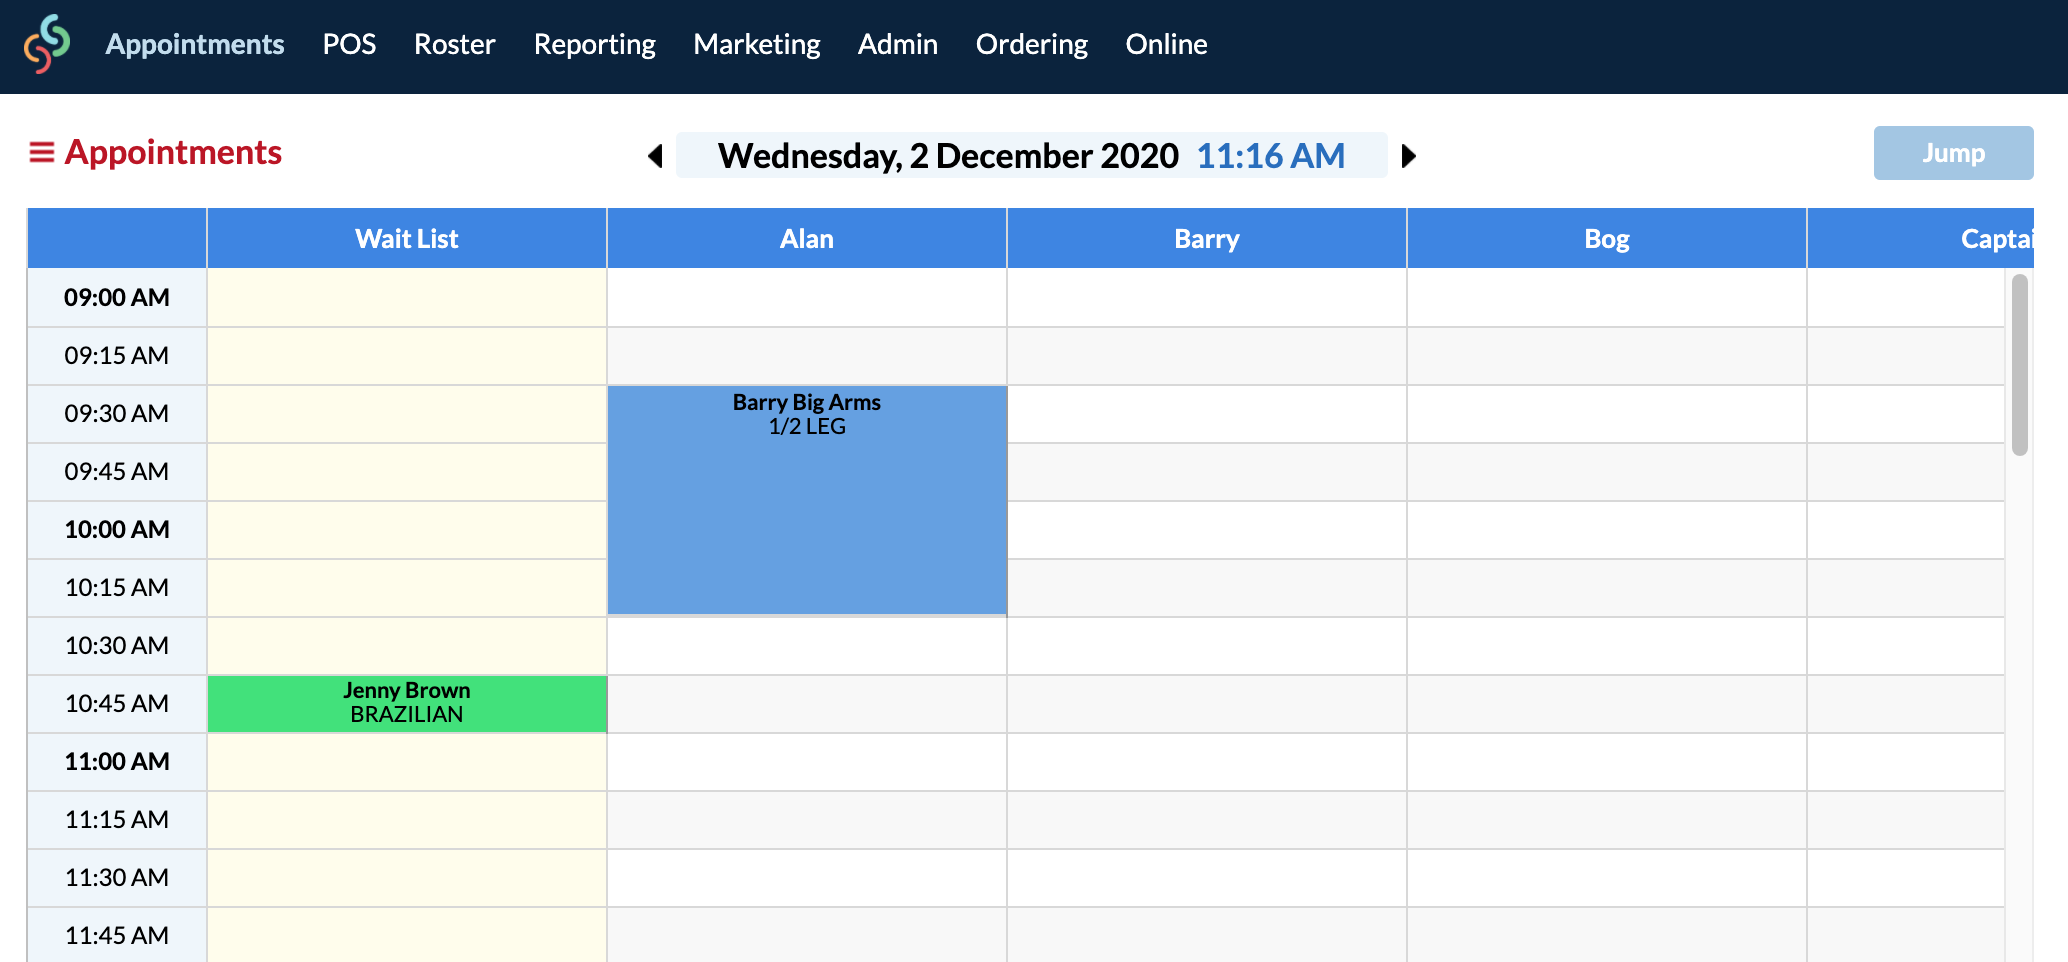
Note: Any client who is put into the Wait List column will not be sent an Appointment Reminder. If you move them into an actual Operator column before your Appointment Reminders are set to go out, then they'll receive their reminder.
How to Add a Client into the Wait List
There are two ways you can add a client to the Wait List:
1. You can make an appointment directly into the Wait List column
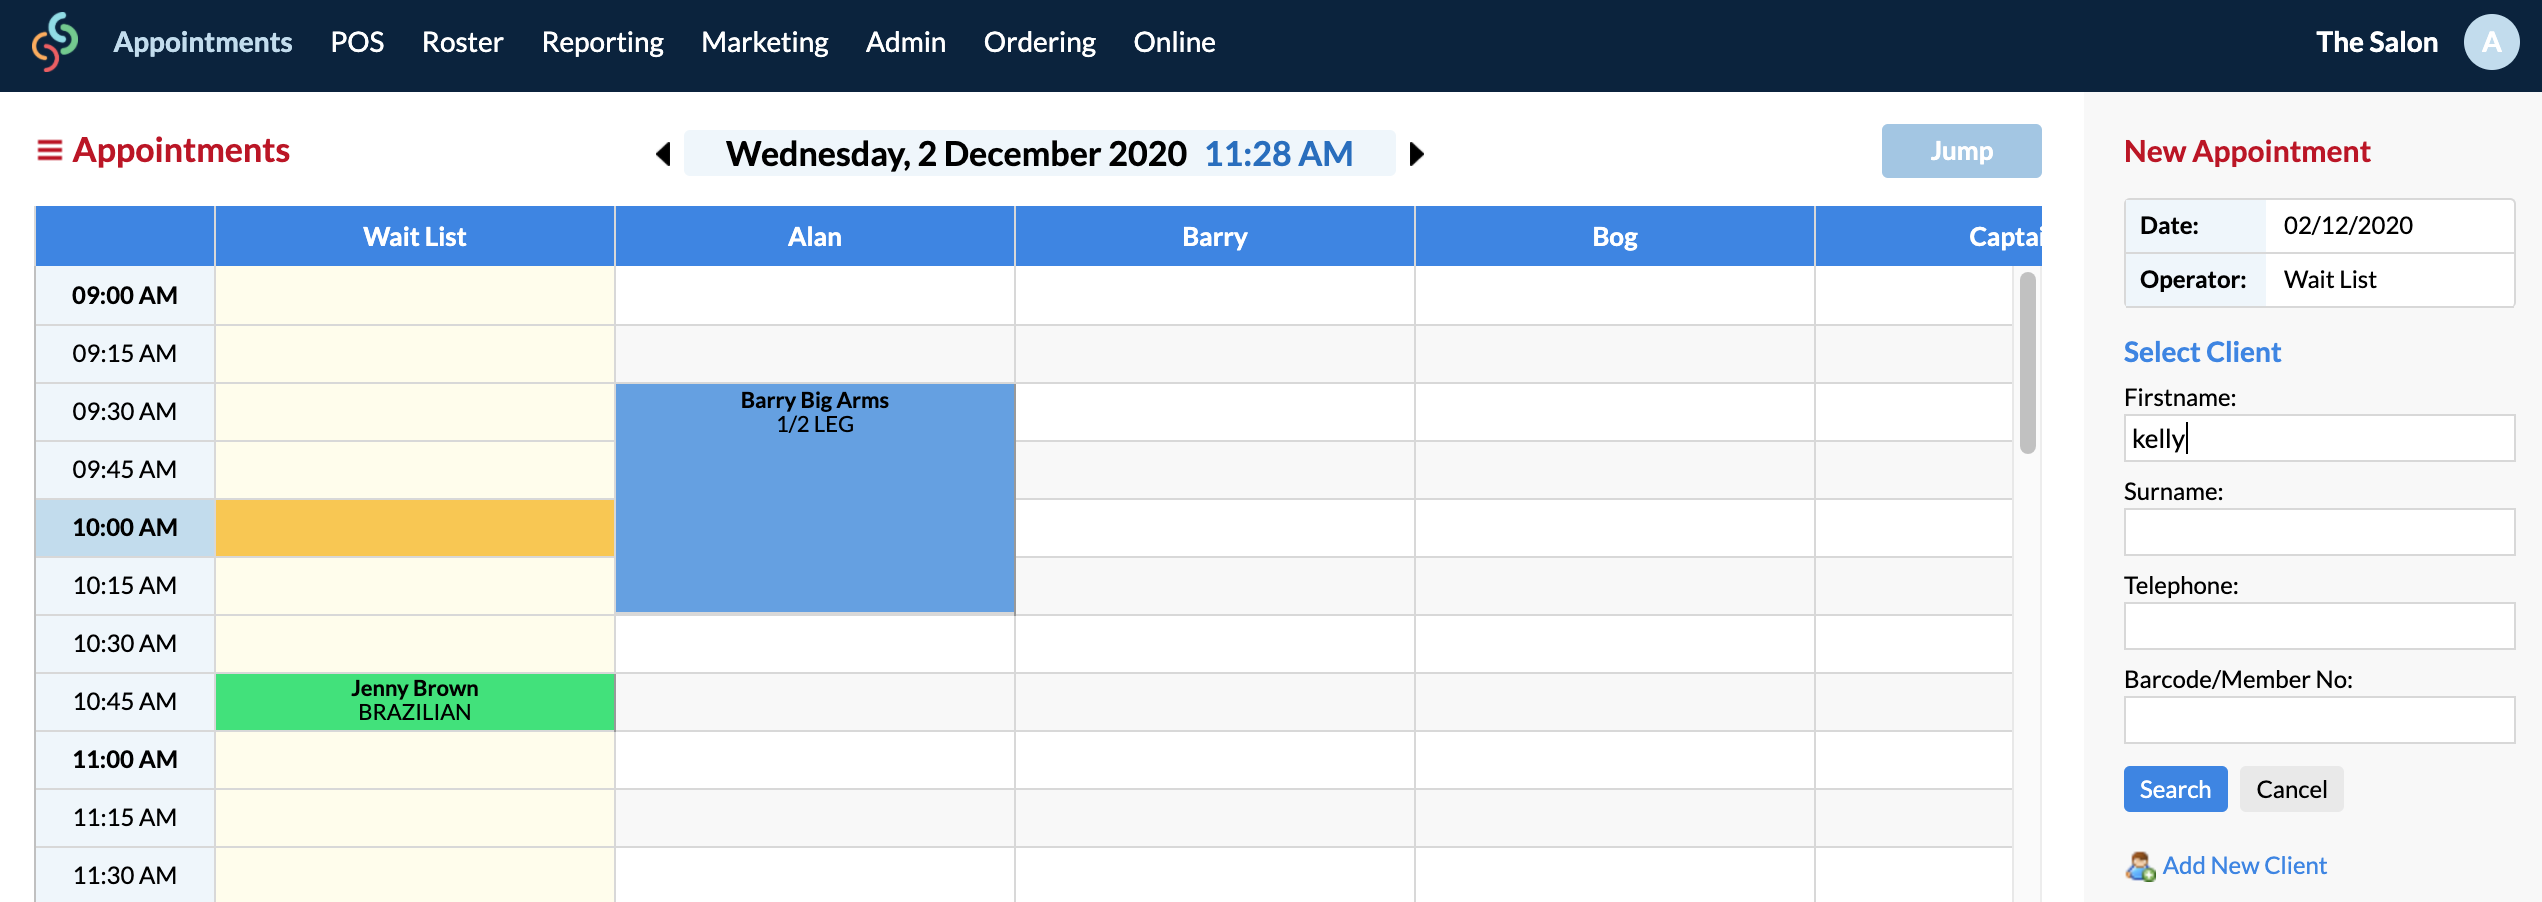
Simply click a time slot in the Wait List column, then search for the client on the right. If they're a new client, then you will instead click Add New Client (below the Search button) and fill in their details:
You'll then be prompted to select their services as normal. Once you hit Confirm, the appointment will be made in the Wait List column:
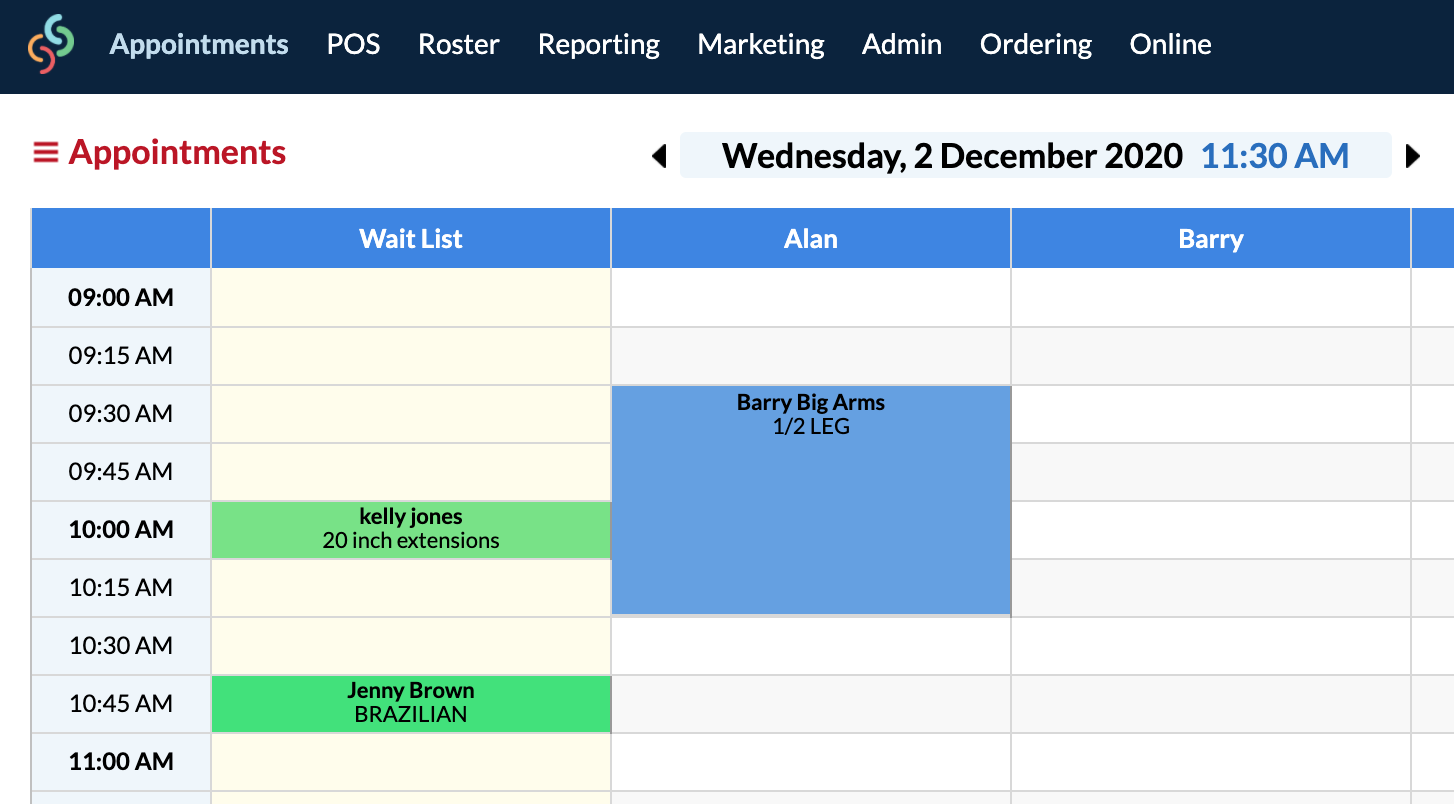
The service that was booked in was actually for 60 minutes, but it was shortened to 15 minutes when it was put in the Wait List. Don't fret, as this is how it's supposed to work!
The system automatically shortens the appointment so that it only take up one time slot. This allows you to have lots of space for other Wait List clients.
If an operator were to have some free time, you would simply drag and drop the appointment to the appropriate Operator column—at which point the service will be extended back to its actual service duration:
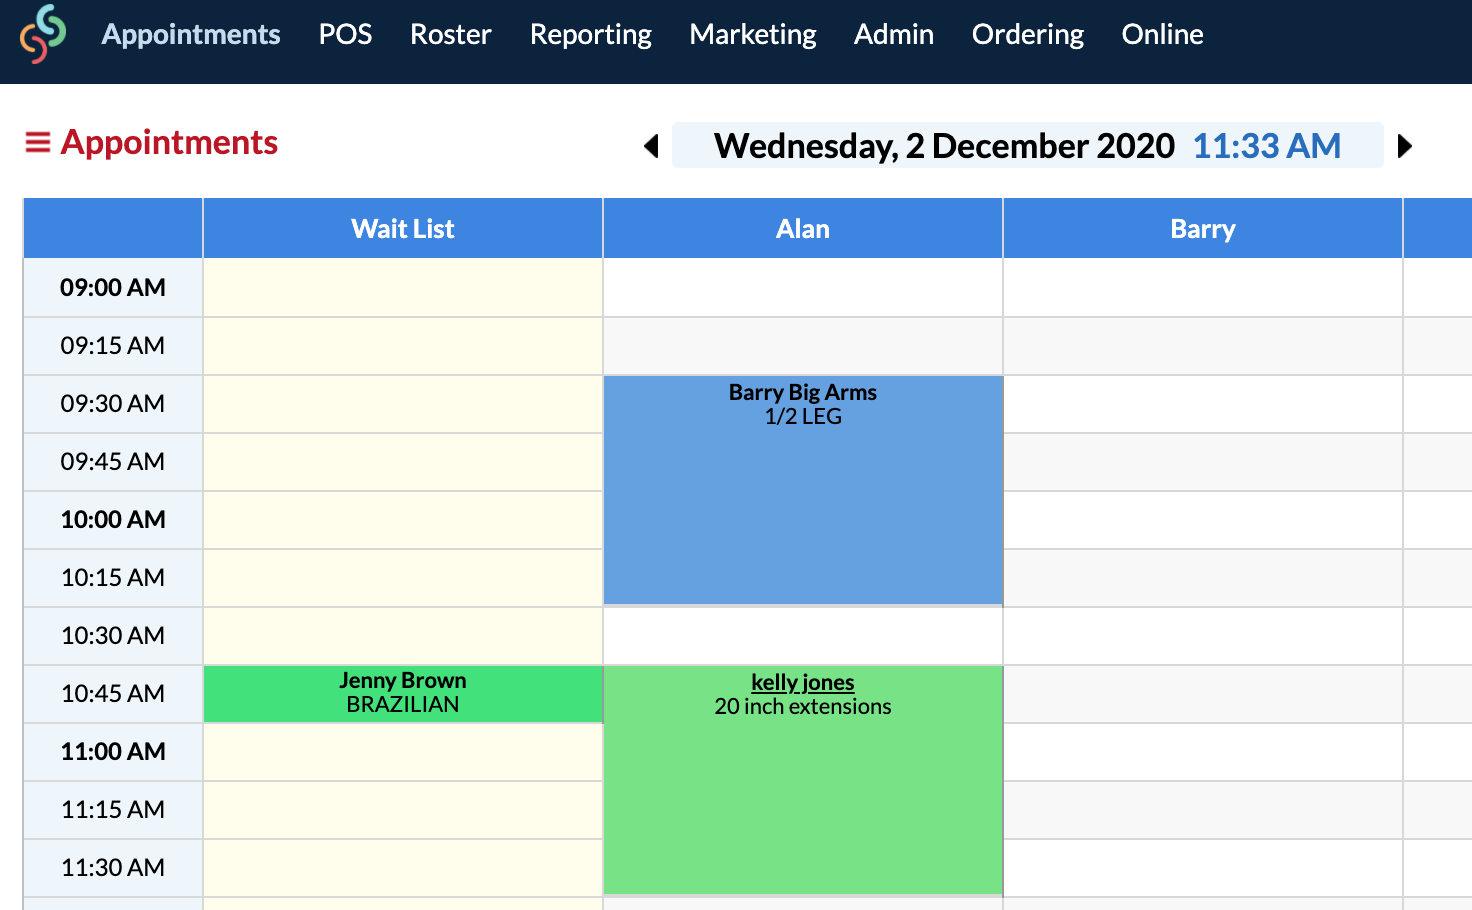
2. You can drag and drop existing appointments into the Wait List column
This way works essentially in the opposite way. You can click on an exisiting appointment in an Operator column, and drag and drop it into the Wait List column.
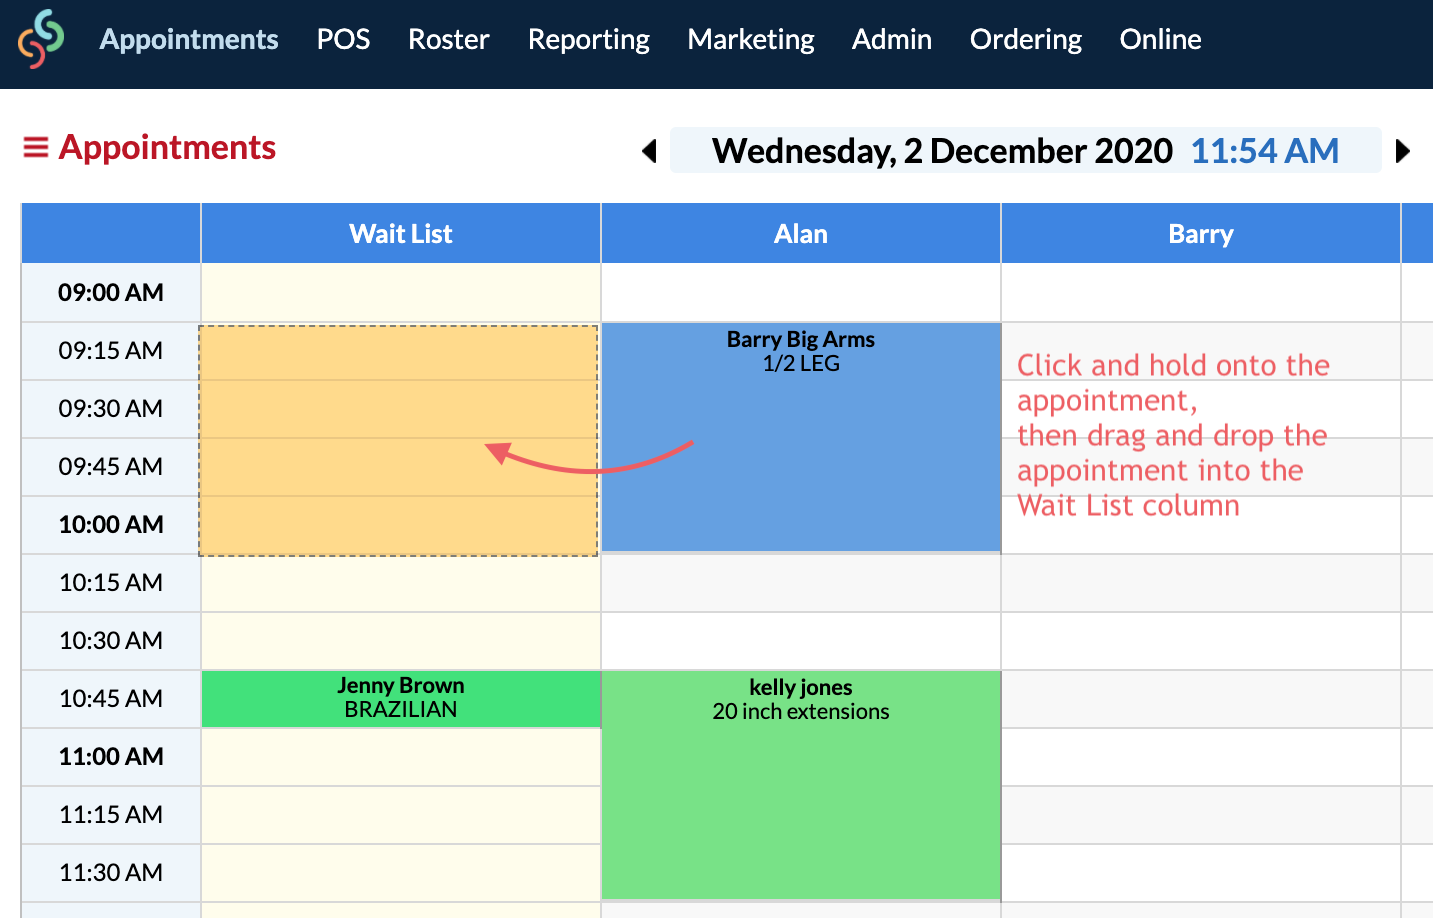
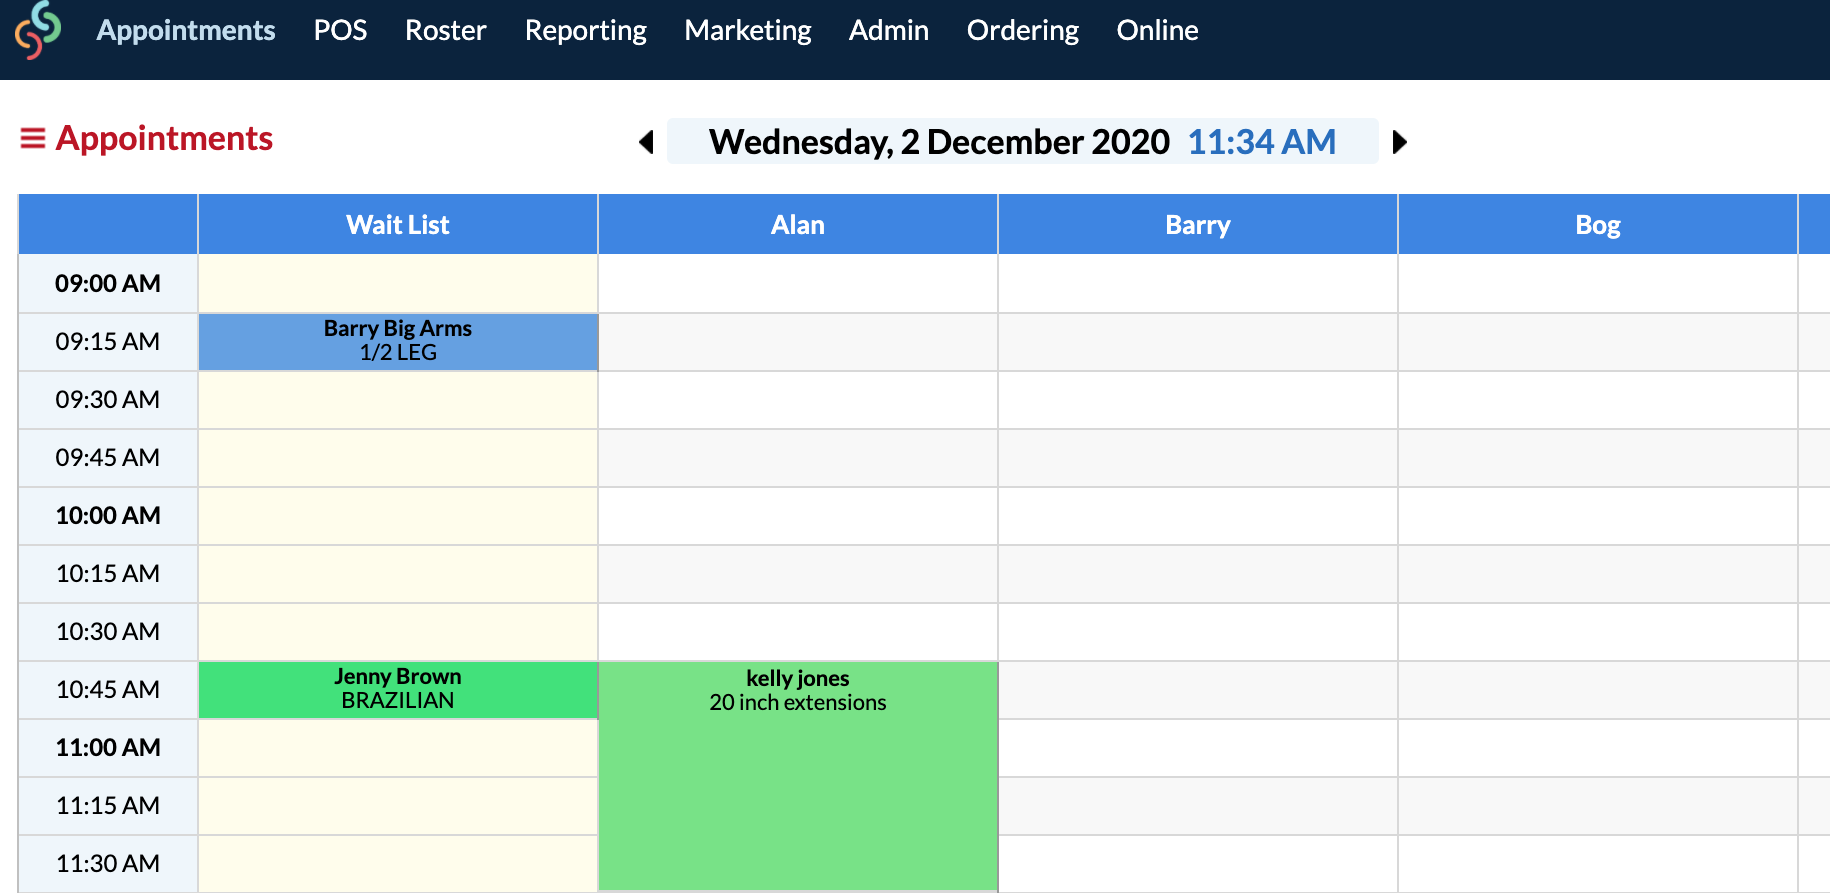
This will automatically shorten the appointment to fit into just one time slot, so you can fit many appointments into your Wait List column:
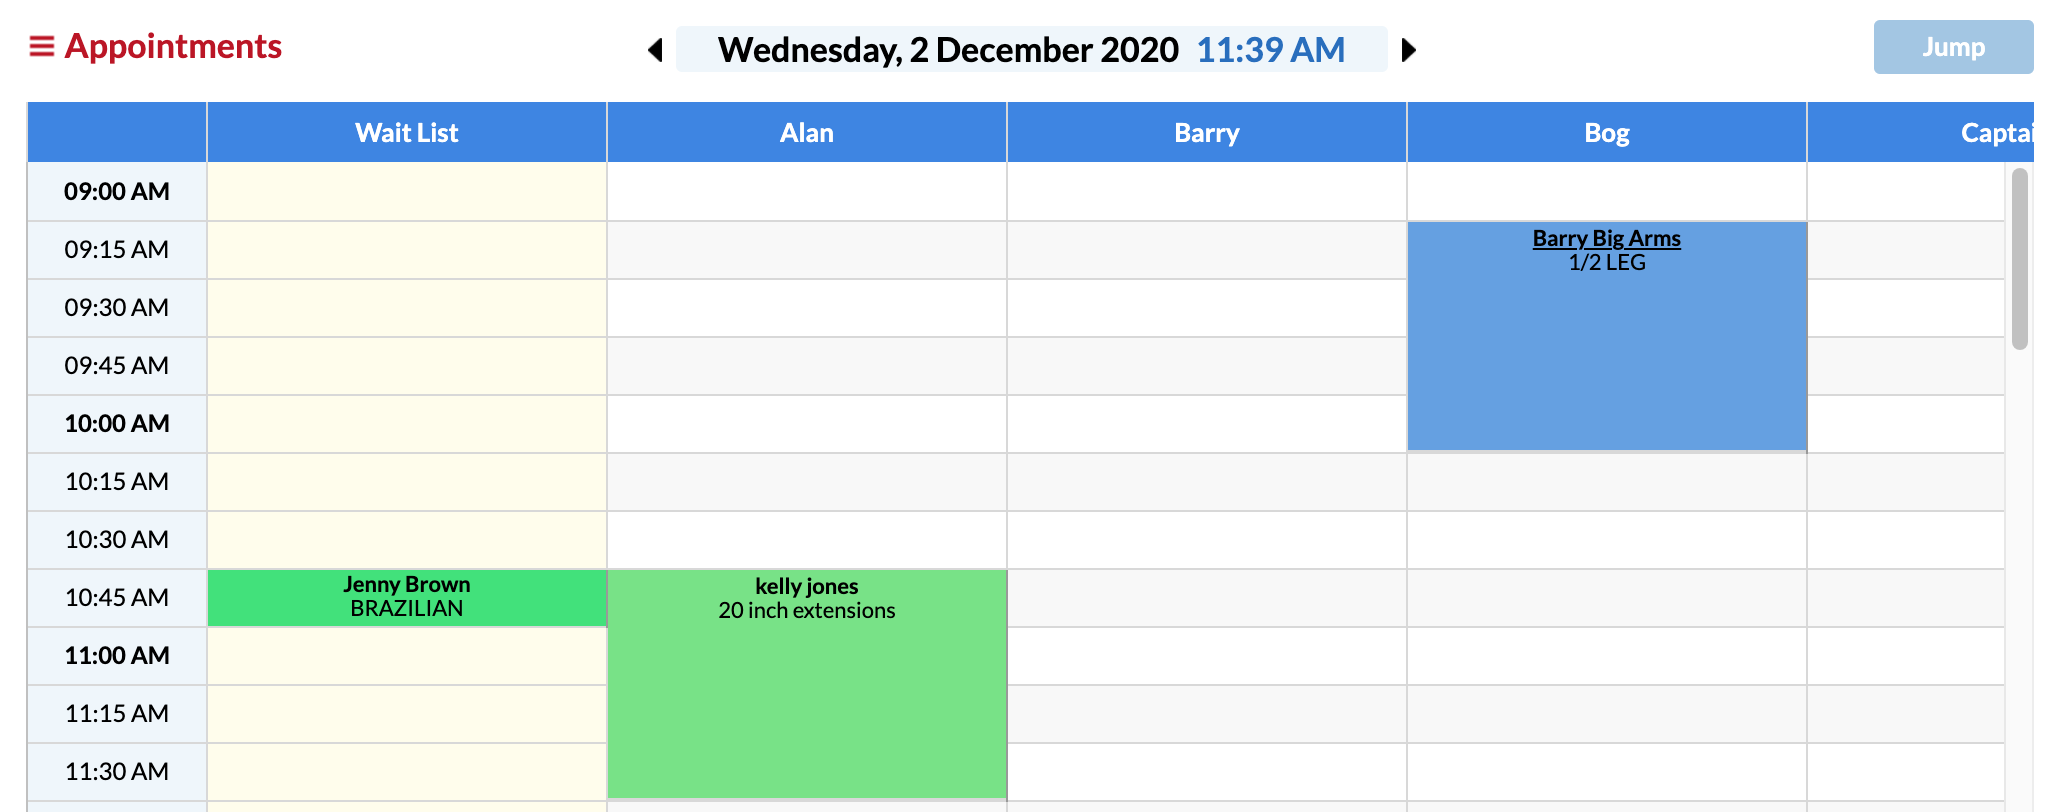
If the client needs to be taken off the Wait List and booked in, simply drag and drop the appointment back into the correct operator column. The service duration will be extended back to normal once its out of the Wait List column:
Moving a Wait List Appointment to a Different Day
To move an appointment that is already in the Wait List column, click on the client's name:

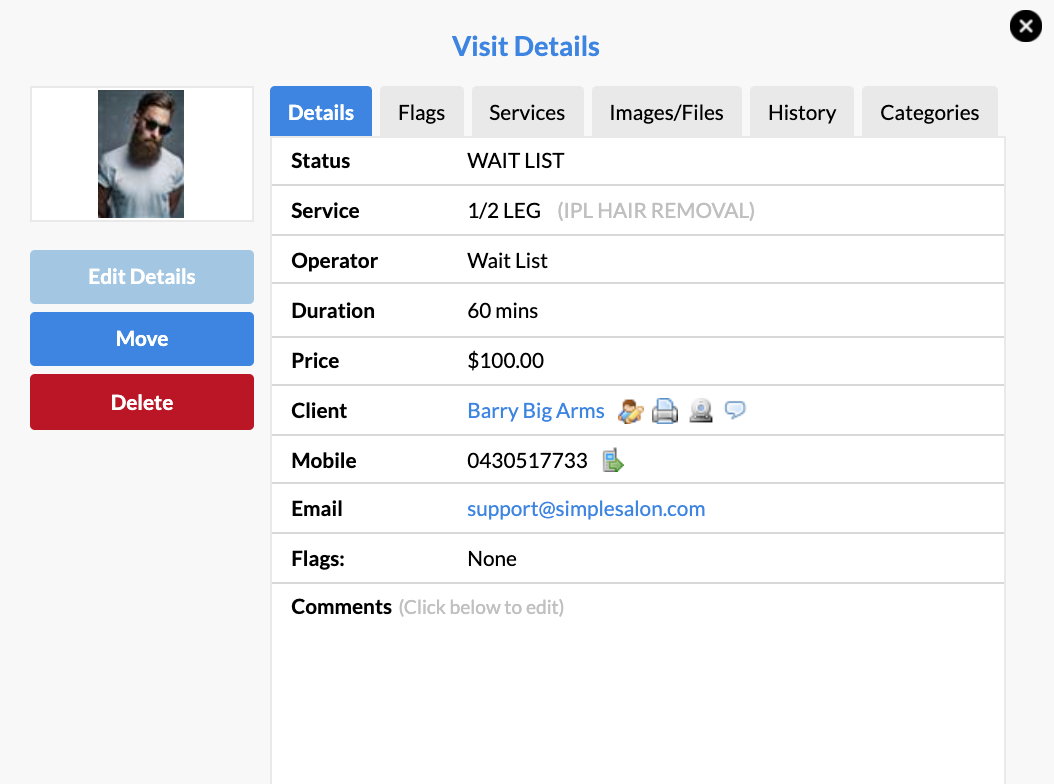
This will bring up the Visit Details window, where you can click Move:
The Wait List appointment will be on the Clipboard to the right:

Now you can go through the dates using the arrows (or click on the date to bring up the calendar).
If you now have free time for the client's appointment, you would simply click in the appropriate Operator's column to paste the appointment.

If the client is still going to be on the Wait List, then you will simply click a time slot in the 'Wait List' column of the alternate day.
Viewing All Wait List Clients for the Week
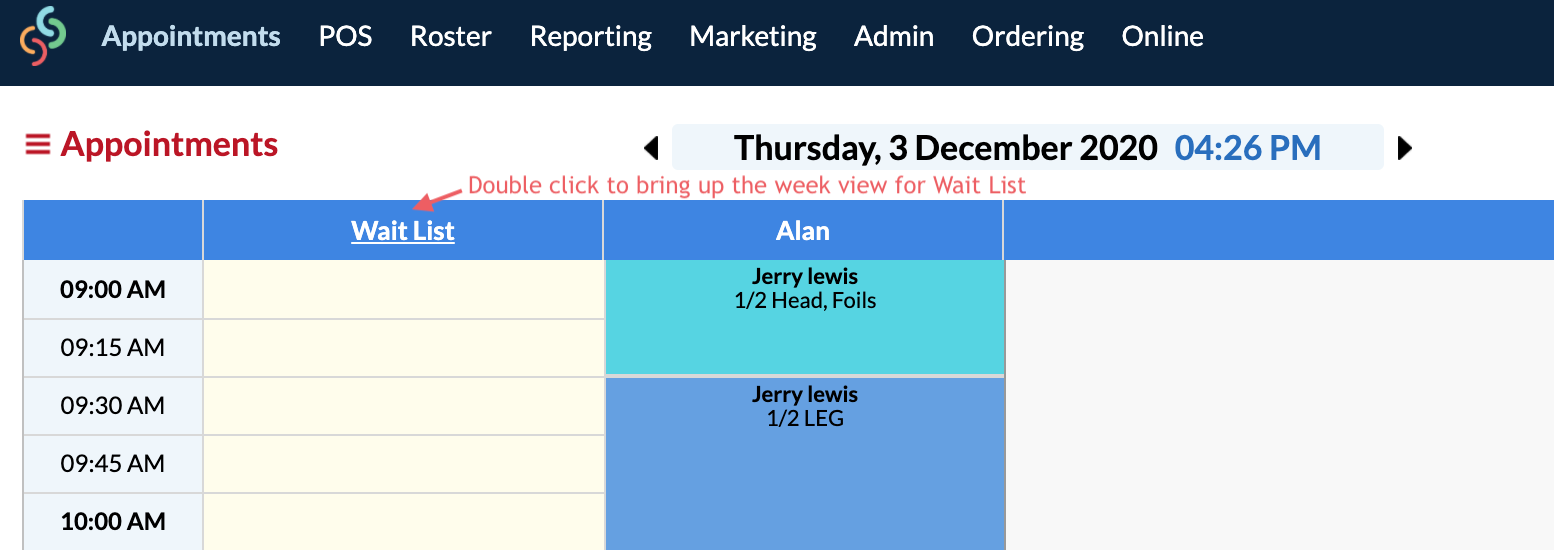
If you would like to see all Wait List client's that are booked in for the week, simply double click Wait List:
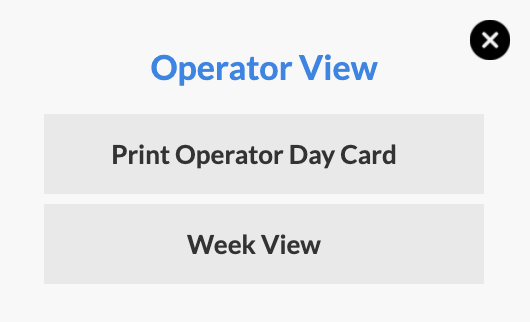
You can also click Wait List once, and select Week View:
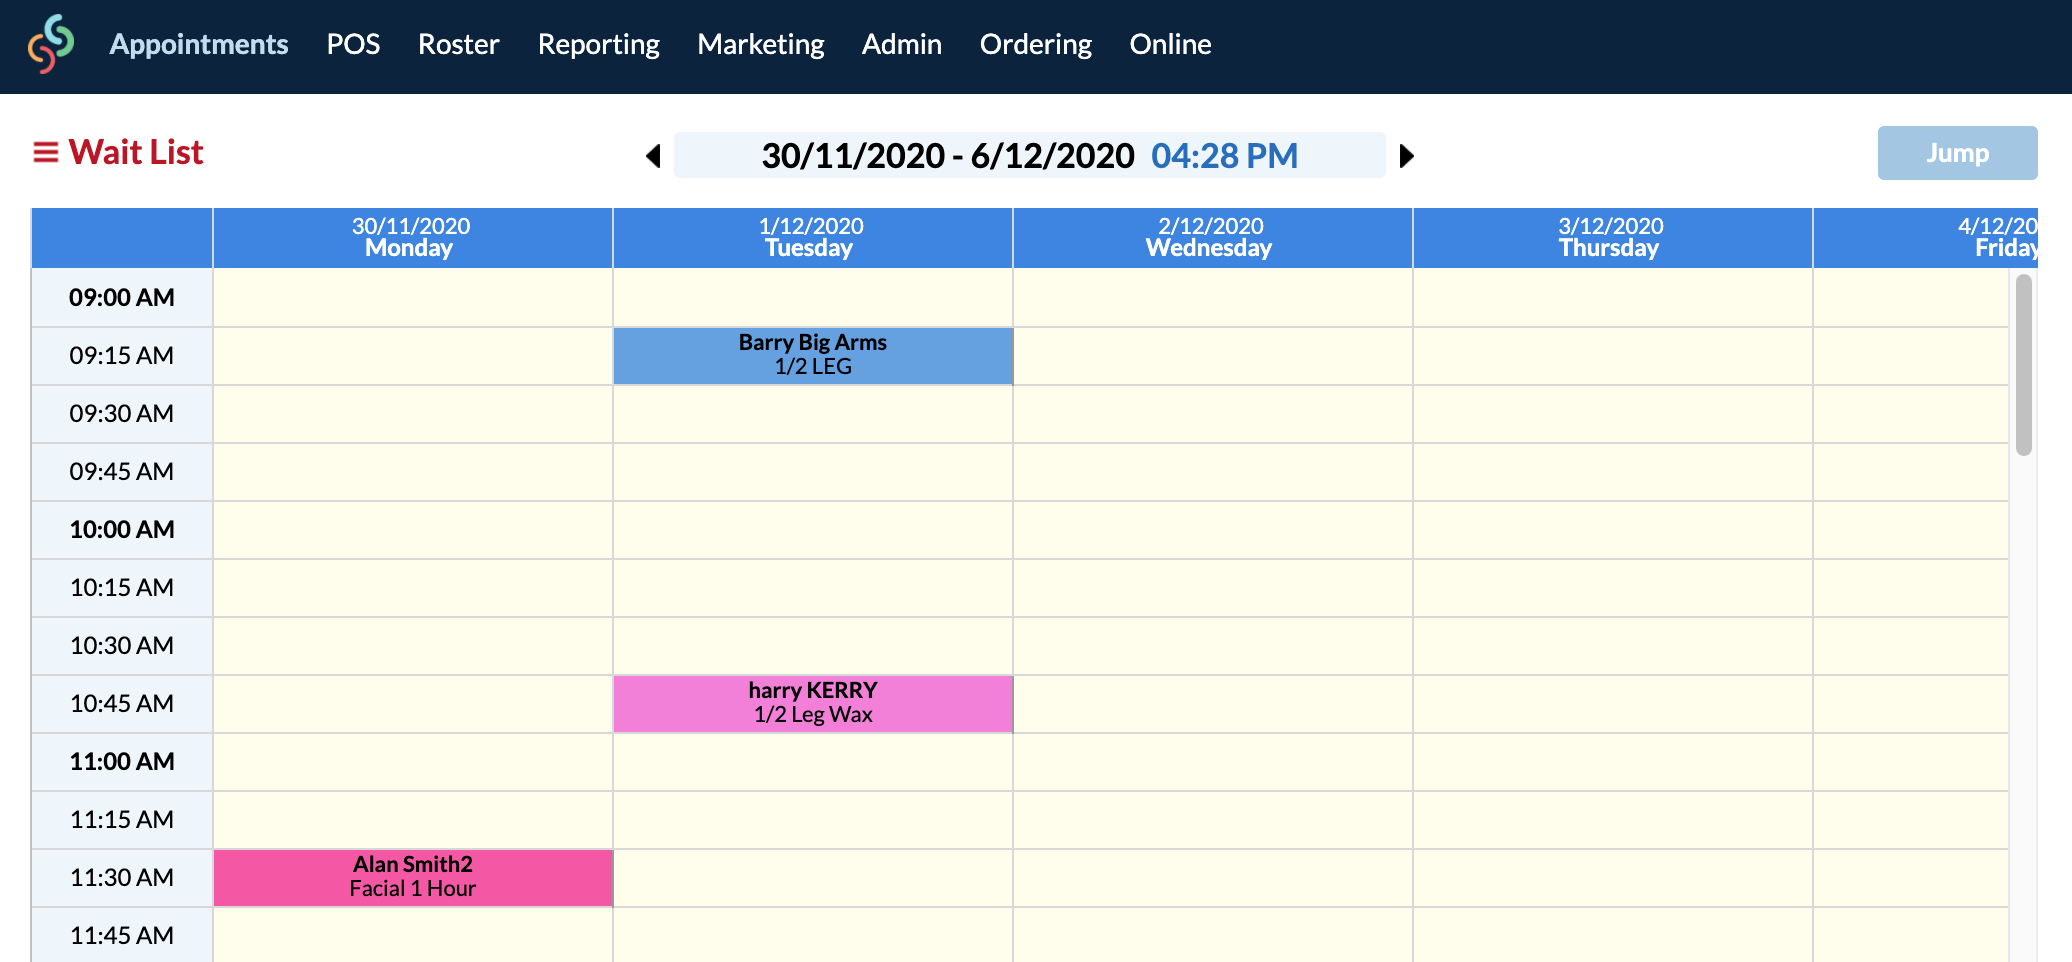
All Wait List clients that are booked in for the current week will be displayed. You can use the arrows to go through future or past week views also:
Changing the Wait List Column Name
If you would prefer to name this column something else you definitely can! For example you may want to use this as a Cancellation column instead.
Go to Settings > Appointment Settings. Locate the Wait List Name option. Enter in the new name in the text box as shown below, then Save when you're done:
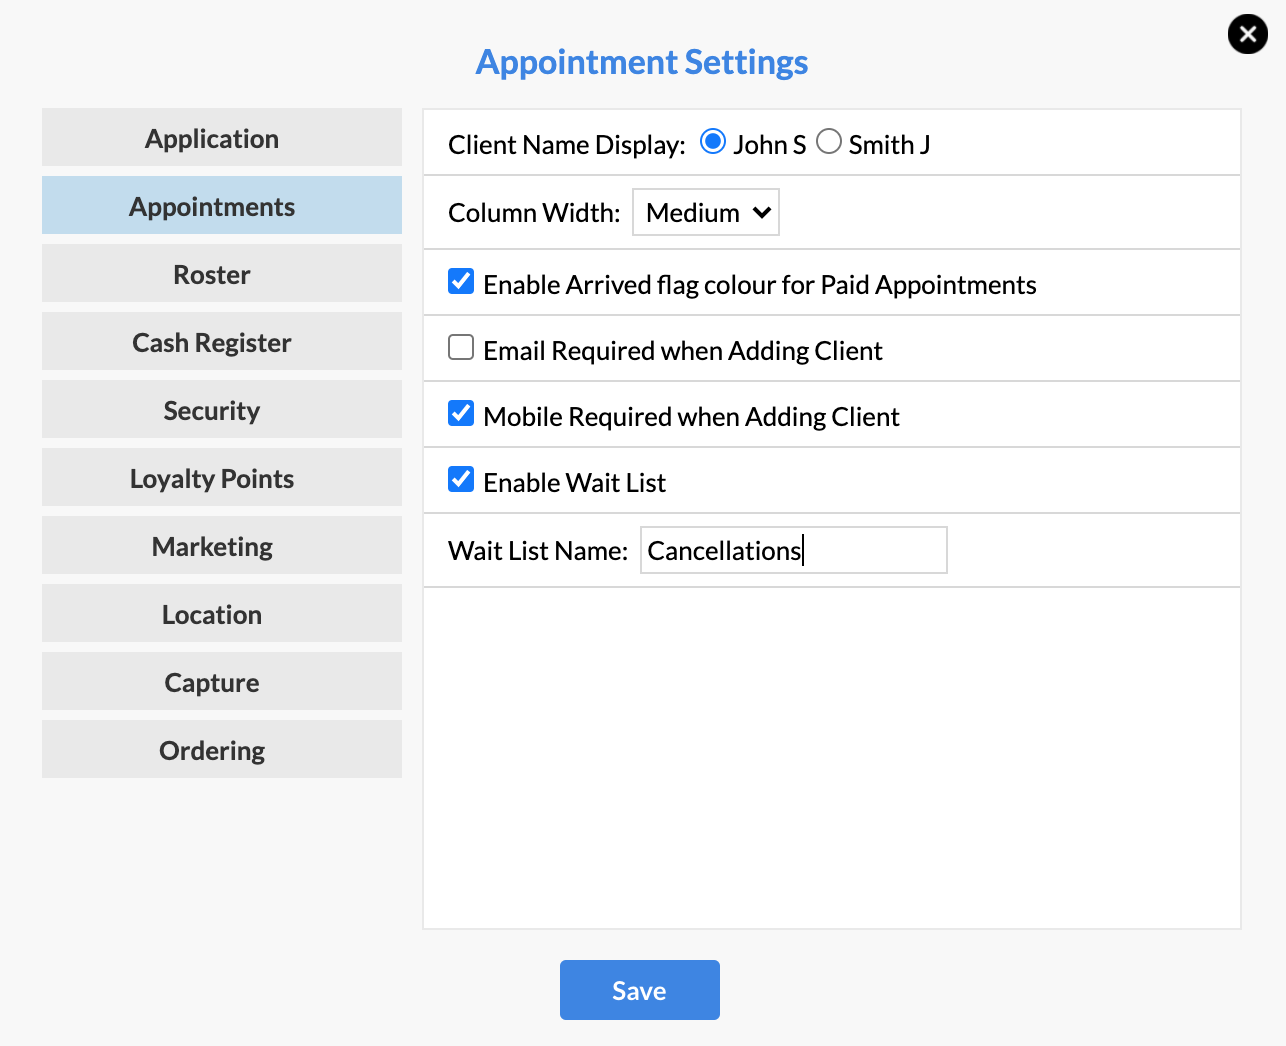
Great! The column will now display the name that you've changed it to:

Viewing Past Wait List Clients in the Appointment Report
If a client has previously been put into the 'Wait List' column, you can see this data via your Appointments Report.
Go to Reporting > Report List > Appointment Report.
Adjust the dates, then under the Operator filter, select 'Wait List'. If you've changed the name, then what you have changed it to will display instead of 'Wait List':
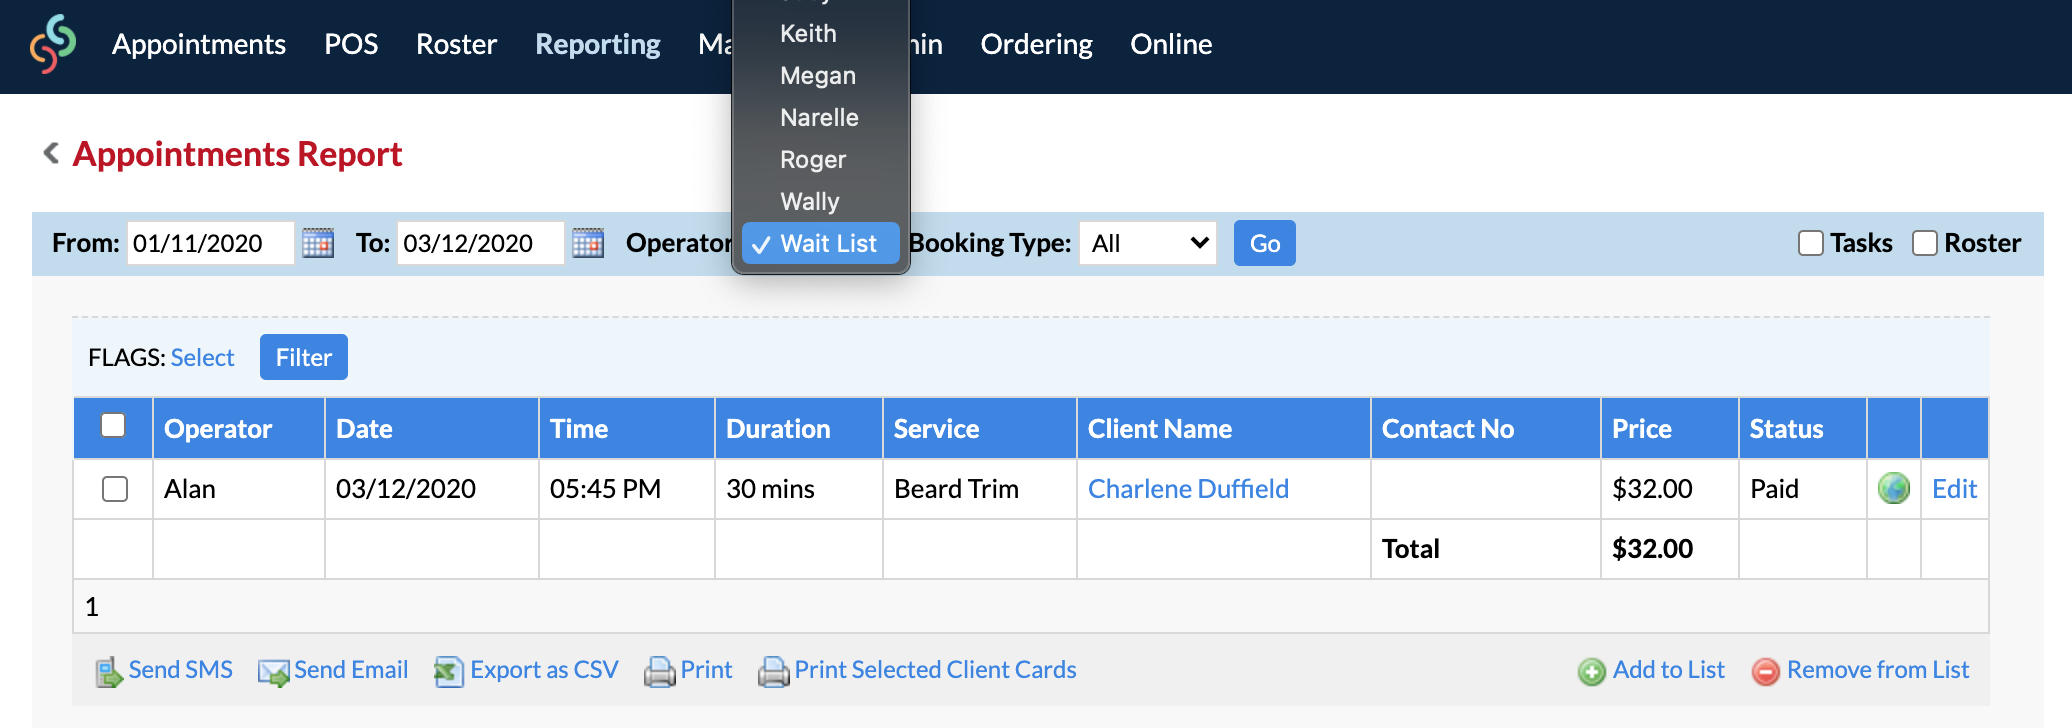
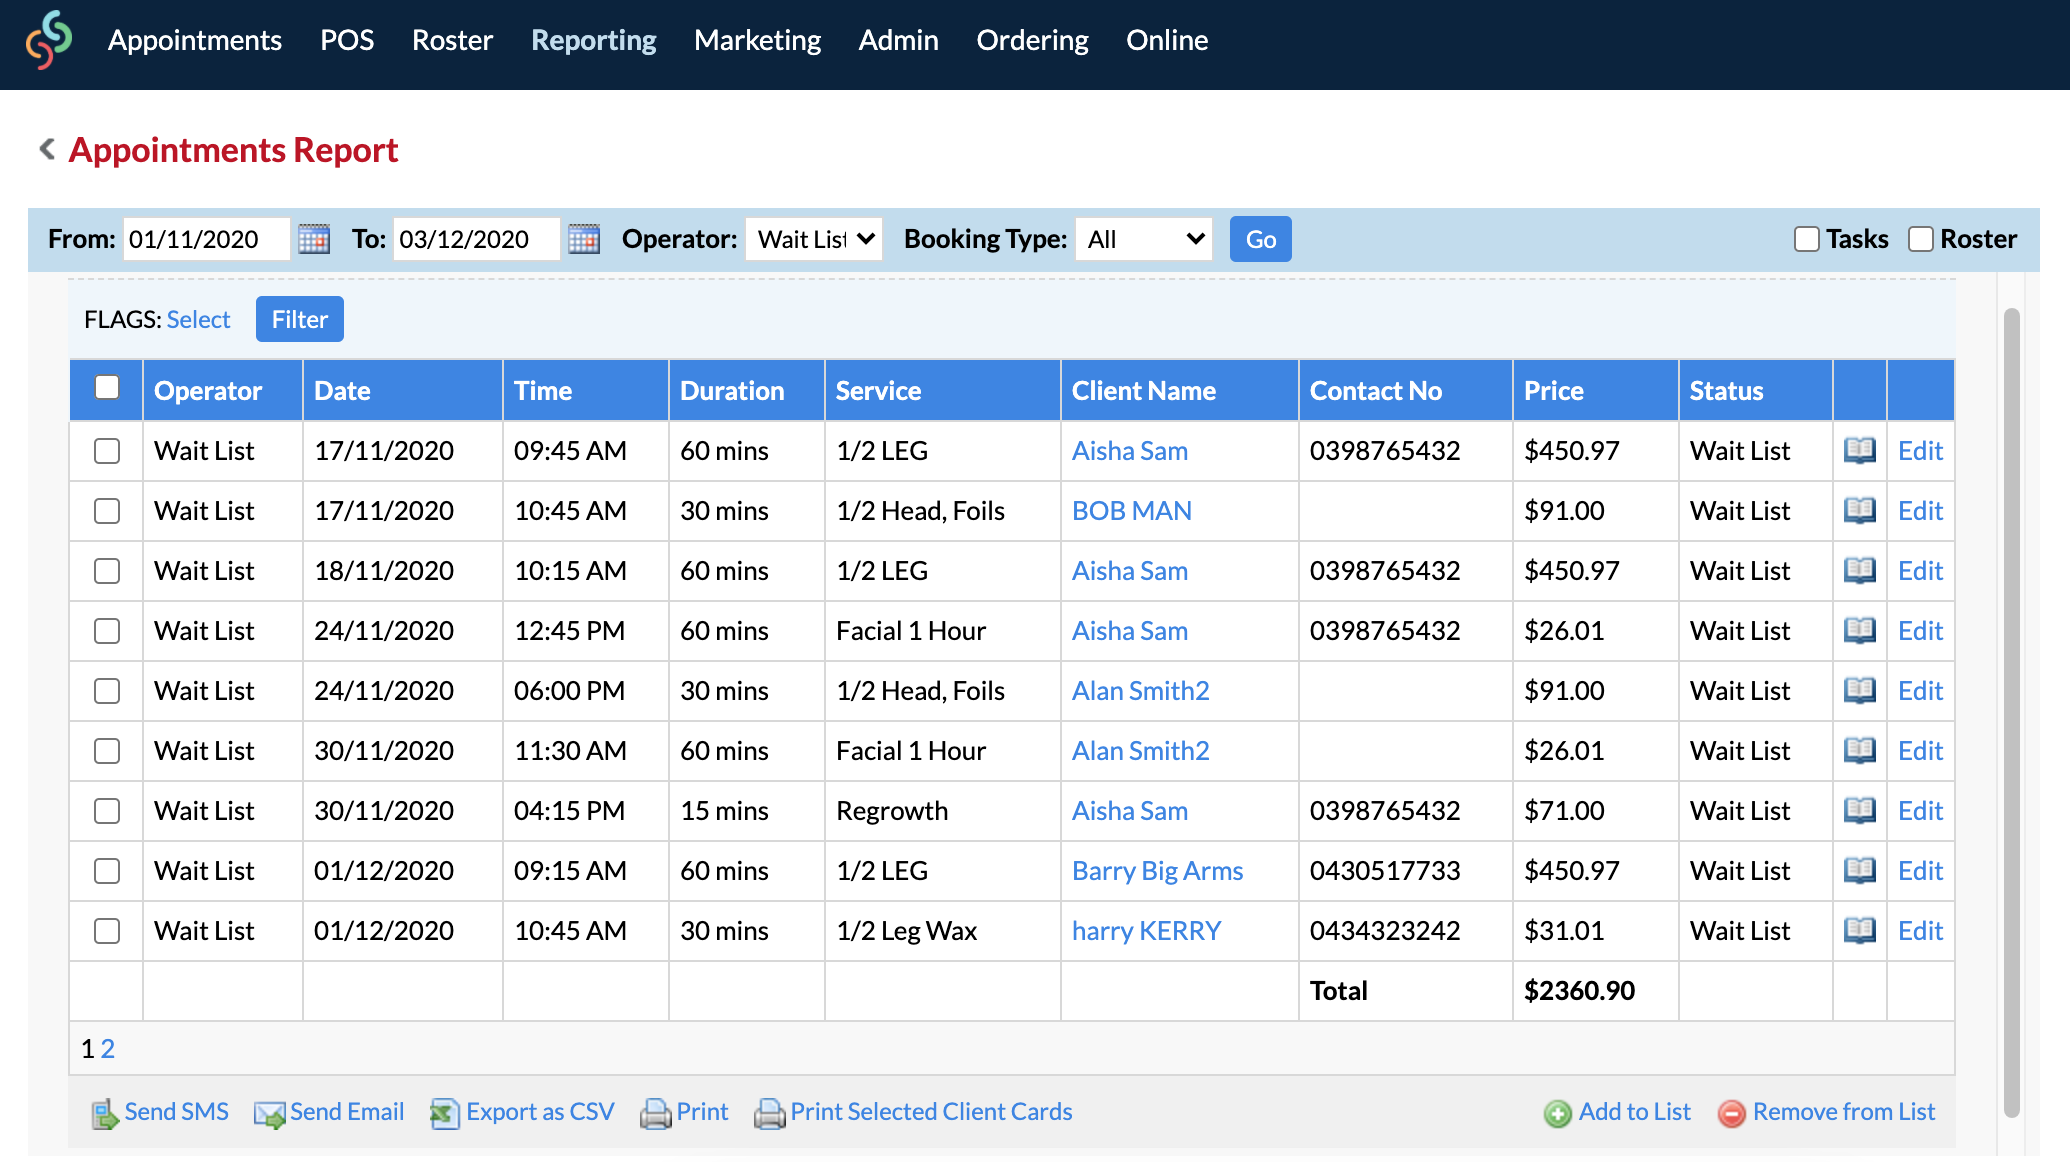
Click Go, then the search results will load.
As you can see below, all clients who were put into the Wait List column between the dates searched will be displayed:
Hiding the Wait List Column
If you are going to be using the Wait List column—but maybe you don't want to view it at all times—it is possible to hide the column when not in use.
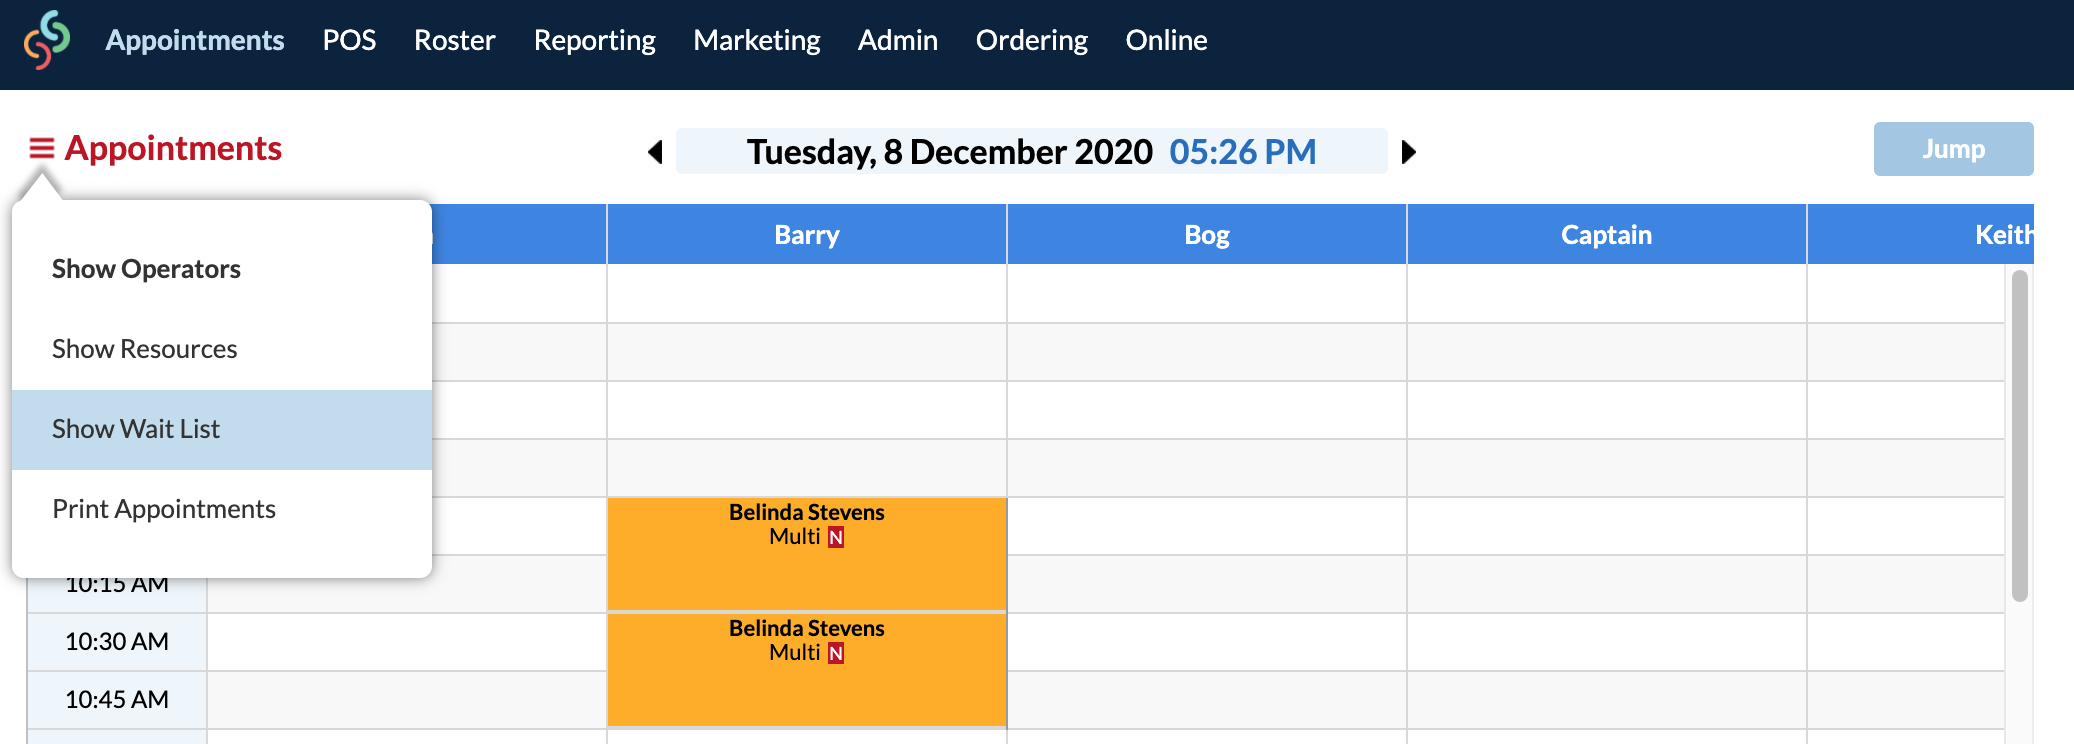
Go to your Appointments page, then click the three lines next to Appointments as shown below. Simply click Hide Wait List.
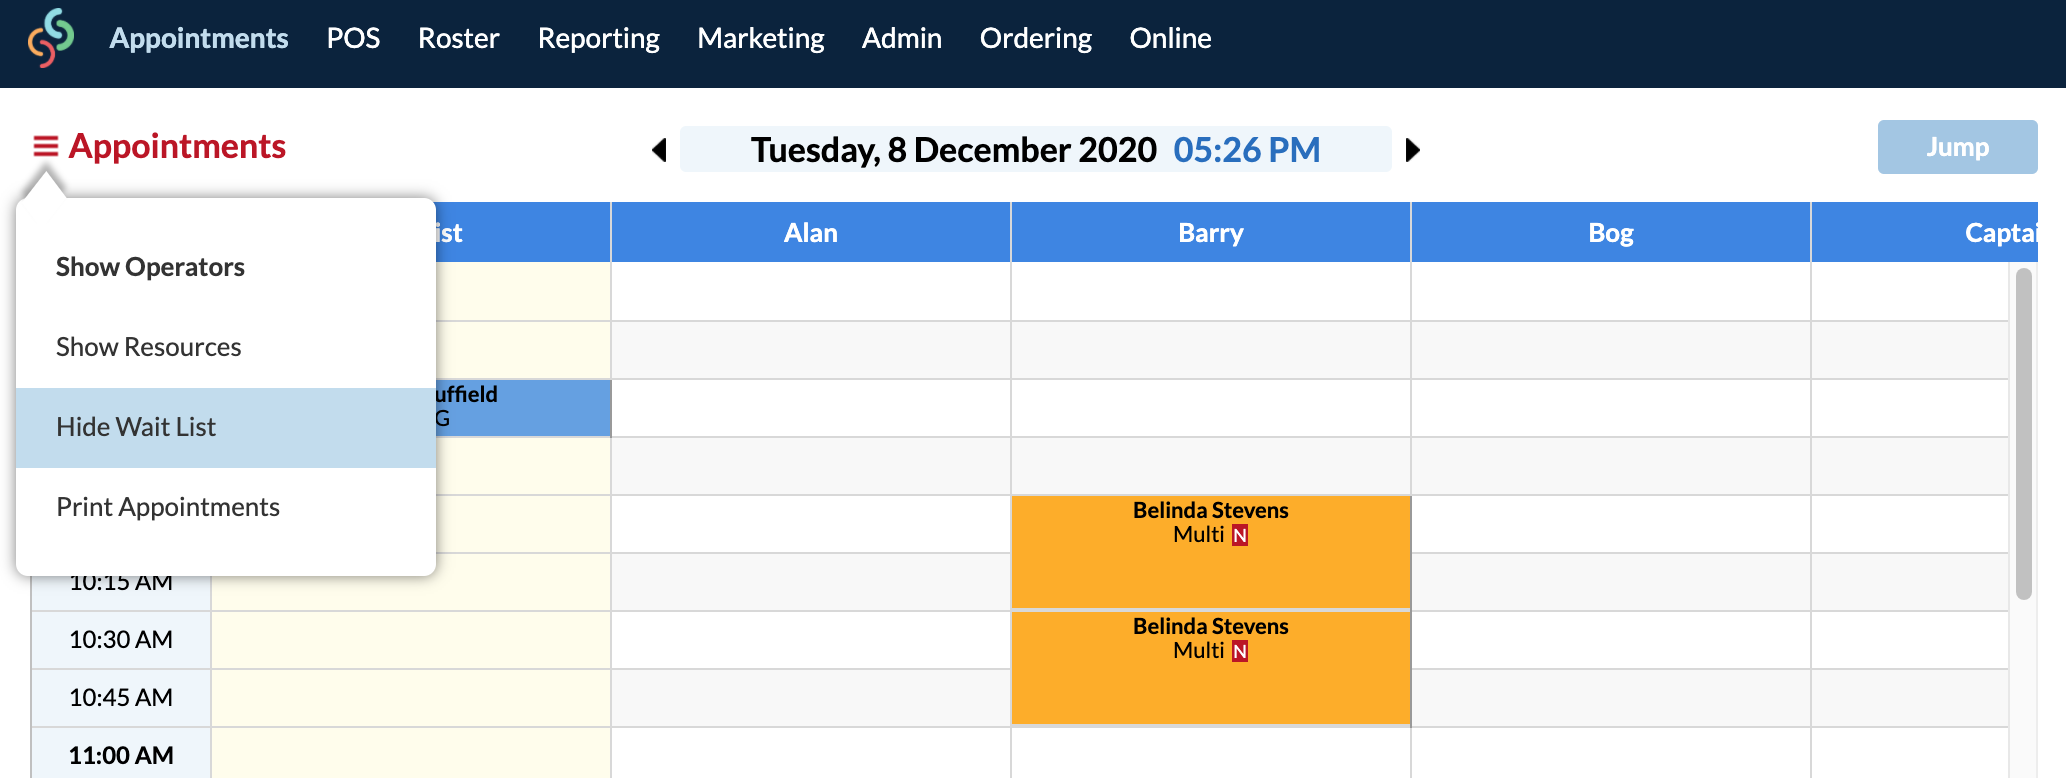
Now your Wait List column will be hidden, but all of the wait list clients will still remain in this column.
If you need to add a client to the Wait List, or you want to check who's on the Wait List for the day, simply click on the menu again and click Show Wait List.
Disabling the Wait List Column
If you would prefer to not have the Wait List column displayed on your Appointments page (and you don't want to hide it as above)—that's totally fine!
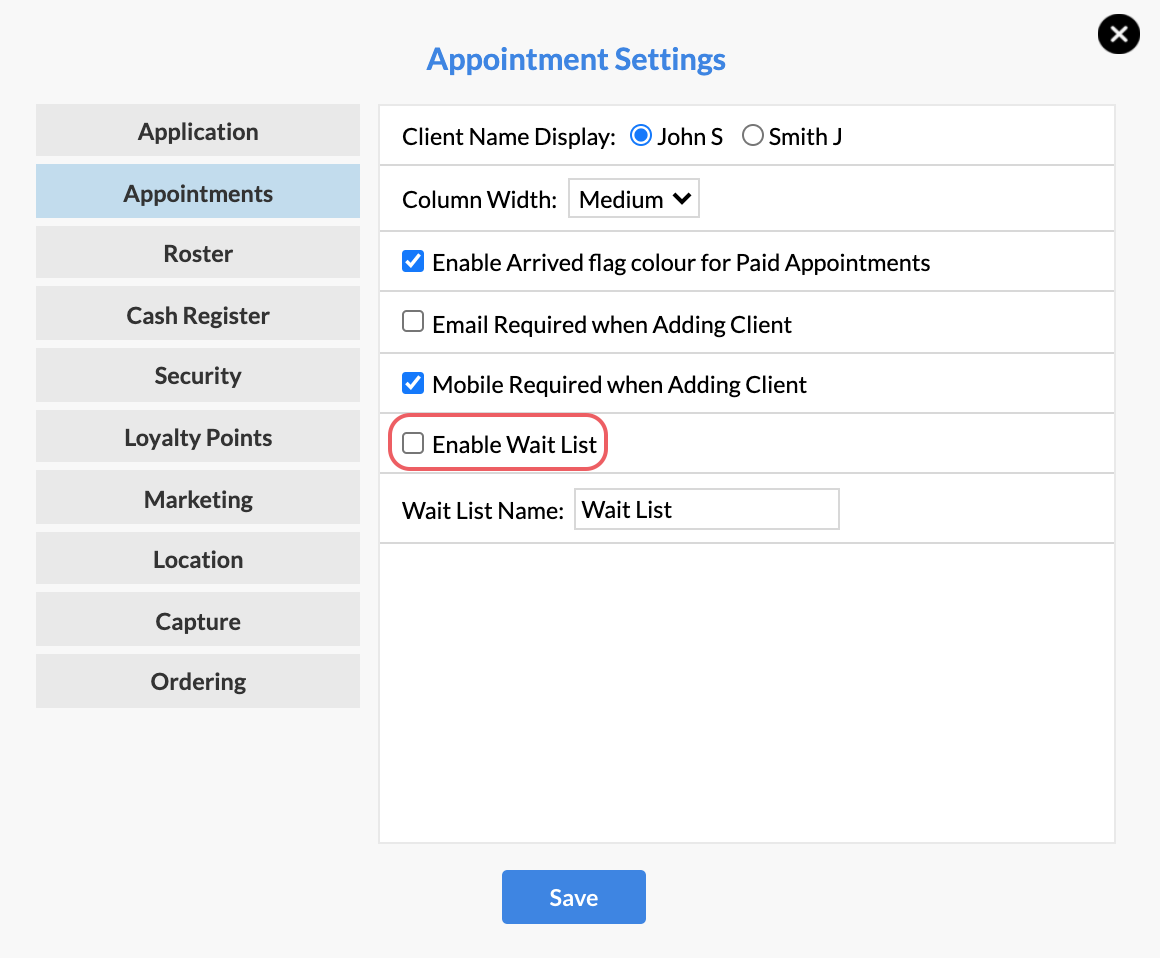
Simply go to Settings > Appointment Settings > Untick Enable Wait List then Save.
The Wait List column will now be removed from your Appointments Page:

If you want to see this in action, feel free to check out the following Help Video:
If you have any questions, please send them to us via the Submit a Request option in your Help & Support page—we're here to help!
