Your appointment book can be used for client bookings, as well as for your own scheduling. You can use your appointment diary to book out time for meetings and lunch breaks.
Creating Tasks
Go to the Admin page, select the Services tab and in Categories click Tasks.
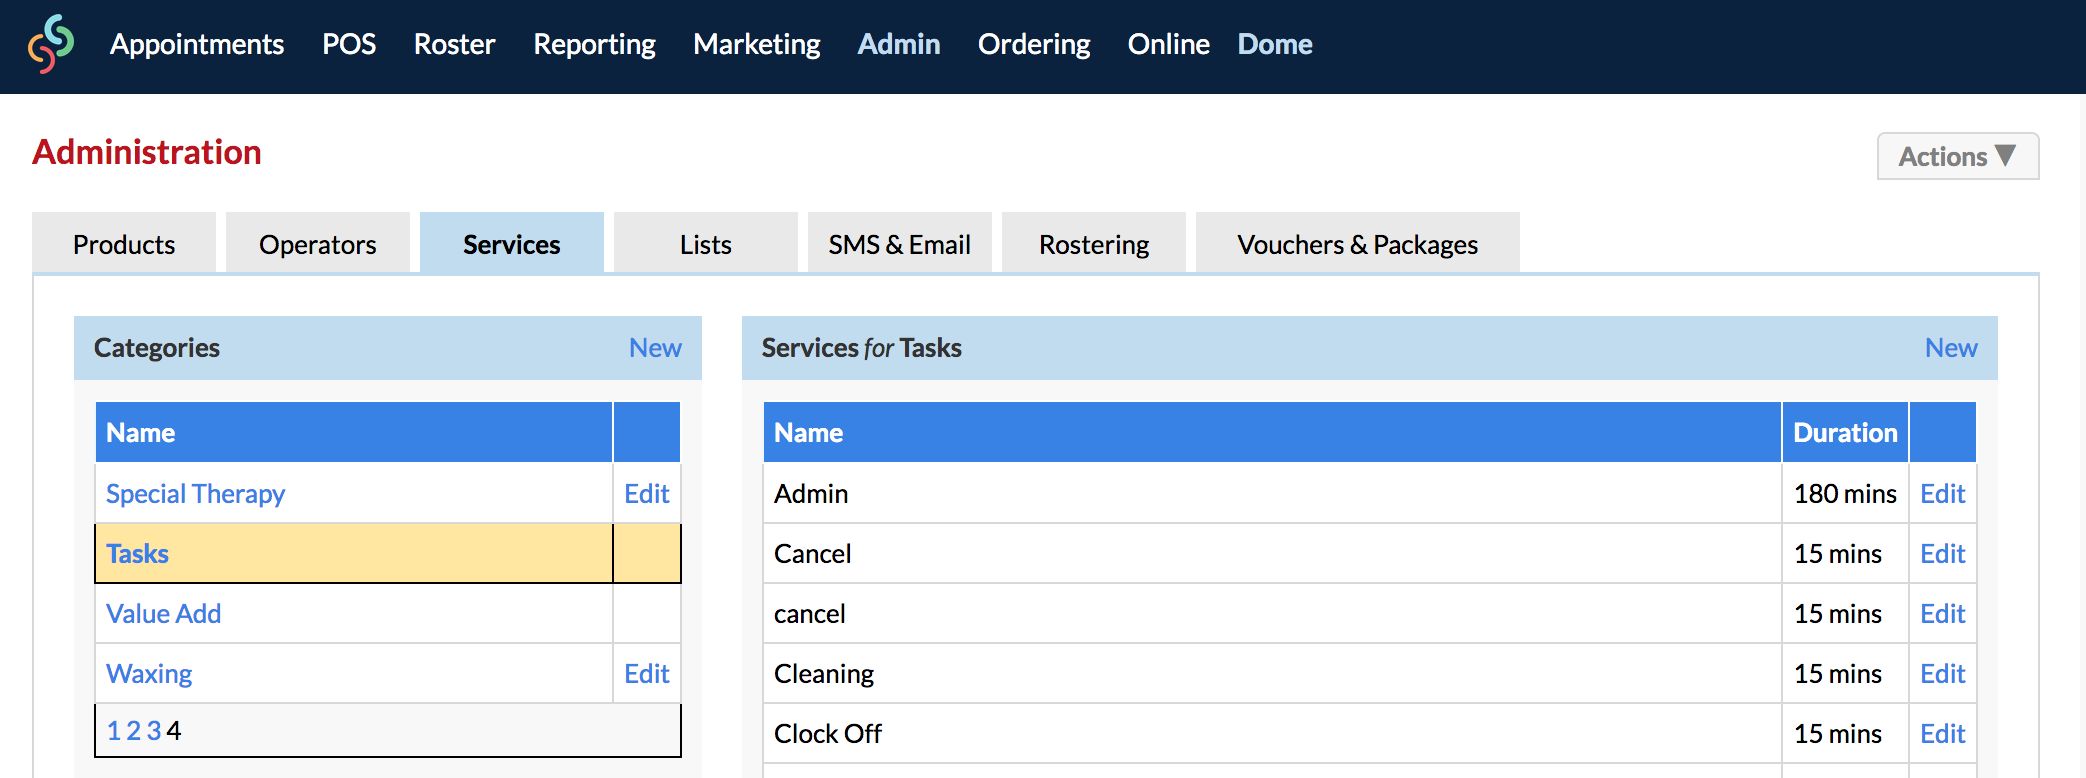
Note: You need to use the Task category, that already exists in the Categories section as these are attached to POS. If you create your own Tasks category you won't be able to use them in POS under "Add Tasks".
In the Services for Tasks section, click New to create your new task—this can be what anything you want, such as Team Meeting, Cleaning, Administration etc.
Great! Now you're ready to schedule your Tasks into your Appointment page.
Adding 'Tasks' to your operator columns
It's just like making an appointment—select the time slot first then choose the Add Task option on the right side panel.
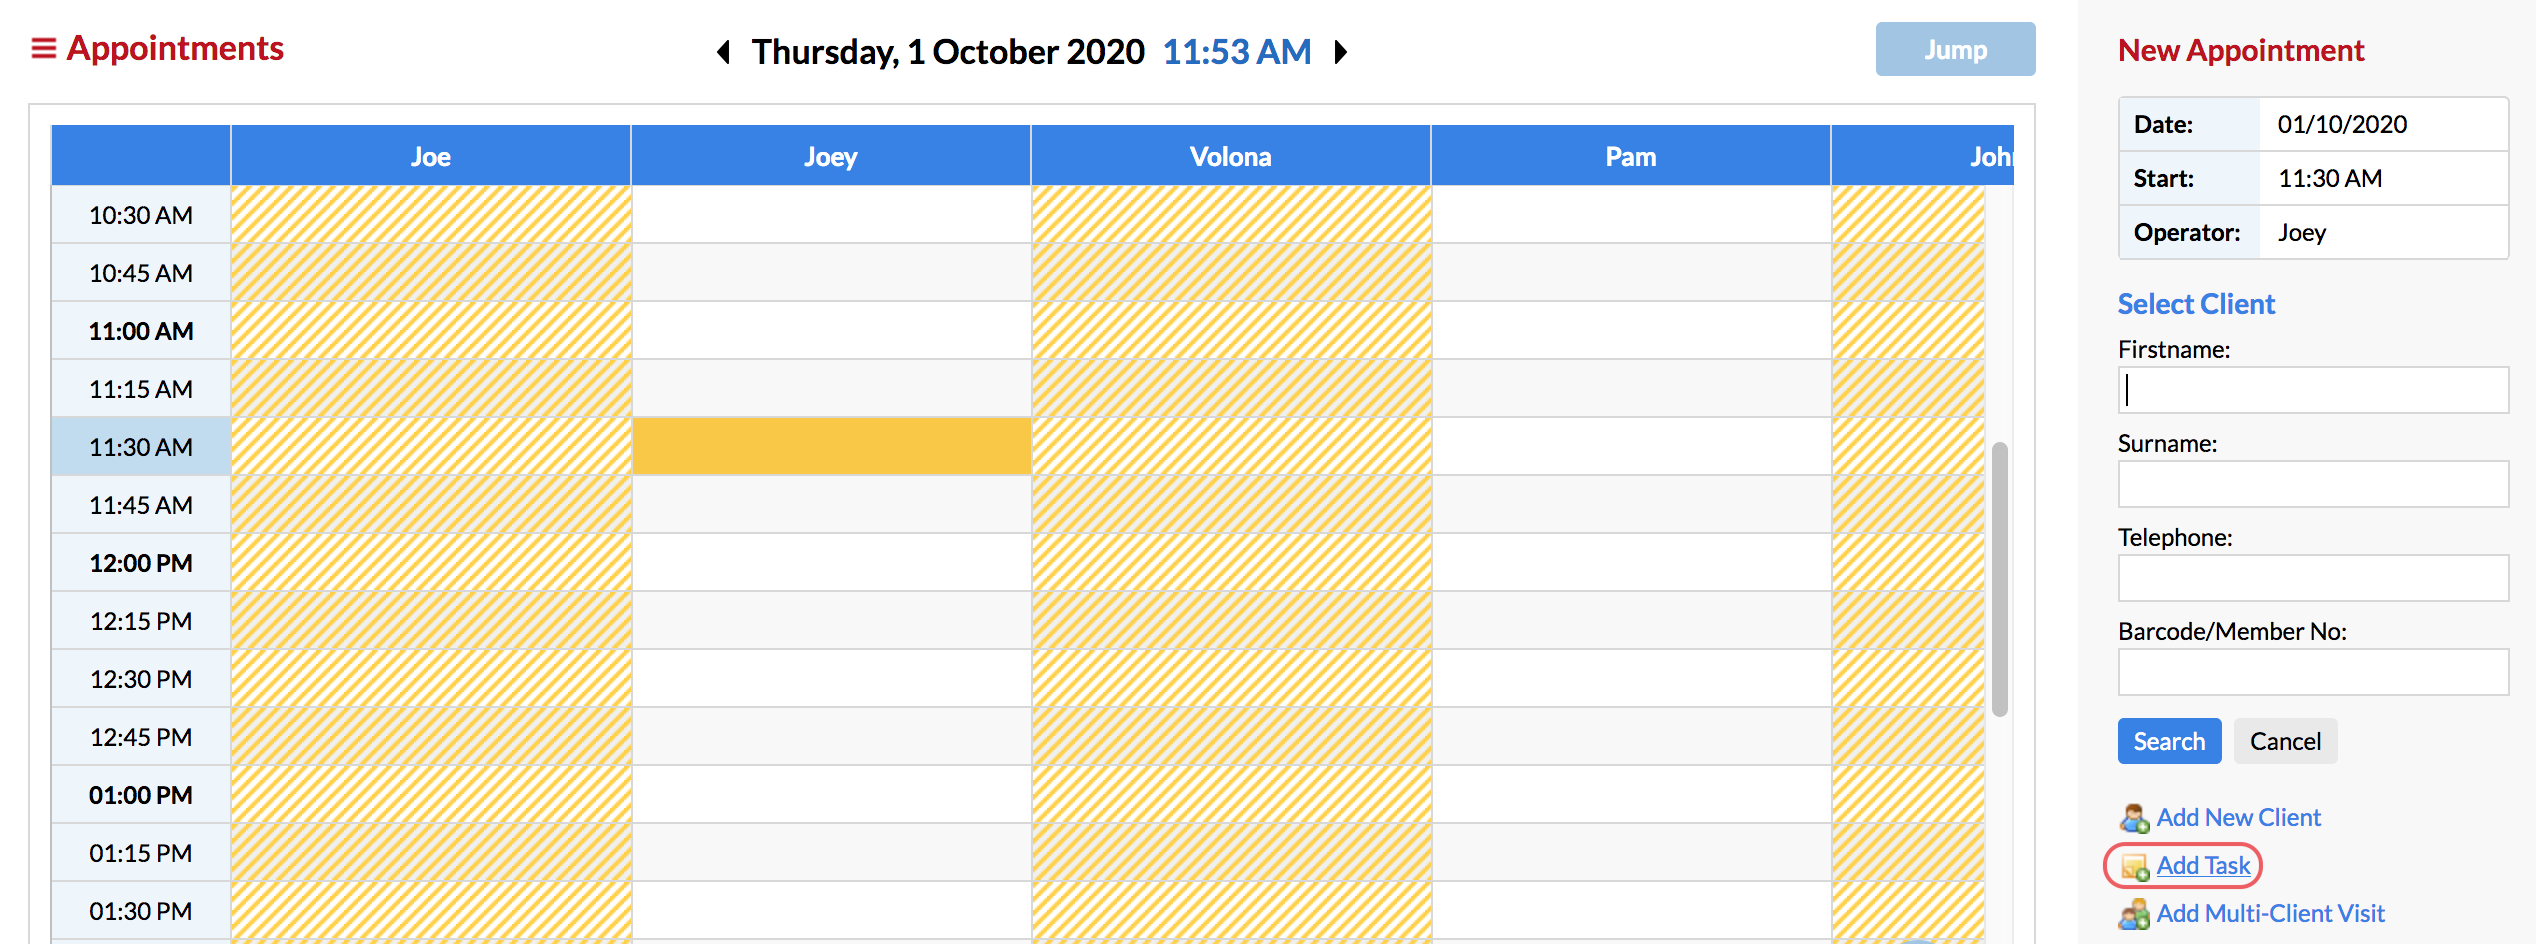
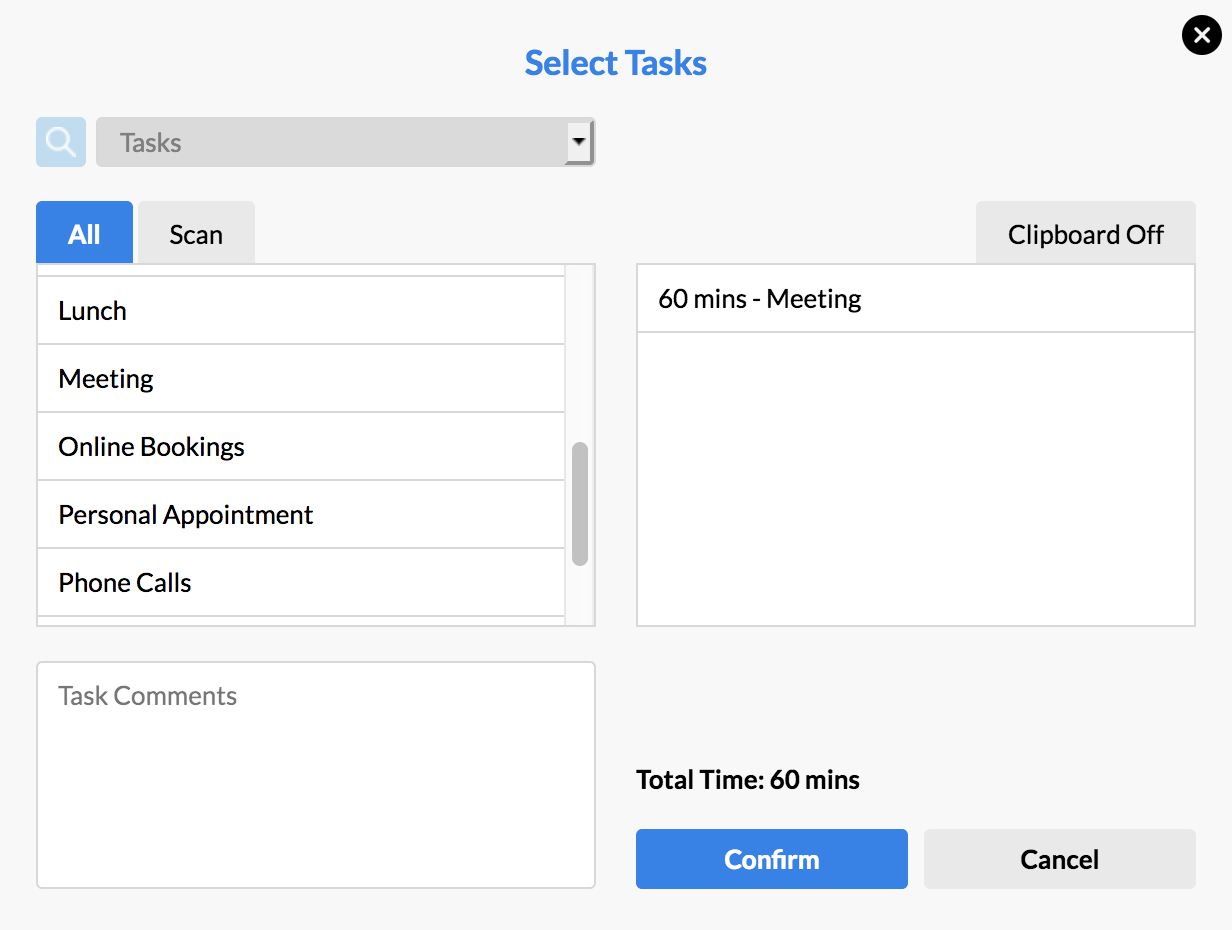
Select the Task from the Select Tasks window, and Confirm when you're ready.
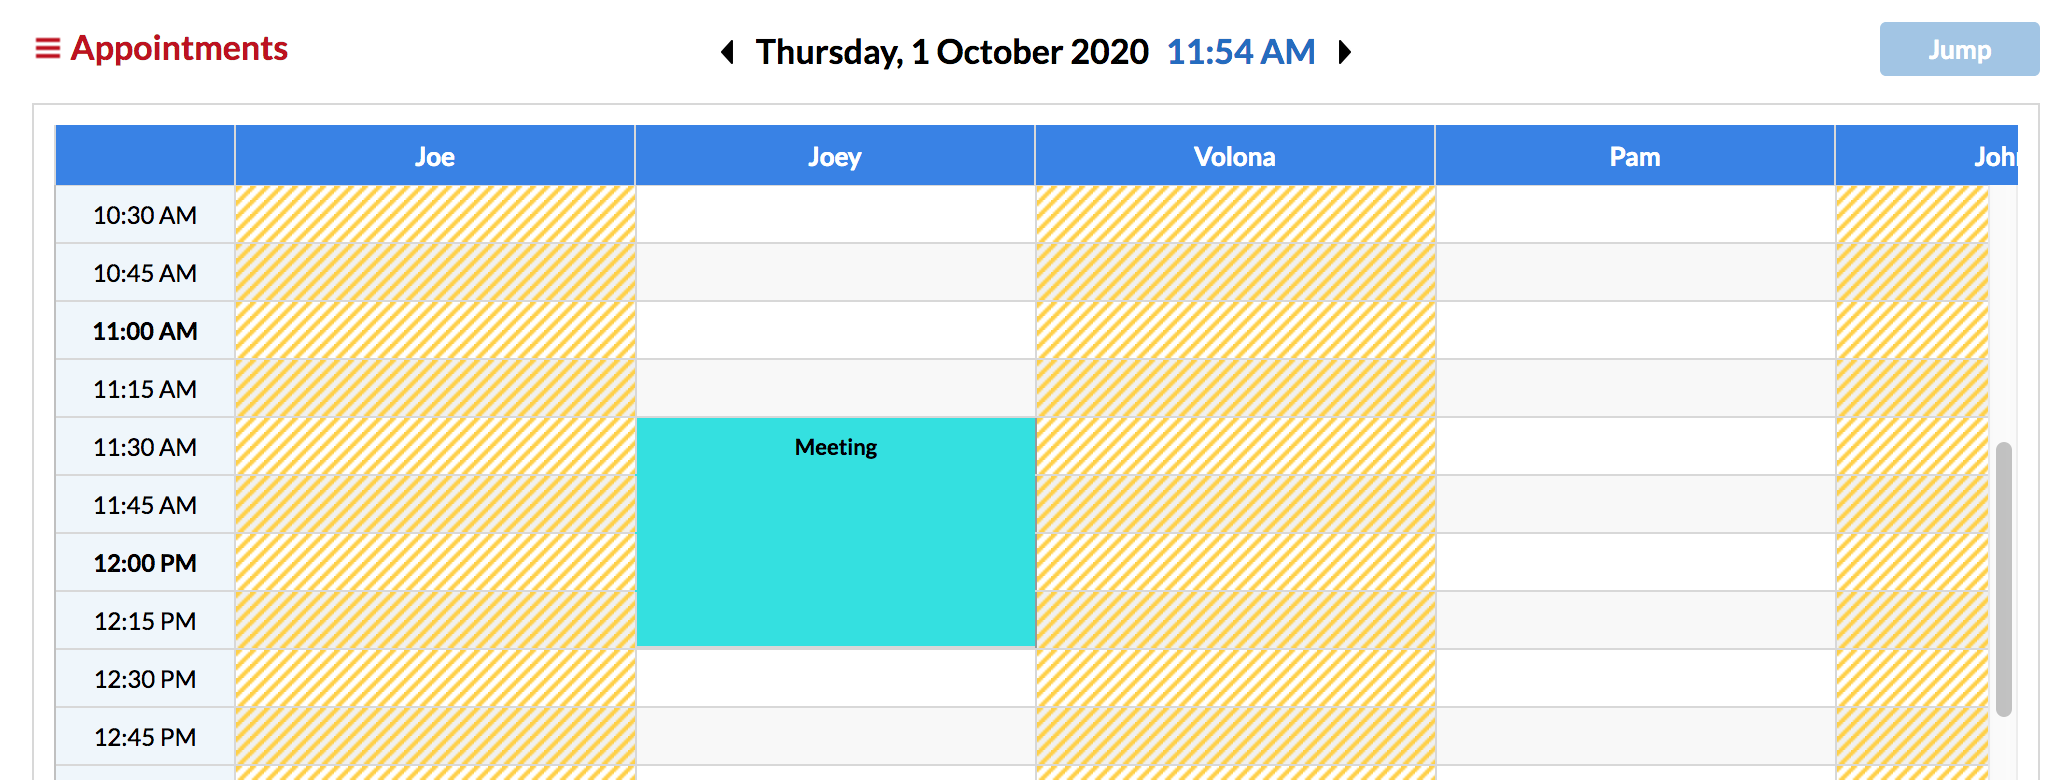
Your task will now display on your Appointments page:
Just like appointments, tasks can be moved around your appointment diary, lengthened and shortened. Tasks are as flexible as you are.
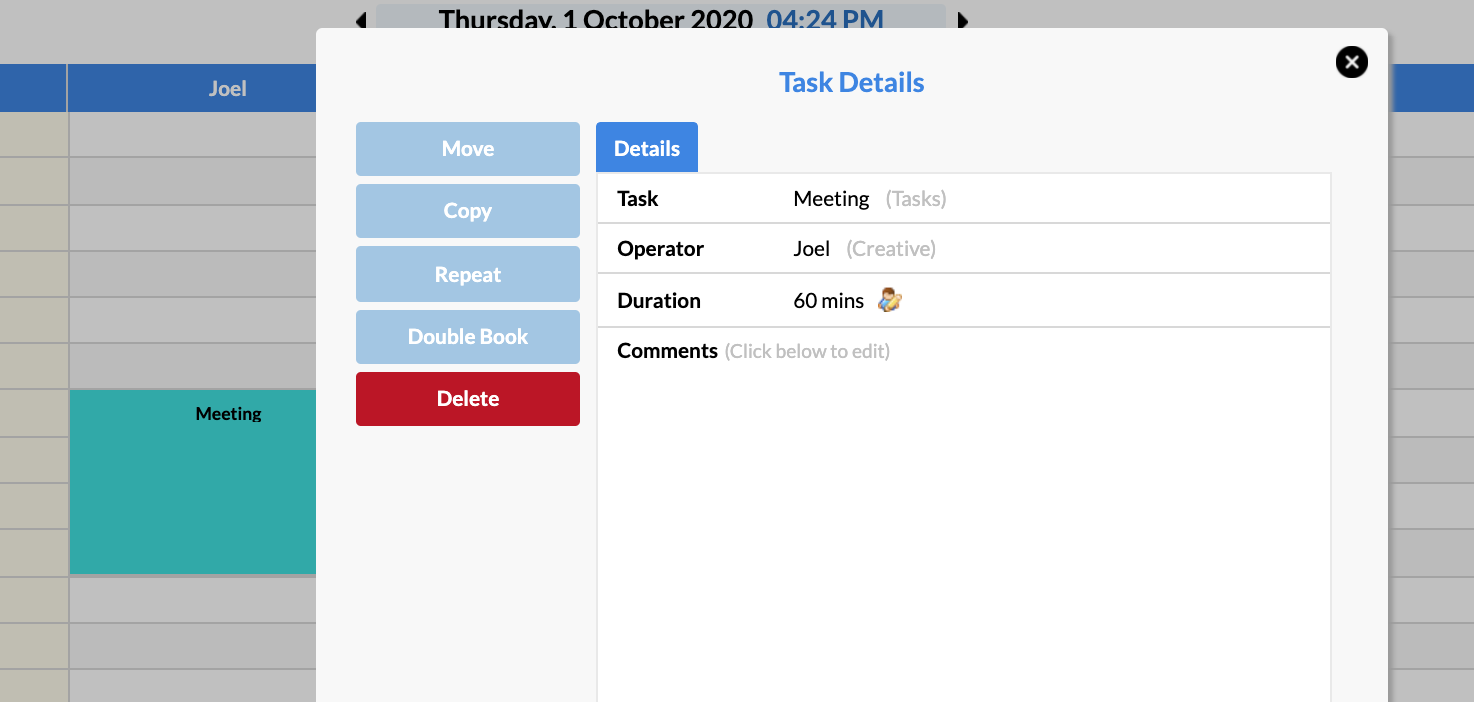
If you click on the Task name while on the Appointments page, you'll be able to view Task Details.
From here you can Move, Copy, Repeat and Double Book the Task - just like you would with an appointment:
If you have any questions, please send them to us via the Submit a Request option in your Help & Support page.