Creating Client Categories
Go to Admin and into the Lists tab. Use the Select List drop-down menu to select Client Categories:

Click New to create a Client Category. On the right side panel, give your category a name, and Save. Otherwise, you can click Edit next to an existing list.
Note: By ticking Add to new clients, this means that this client category will be automatically applied to all new clients (e.g. the Loyalty Program category is one which you might like all new clients to be automatically assigned to).
Continue clicking New and creating each of your client categories until you have them all listed.
Assigning Clients to their Client Categories
Next, we need to assign the clients to the Client Category you want them a part of—there are a couple places you can do this (click any of the links below to jump ahead):
- Client Card
- While Creating an Appointment
- Viewing an Existing Appointment
- Before Approving an Online Booking
These are also where you can go when you simply want to view which Client Category your clients are assigned to.
Client Card
Search for a client and go to their client card. In the Actions menu, of the client card, click Categories.

Tick the category which the client belongs to then Save.
Note: Clients can be assigned to multiple categories. Tick all of the categories this client needs to be assigned to and Save.

Creating an Appointment
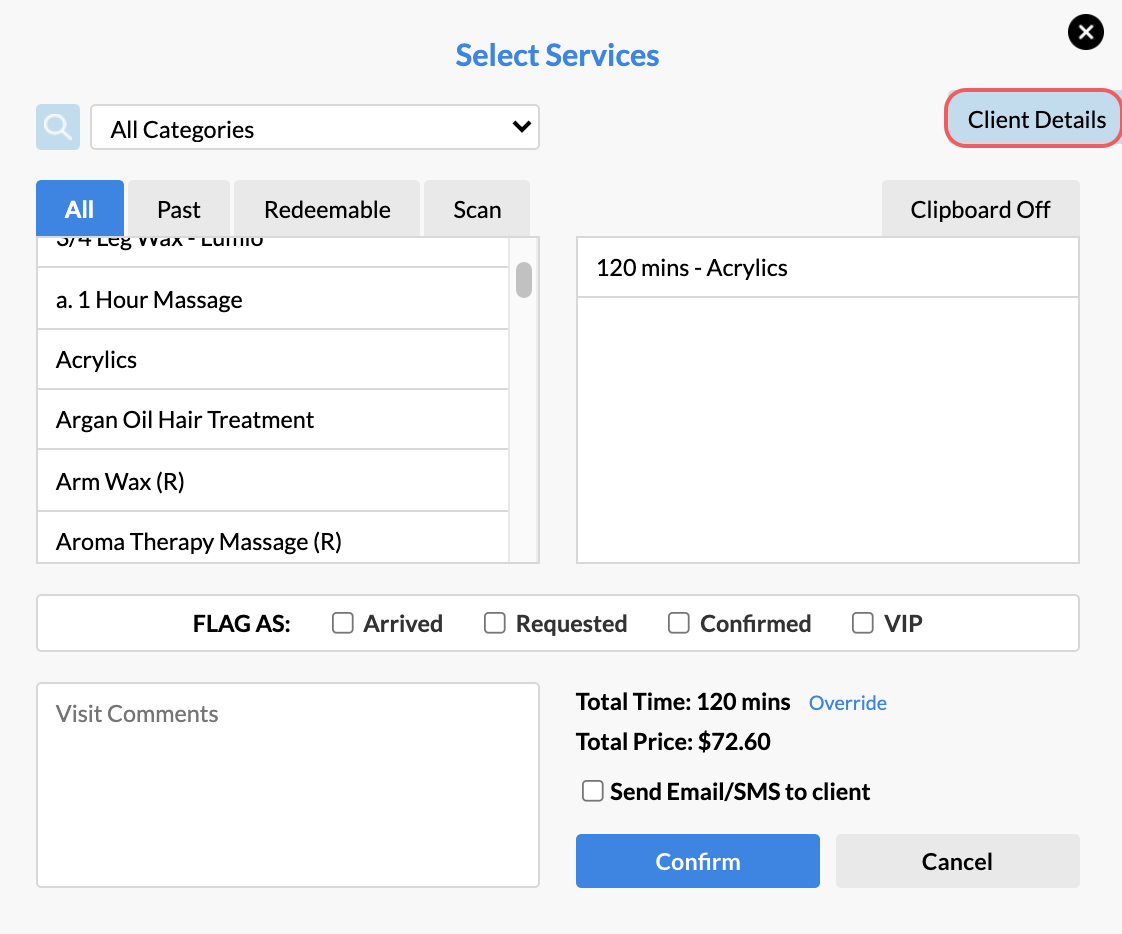
When you are creating a clients appointment and selecting their services via your Appointments page, you'll notice a Client Details button:

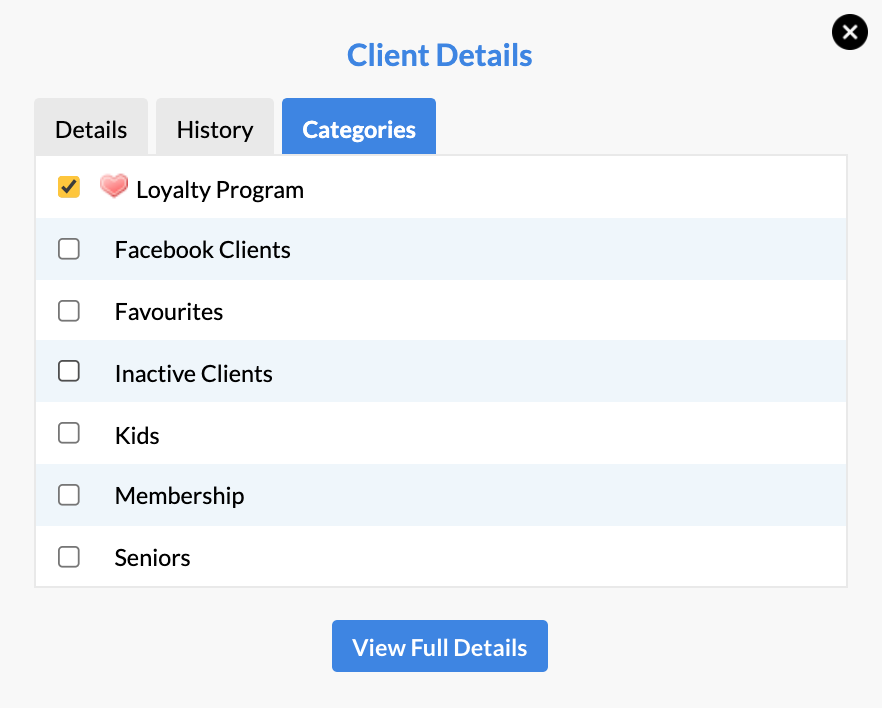
If you select this, you'll see a Categories tab. Simply click this button and you can update the clients Client Category from here. There's no need to Save, as it will automatically update if you make any changes:

Otherwise if you don't need to make any changes, you can simply come here when you need to view a client's Client Category prior to booking them in for an appointment.
Viewing an Existing Appointment
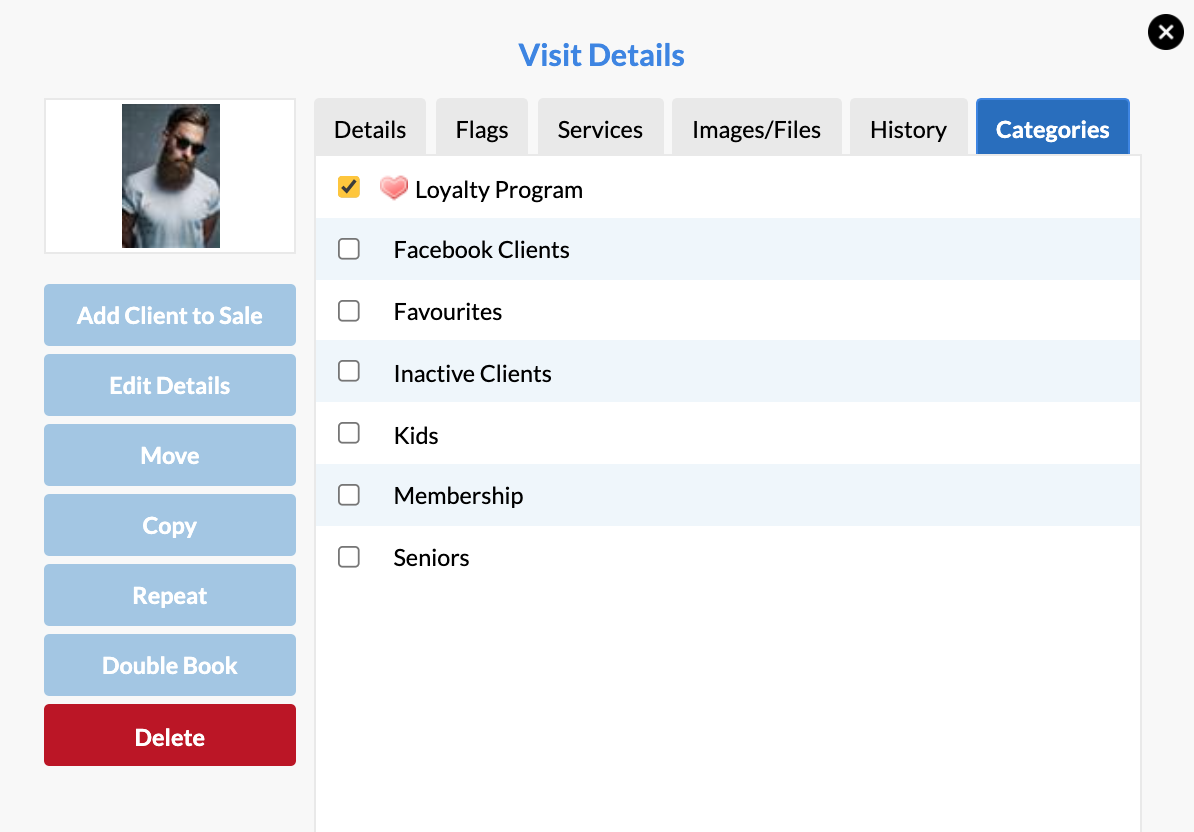
When viewing a clients existing appointment via the Visit Details window (by selecting the client's name on the Appointments Page), you'll notice a Categories tab:

Simply click Categories and you can update their Client Category from here. There's no need to Save, as it will automatically update if you make any changes.
If you don't need to make any changes, you can simply come here when you need to view a client's Client Category.
Approving an Online Booking
You can also view (or assign) a client's Client Category via Online Bookings if you are manually approving your bookings.
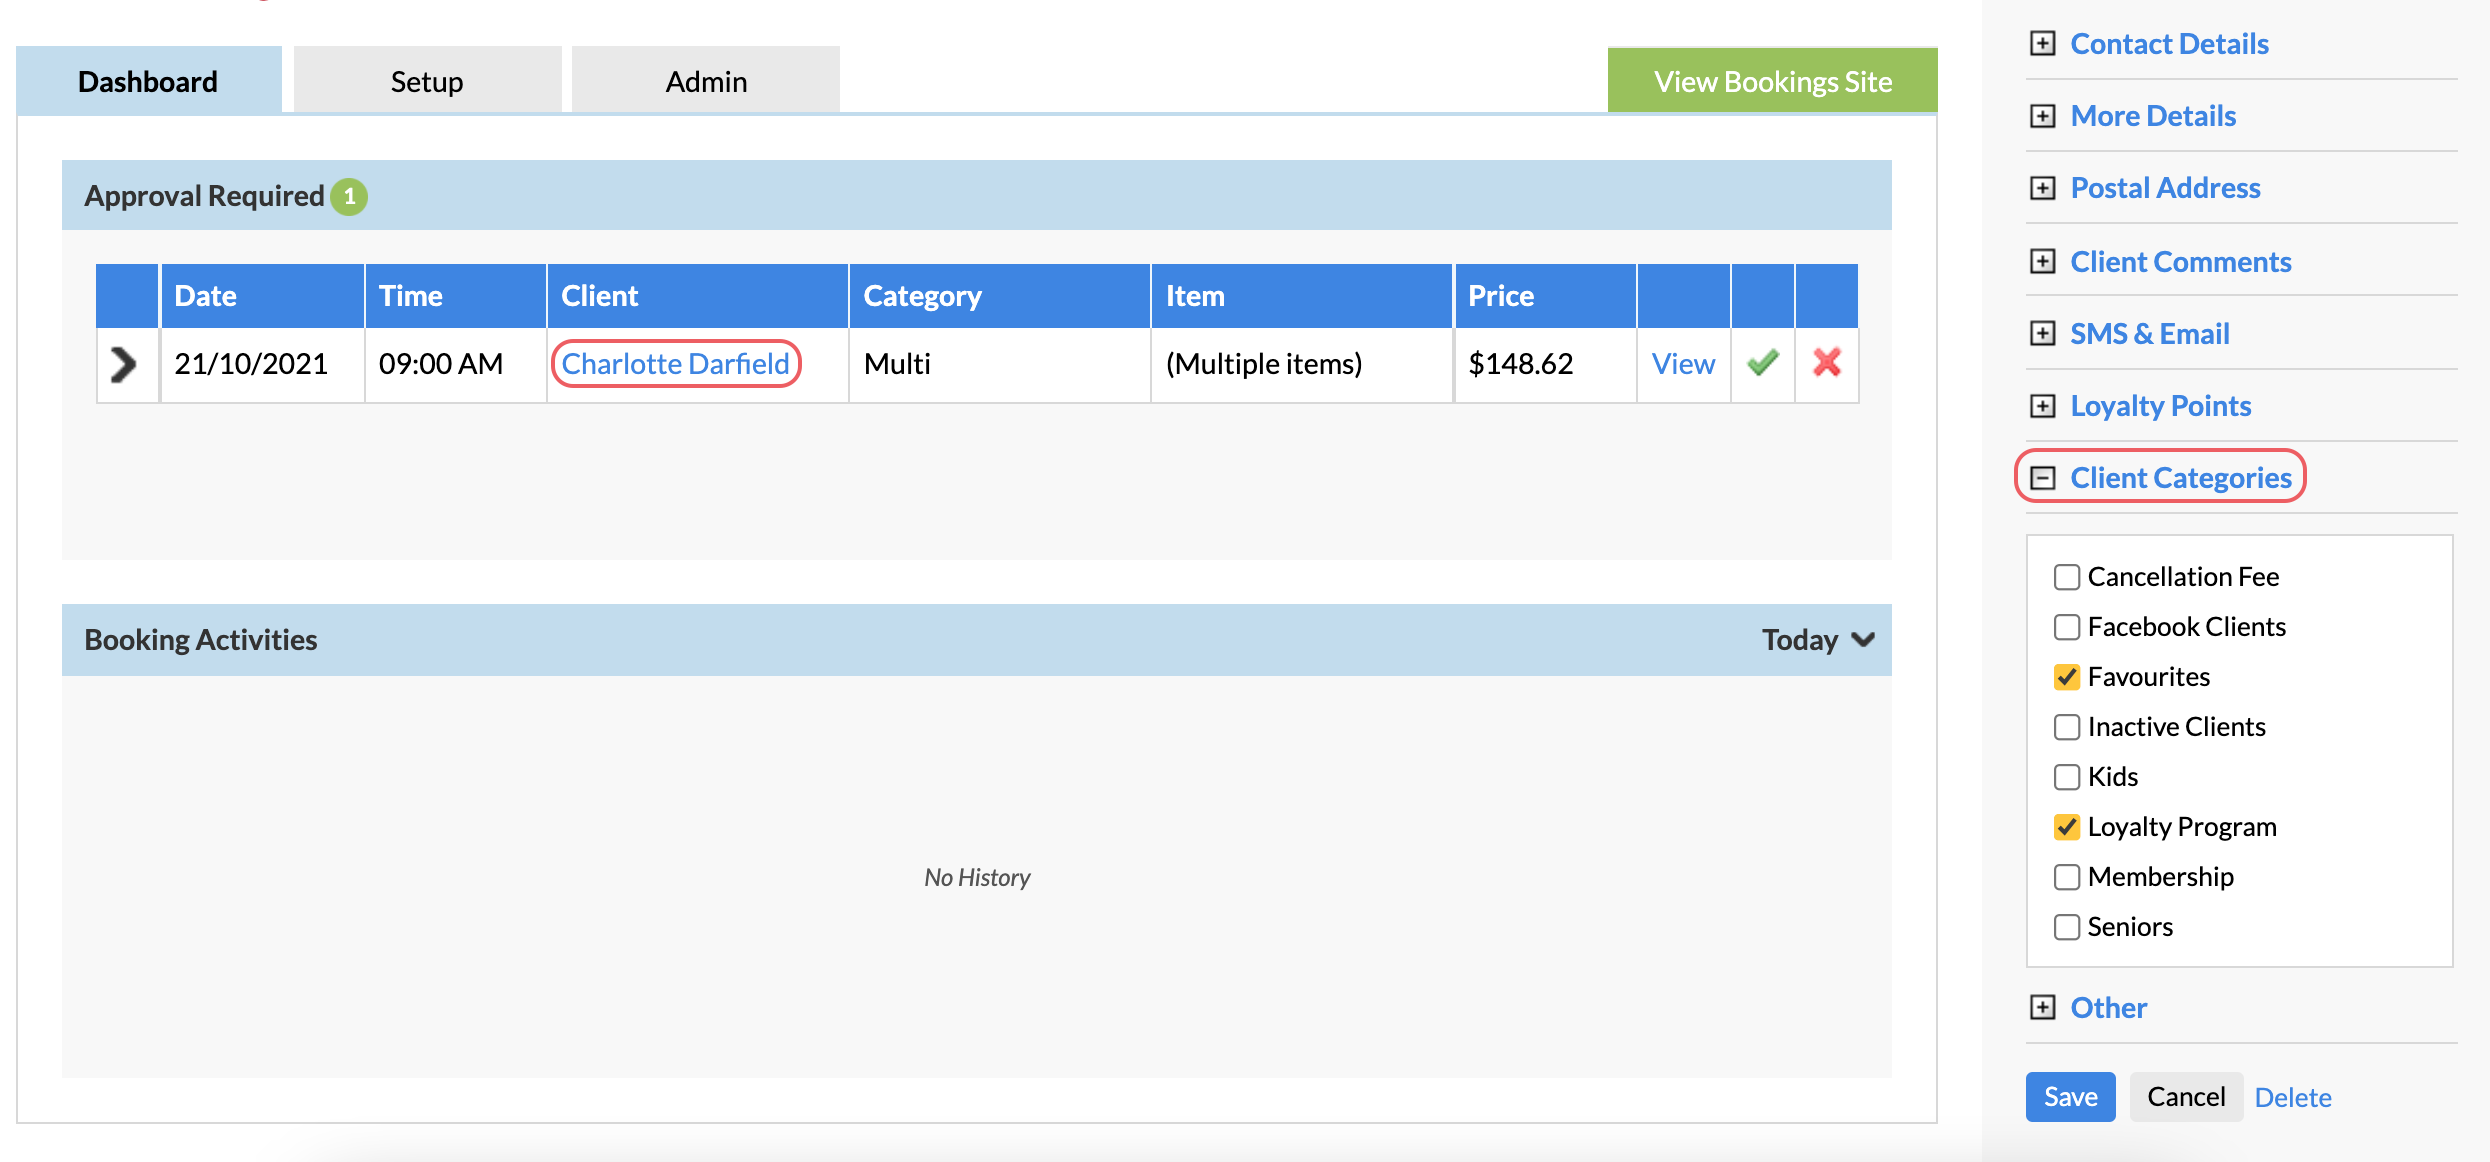
If you have an Online Booking waiting approval (via Online > Dashboard), you can click on the client's name under the Approval Required section to bring up their Personal Details:

From here you can click Client Categories to either view what categories they're assigned to, or you can also change their categories from here. If you change one of their Client Categories from here remember to click Save.
Finally, if you ever wanted to check which clients are on each Client Category list, you can do so via Marketing > All Clients.
Then, simply use the Category drop-down menu to view the clients in each category:

If you have any questions send them to us via the Submit a Request option in your Help & Support page.