You know that feeling you get when you tidy the house? Feels great doesn't it? It's time to tidy up your service list. Let's sort all of your services into categories.
This article provides you with detailed instructions on setting up categories for your services. This will carry across to your reports allowing you to report on any specific service category.
Creating your Service Categories
Go to Admin, Click the Services tab, then under Categories click New.
Then you can now type in your new Category (e.g. Colours) over on the right hand side and click Save.
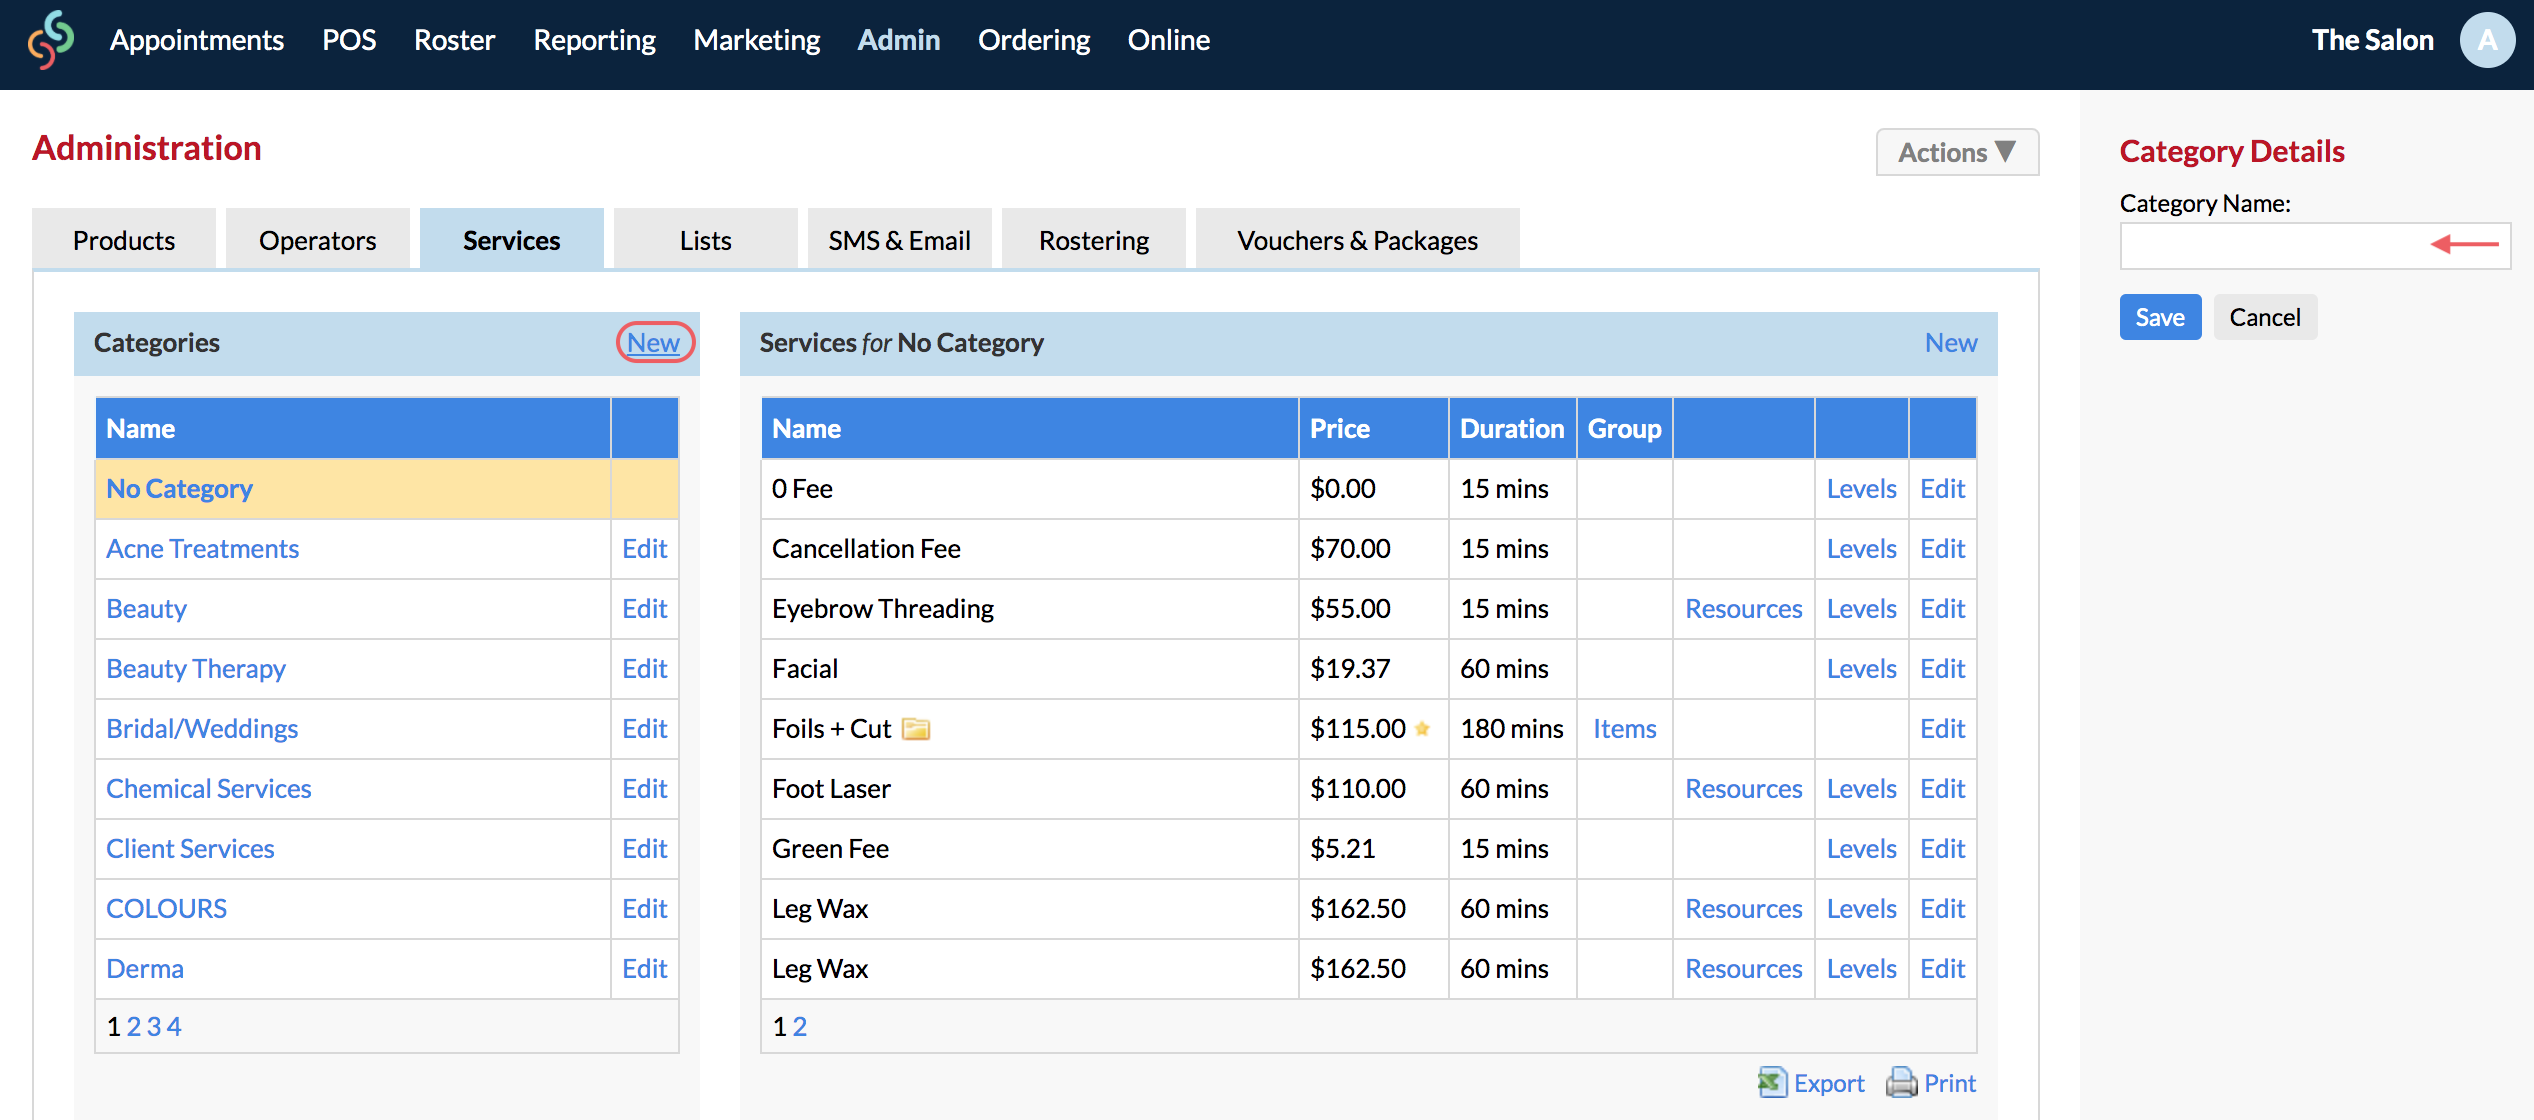
You will see your newly created category is listed under Category heading.
Allocating Services to their Corresponding Category
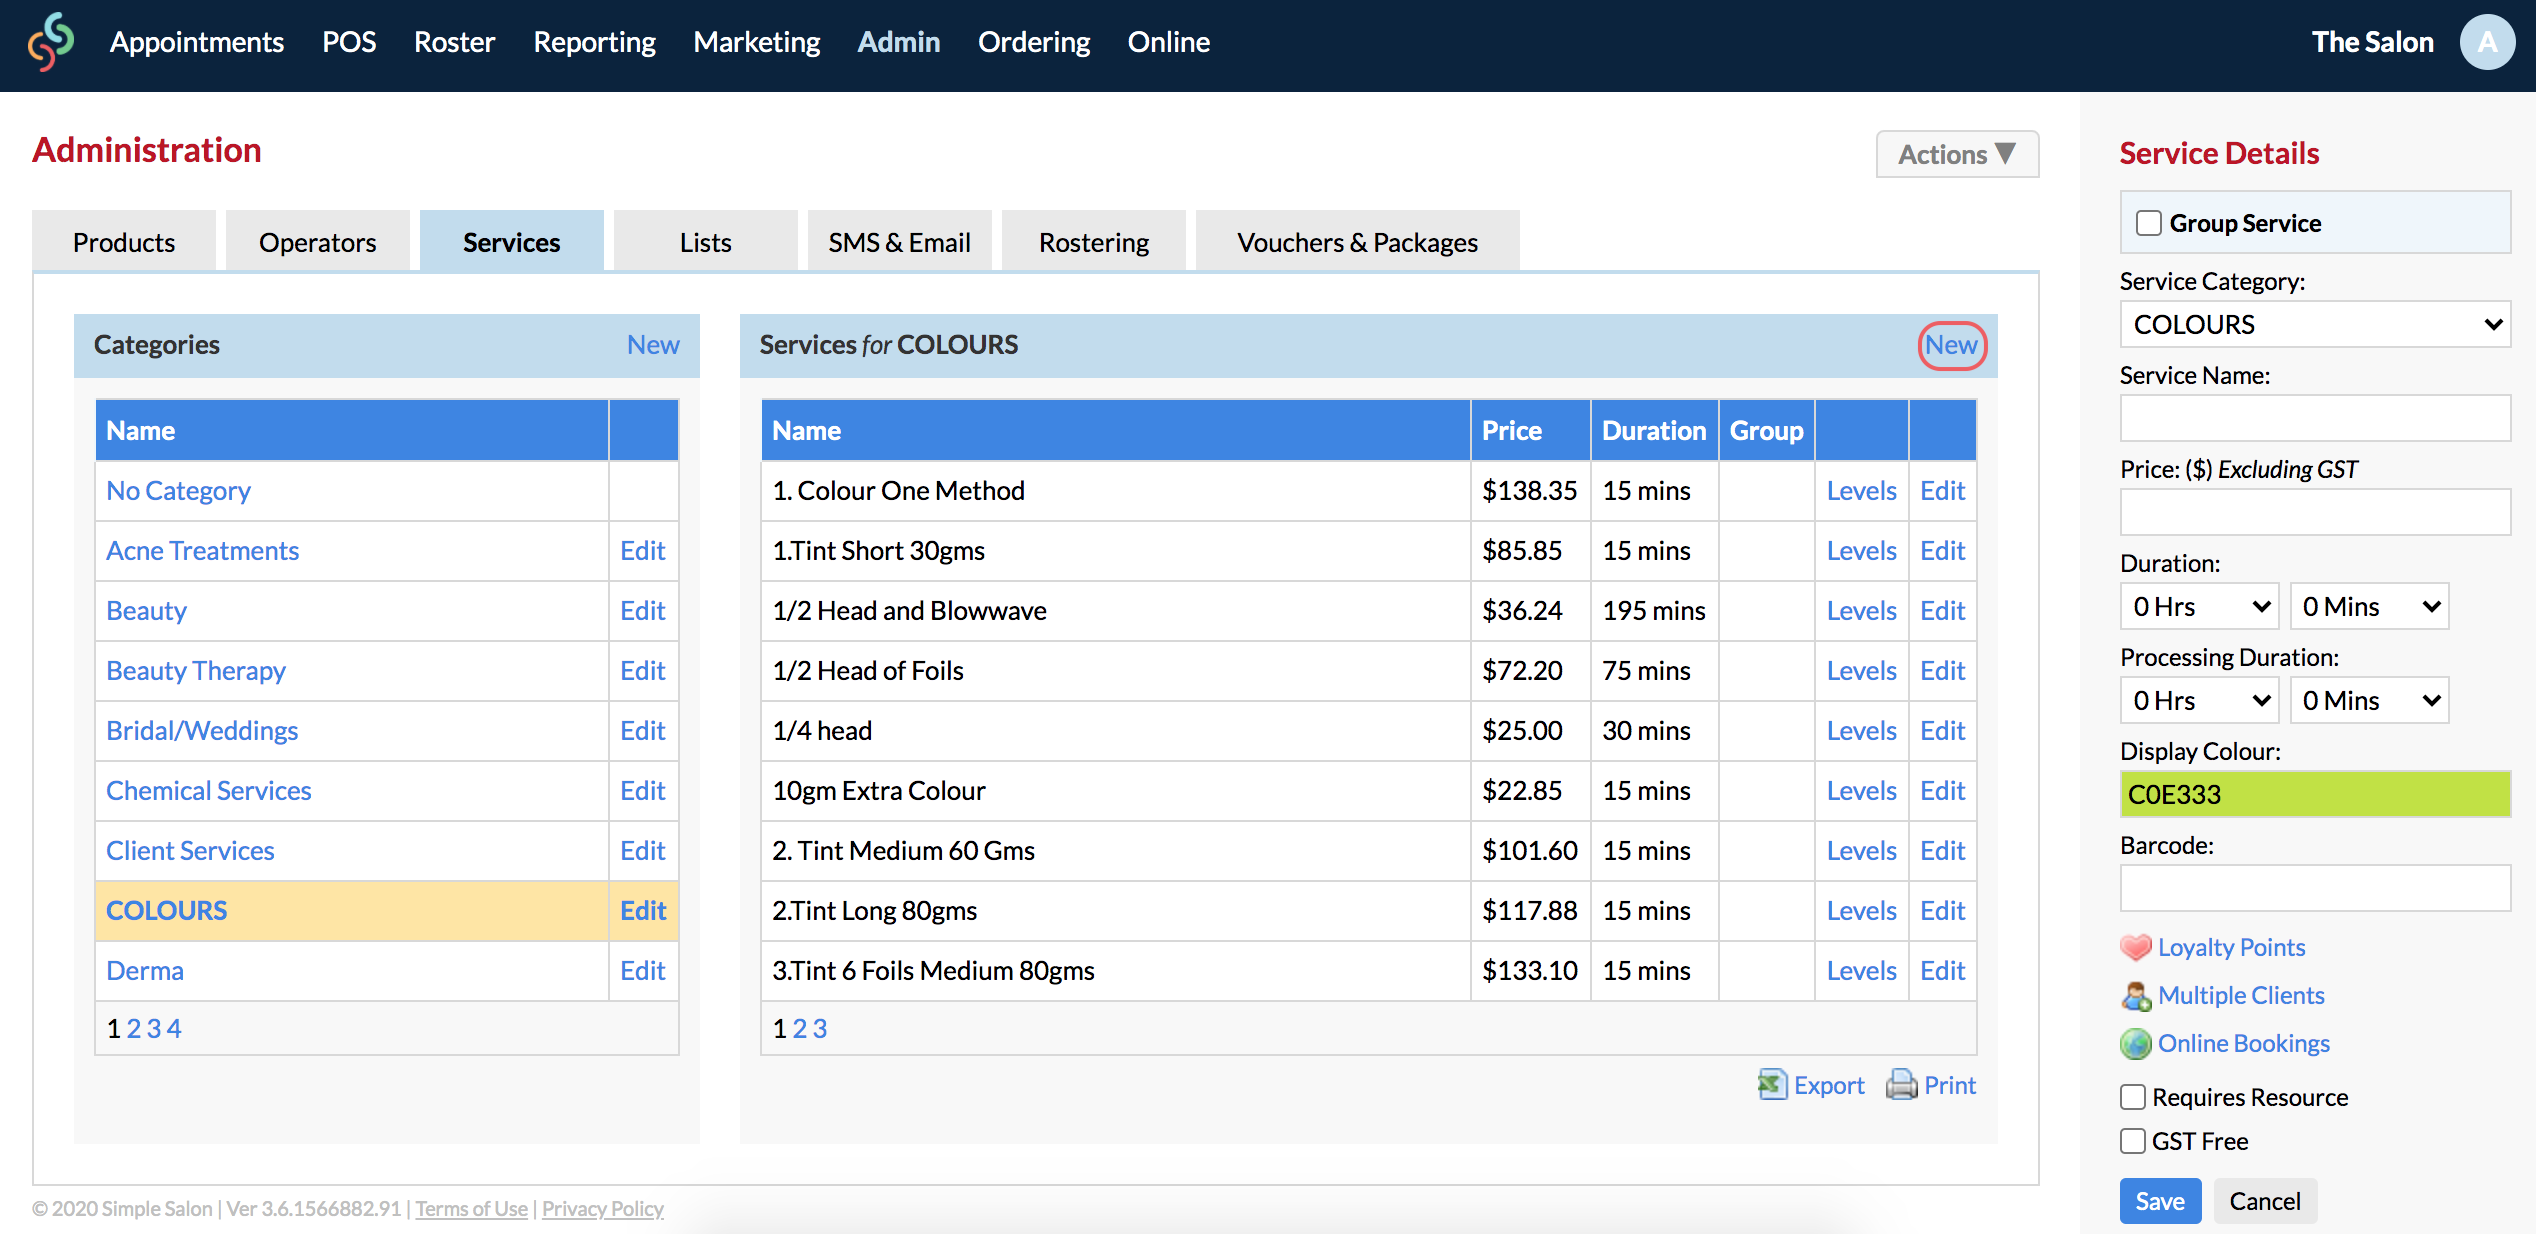
Now that you have created a new category we can allocate the services which belong to that category.
Click the category (e.g. Colours), and then over on the Services for side, click New.
On the right side panel enter the name of service that falls under this category.
Then enter all the other details - Name, Price, Duration, Processing Time, Display Colour and so forth, in the Service Details box on the right hand side of your screen and click Save.
Making Appointments Using your Service Category
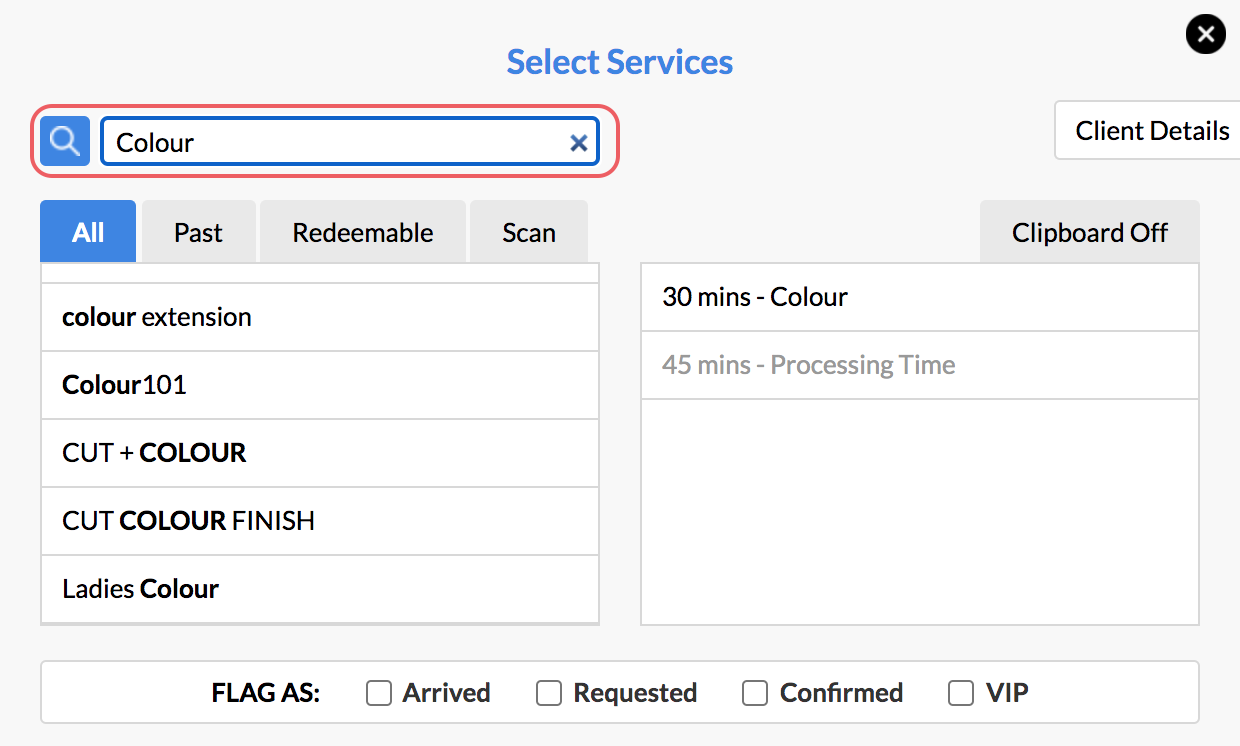
Now when you go to your Appointments page and make an appointment, you will see a categorised drop down menu, and you can select the Category your require (in this case Colours) and you will see a list of services that fall under that category.

You can also directly search for a service instead of using the Category dropdown menu. Simply click the magnifying glass and start typing:
If you have any questions, please let us know via the Submit a Request option in your Help & Support page.