The below set-up is for Simple Rostering. This is the default roster and has a one week view. If you have a fluctuating roster, you will want to use Advanced Rostering. Checkout this article for more information:
Advanced Rostering—Roster Types & Operator Hours
Setting up Opening Hours
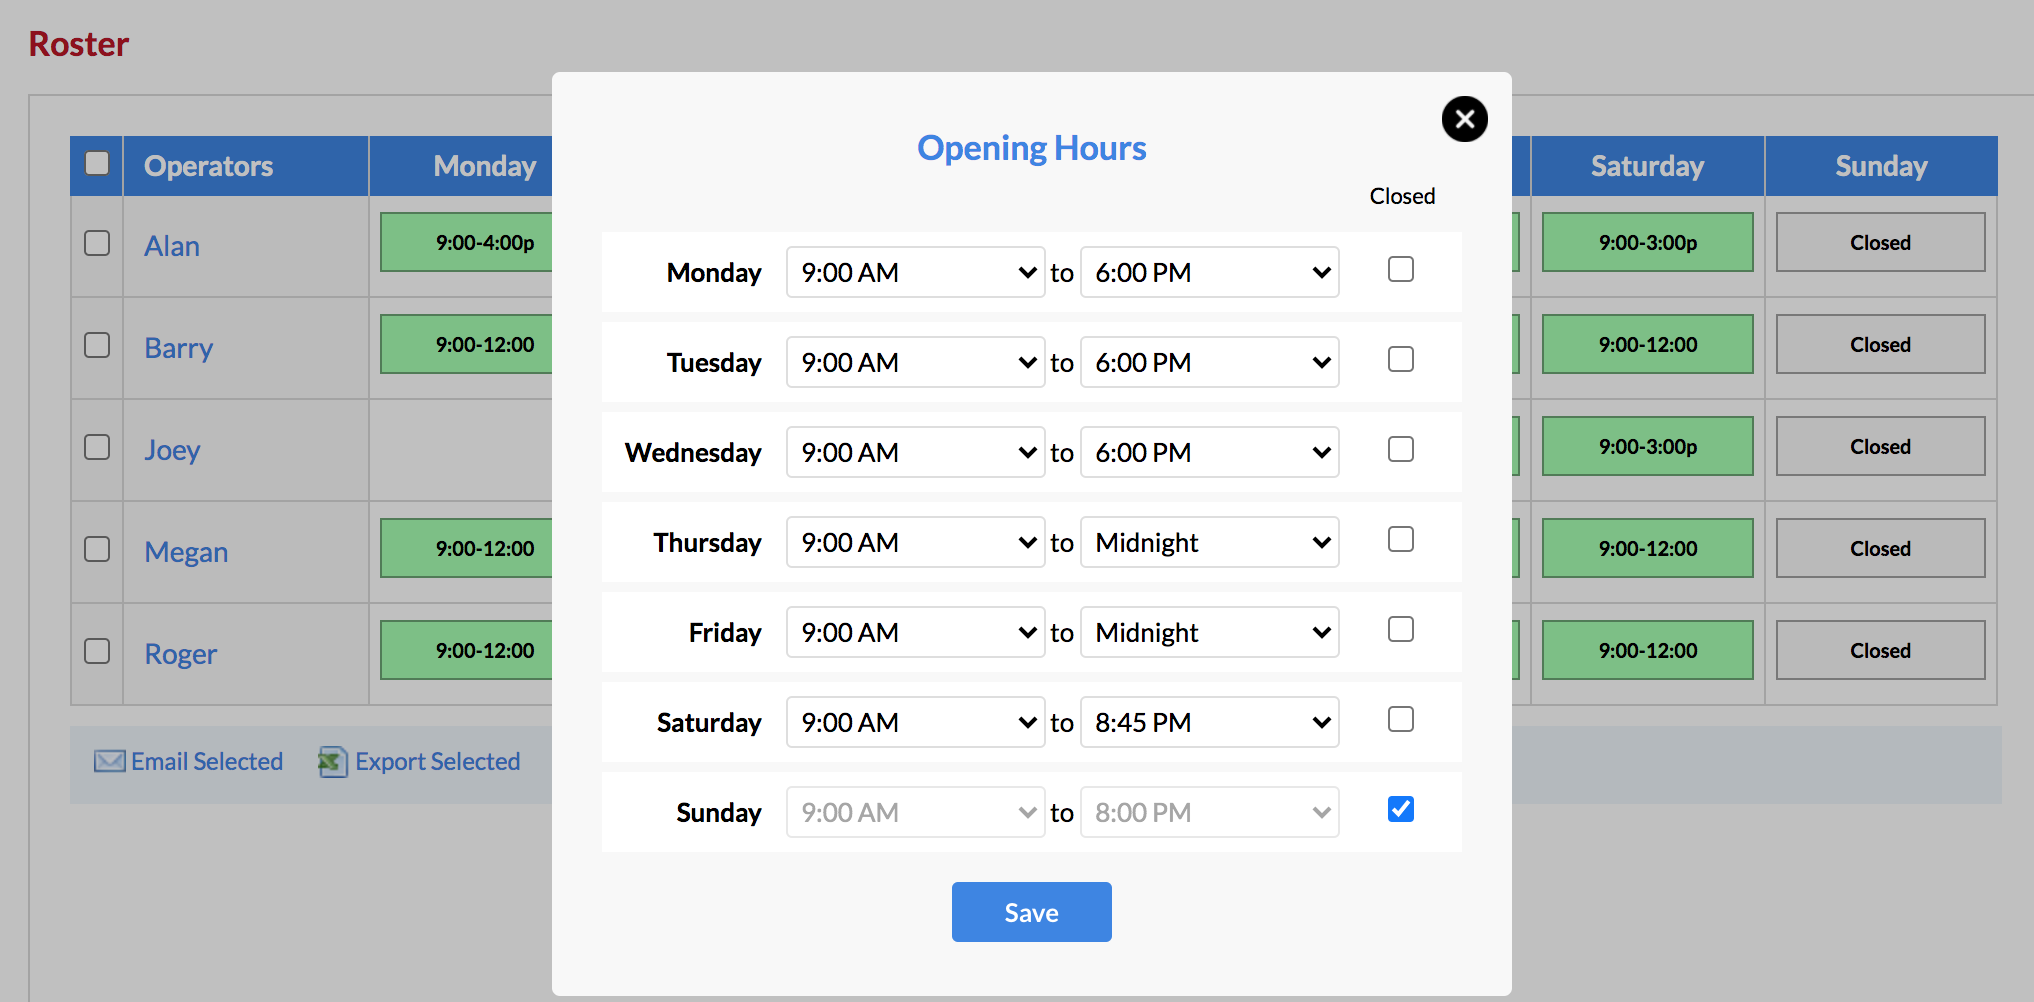
Go to Roster, then click Opening Hours.
Choose your opening hours for each day and tick Closed on the days you're not open.
Managing Public Holidays & Alternate Trading Hours
On the Roster tab, Click the Public Holidays/Alternate Trading Hours to set up your public holidays and alternate trading dates.
You'll be taken across to the Lists tab in Admin. Click New to create them on the right side panel:
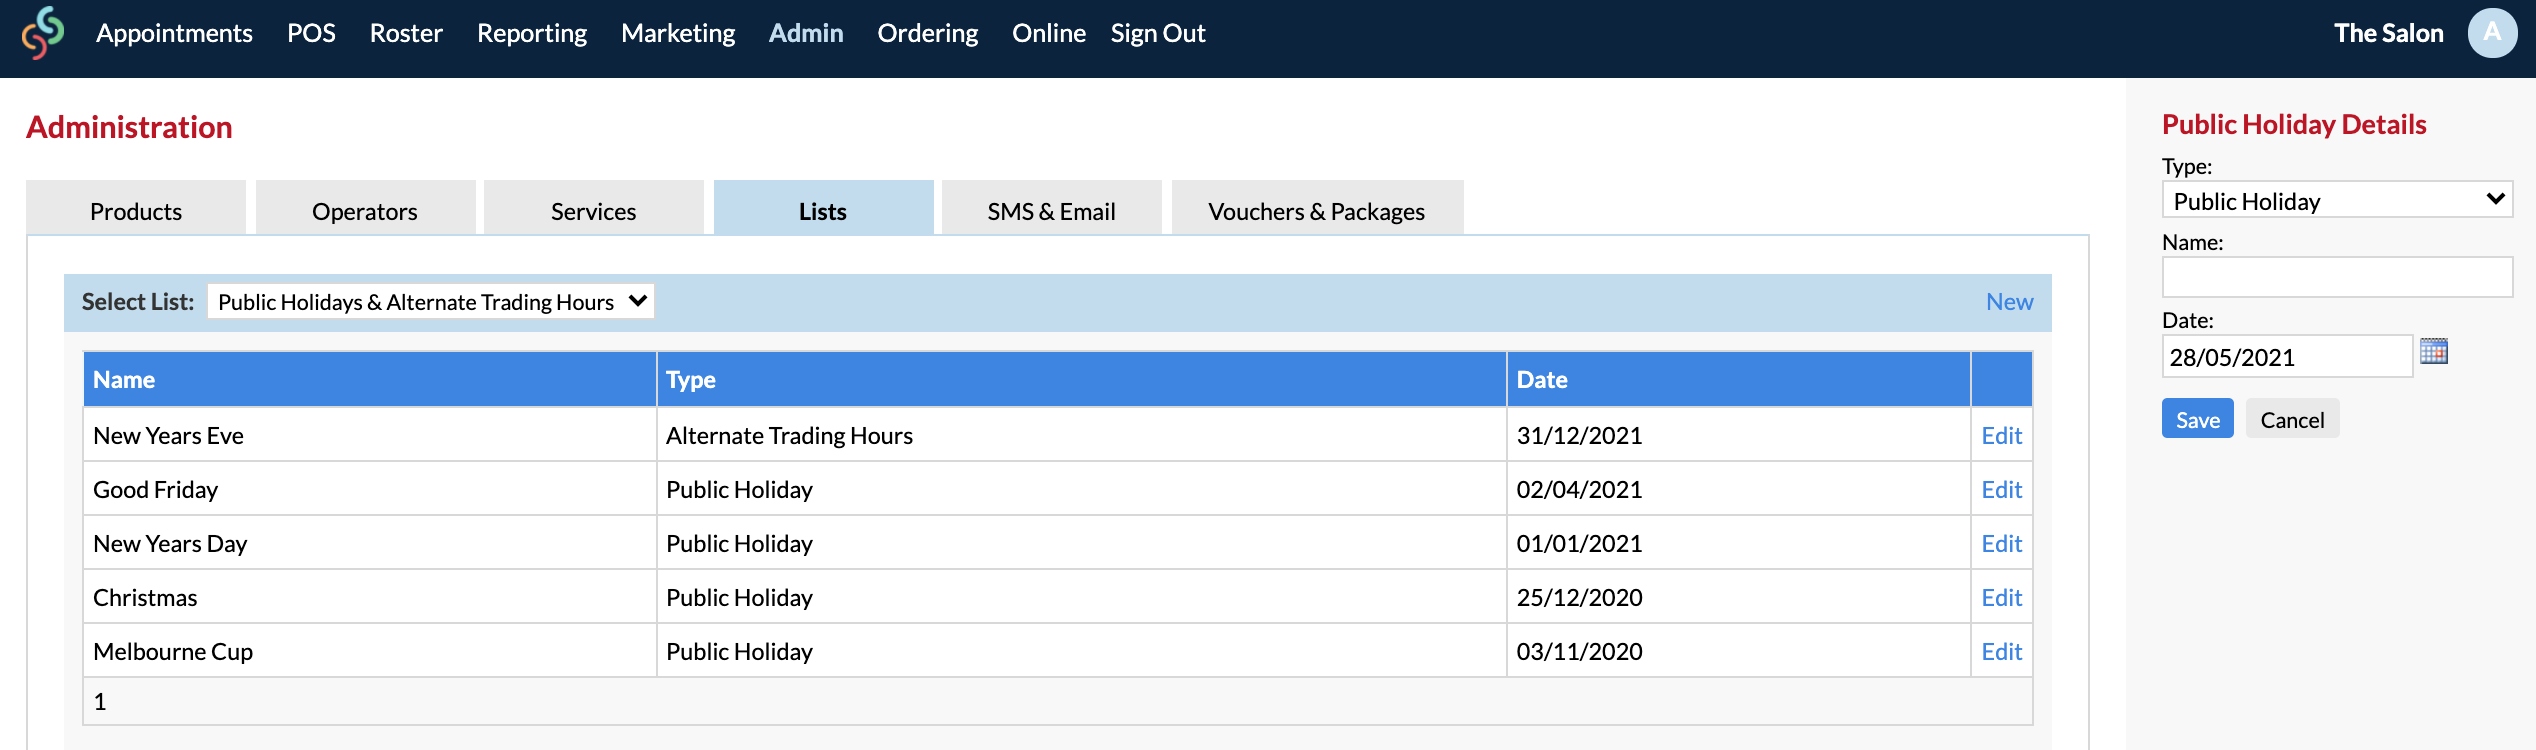
On the right, choose from the Type drop-down menu whether you would like to create a Public Holiday or Alternate Trading Hours.
- Public Holiday: This will automatically close your Appointments Page for the date that you've set, even if you are normally open on that day.
When creating a Public Holiday, you'll give it a name and a date, then this will block off the whole day in your Appointments Page.
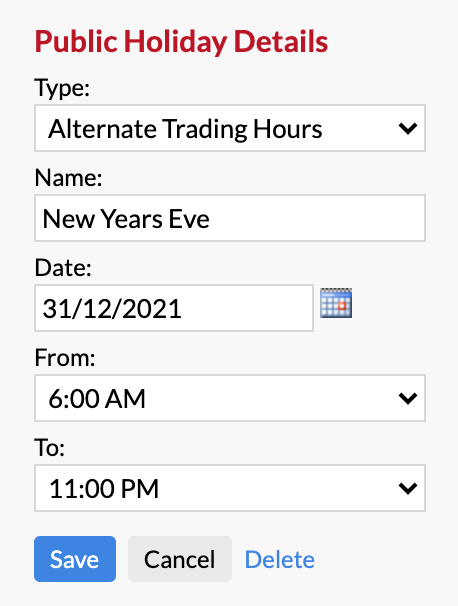
- Alternate Trading Hours: This allows you to open up your Appointments page on a day that's normally set to closed; and allows you to set the hours that you will be trading that day
For creating Alternate Trading Hours, you'll also give it a name and a date, but you'll be adding in a From and To time:
You can come to this page at any time to add in a day that you need blocked off, or a day that you need opened up.
Setting your Operator Hours
Now that your salon opening hours are done, you can set up your operator hours.
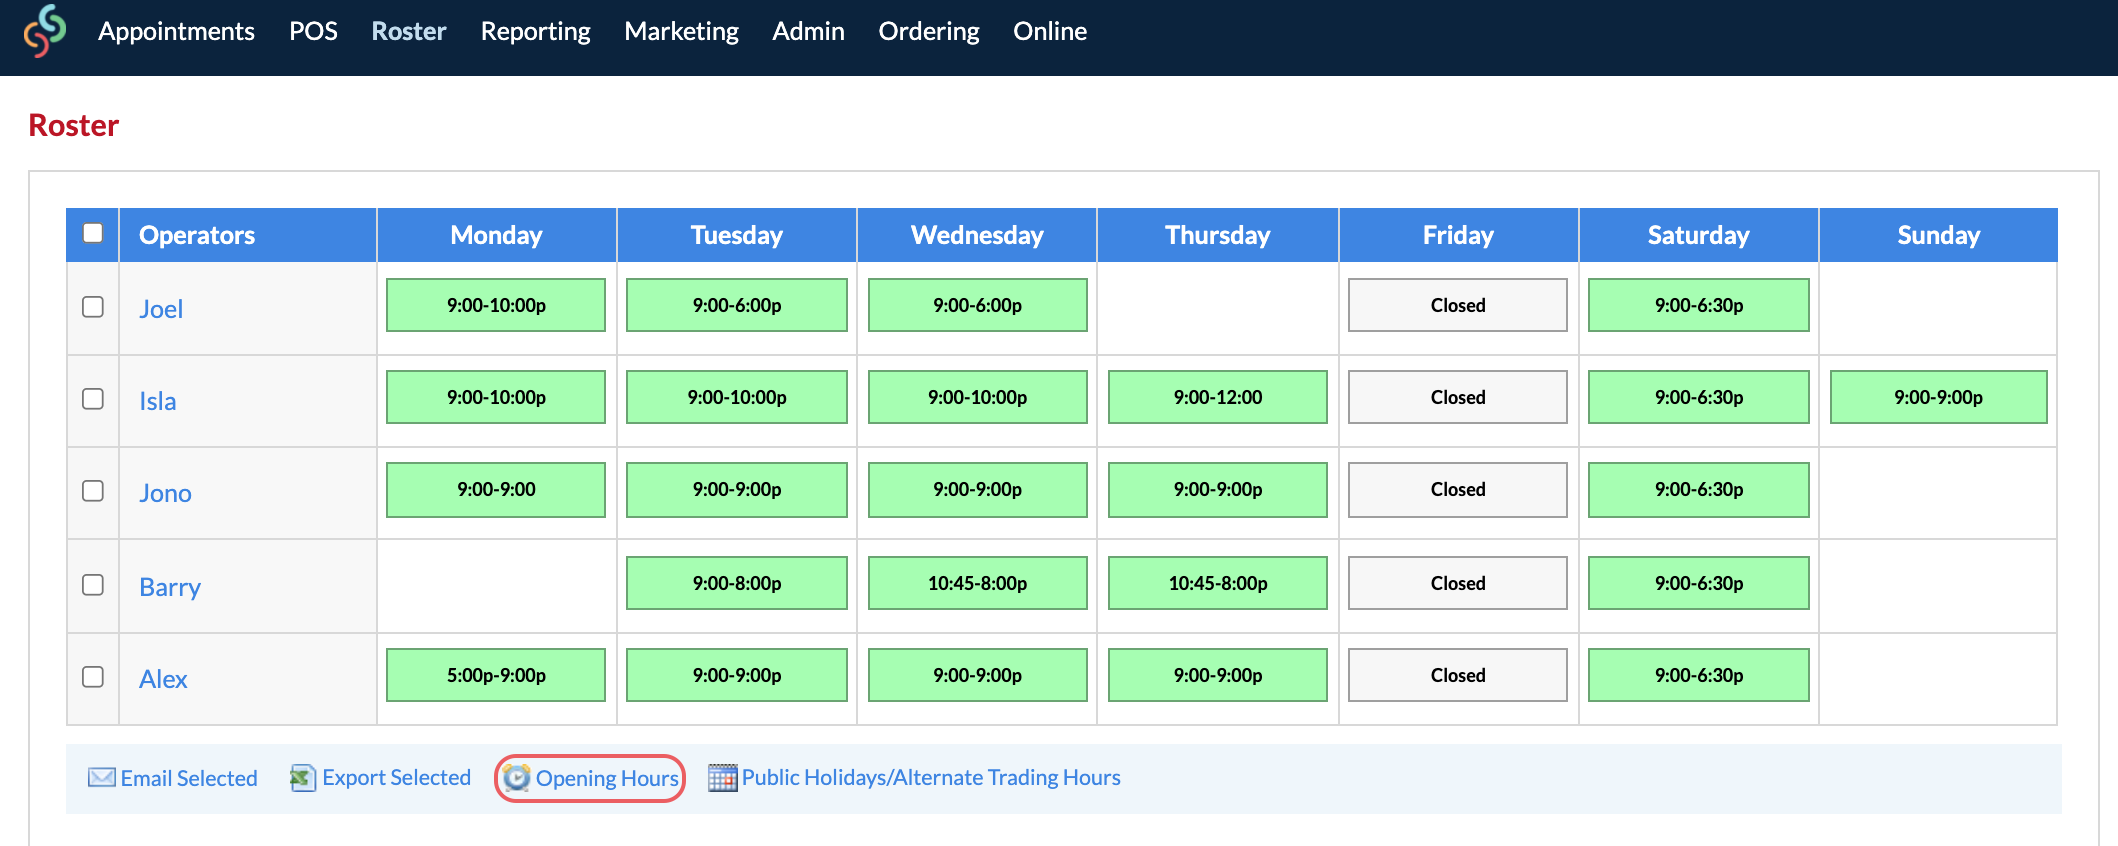
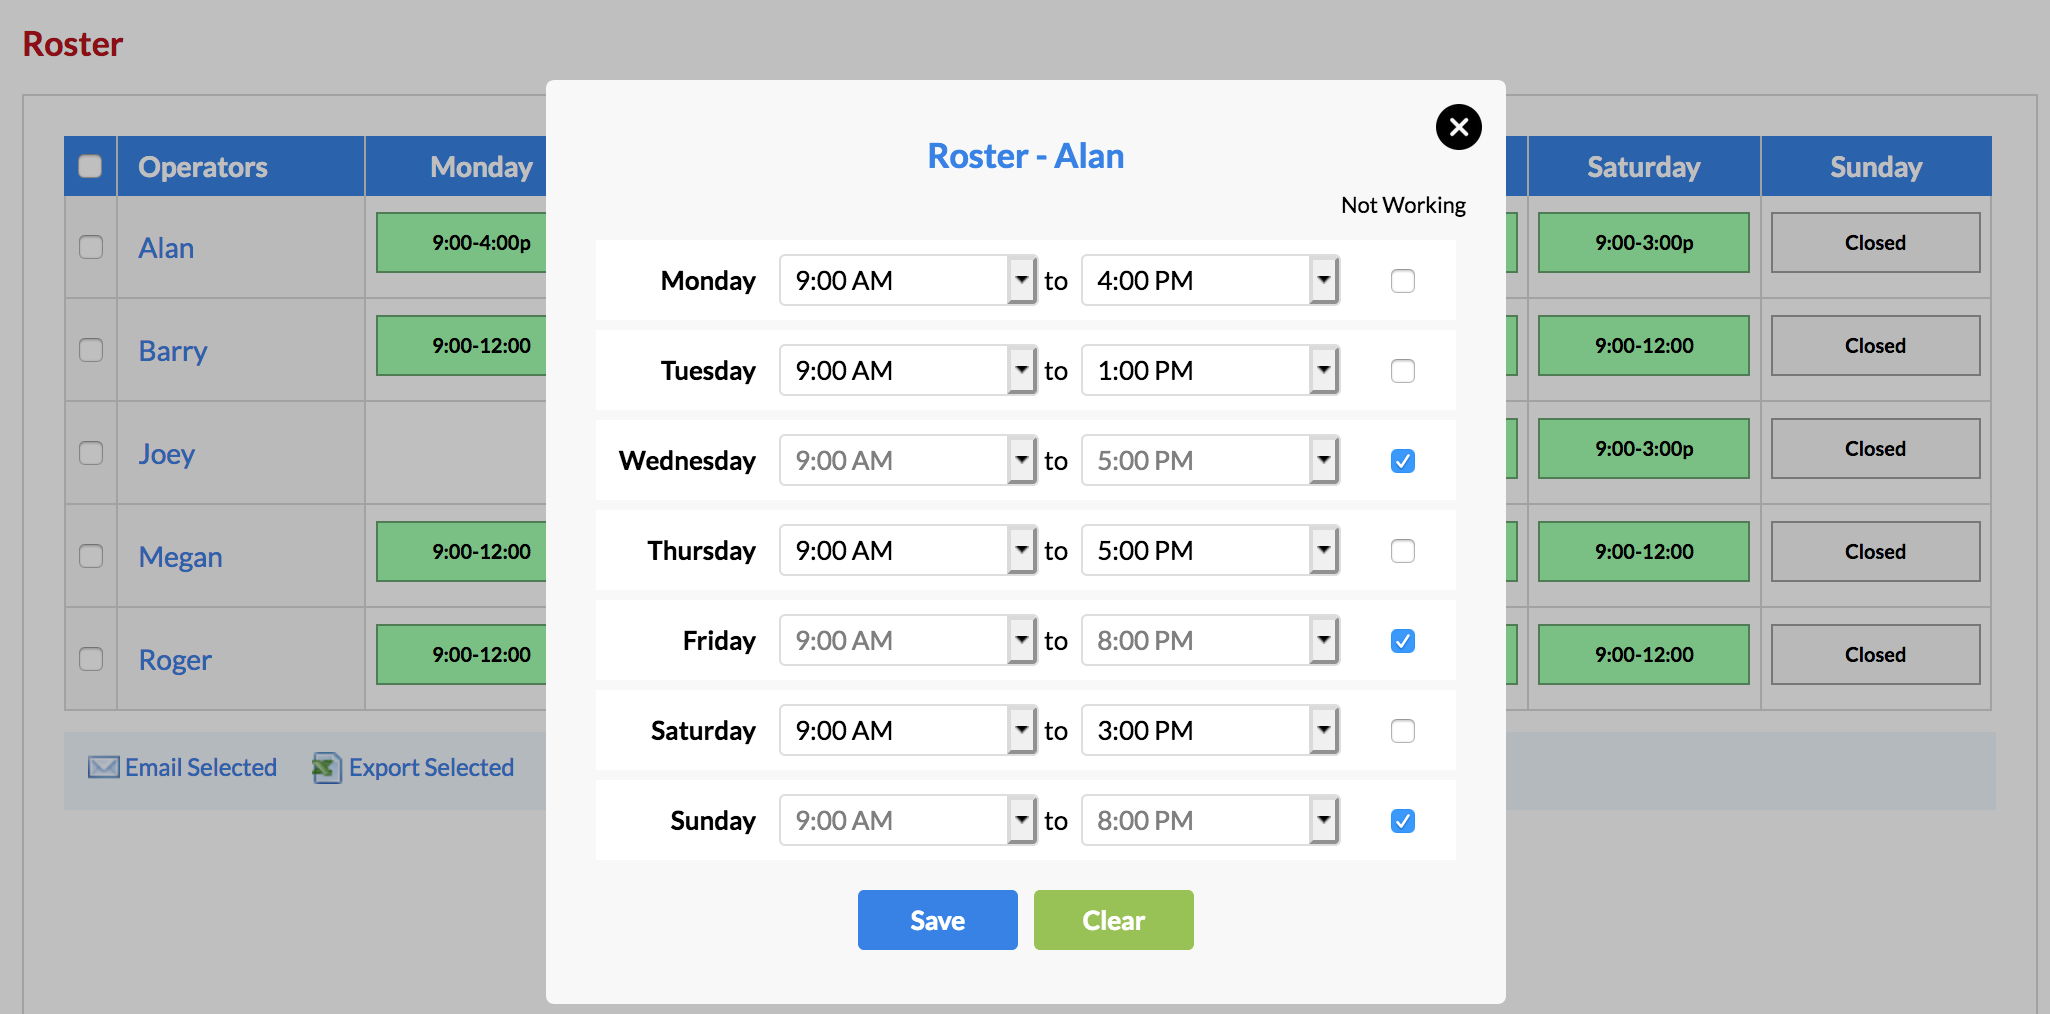
Go to the Roster and click an operator name. In the pop-up window set the hours the operator works, tick and days that they are not working, and click Save.
Do this for each operator and you're done.
Note: You can also set the operator hours via Admin, then in the Operators tab and click the Roster link next to an operator.
If you're unsure of if you want to use Simple or Advanced Rostering, click here to go to the Rostering Overview—it goes through both systems, and you can decide which one is more suitable for you.
Feel free to check out the next article in the Getting Started section to see what to do next.
If you have any questions, send them to us from your Help & Support page by clicking Submit a Request.