Your Simple Salon account is not only a management tool but a very powerful business tool too. Using your Marketing options can help you generate more business.
Use the Client Categories feature to create unique client groups to target market. Send your various Client Categories SMS and email promotions to get your clients back through your doors. Get specific!
If you've already created your Client Categories, click the following link to jump ahead:
Creating Client Categories
Go to Admin and into the Lists tab. Drop down the Select Lists menu and pick Client Categories.
Use the Select List drop-down menu to select Client Categories.
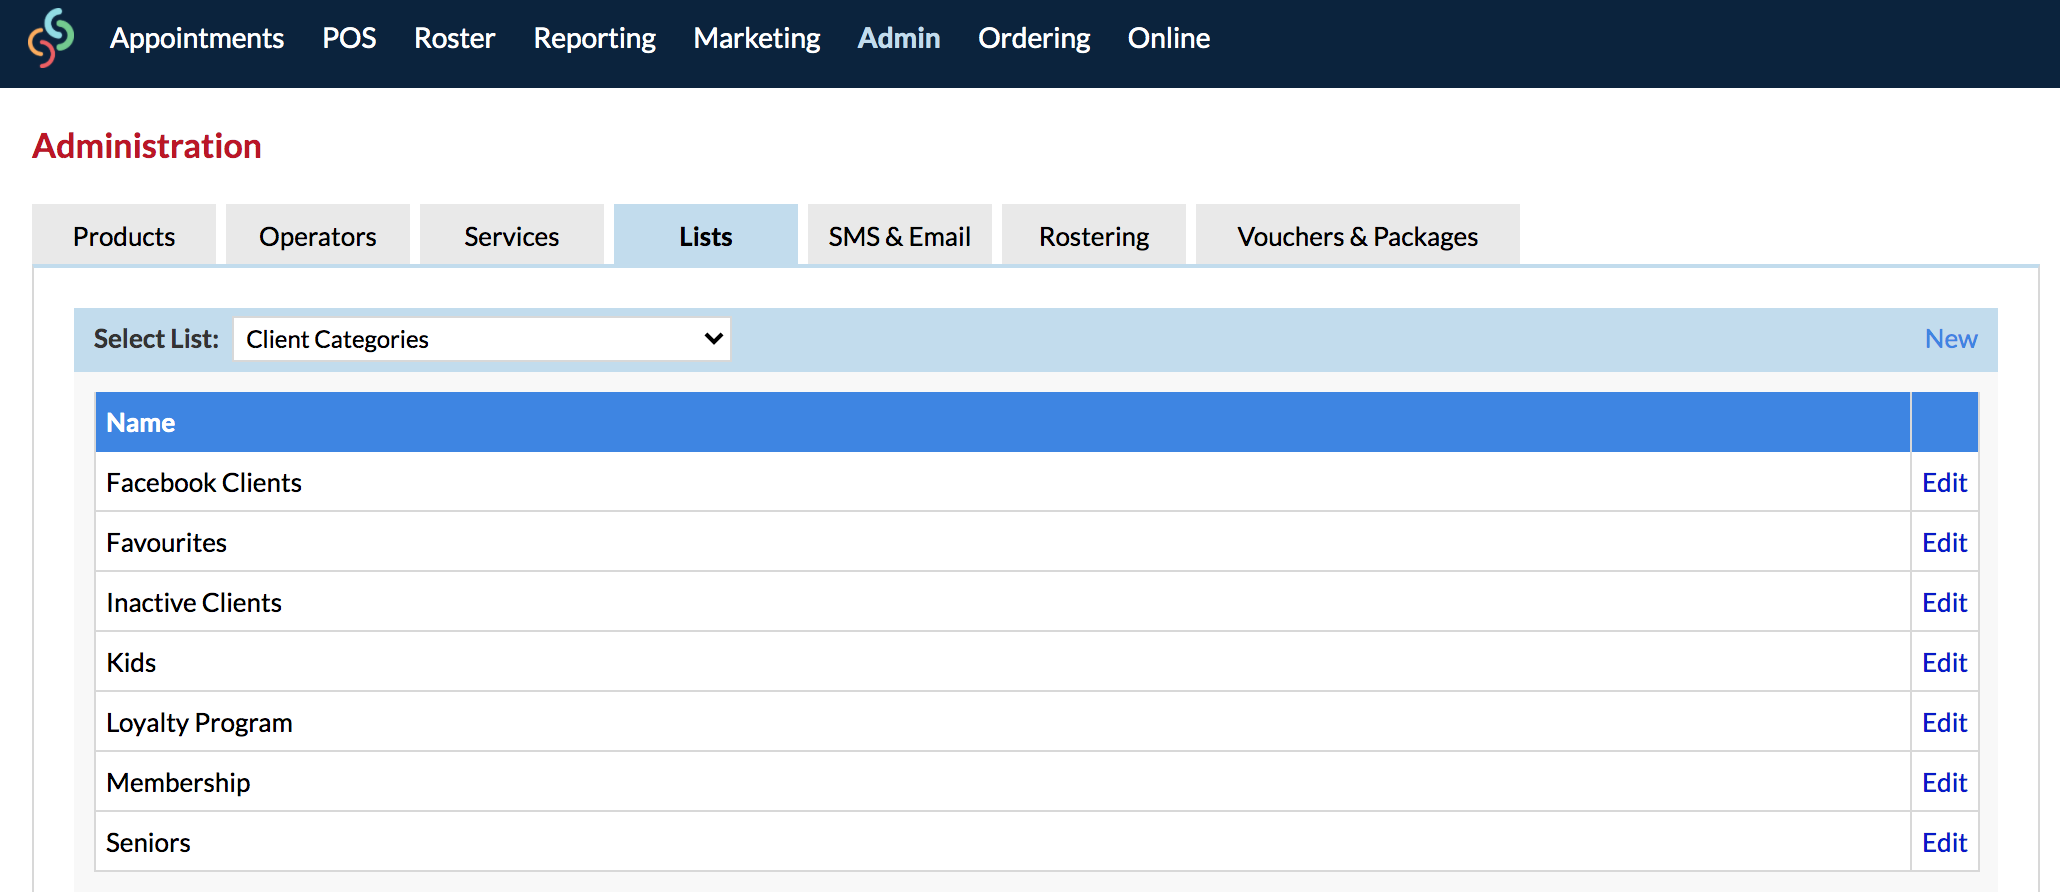
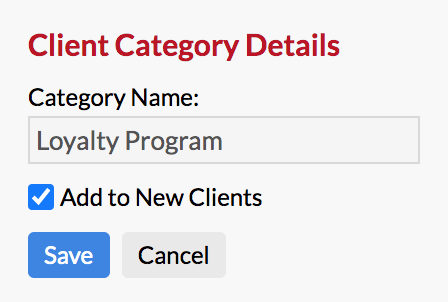
Click New to create a Client Category. On the right side panel, give your category a name, and Save. Otherwise, you can click Edit next to an existing list.
Note: By ticking Add to new clients, this means that this client category will be automatically applied to all new clients (i.e the Loyalty Program category is one which you might like all new clients to be automatically assigned to).
Continue clicking New and creating each of your client categories until you have them all listed.
Assigning Clients to the Client Categories
Next, we need to assign the clients to the Client Category you want them a part of. There are a couple places you can do this:
Client Card
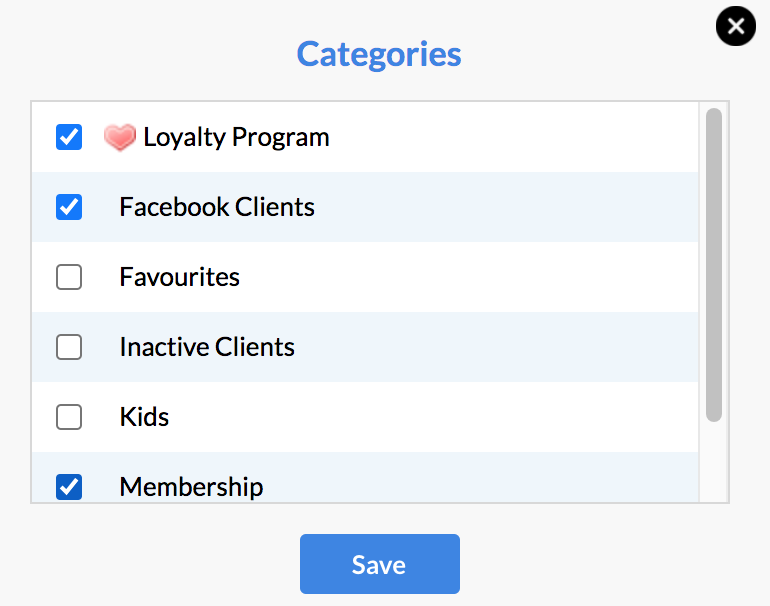
Search for a client and go to their client card. In the Actions menu, of the client card, click Categories.

Tick the category which the client belongs to then Save.
Note: Clients can be assigned to multiple categories. Tick all of the categories this client needs to be assigned to and Save.
While Creating an Appointment
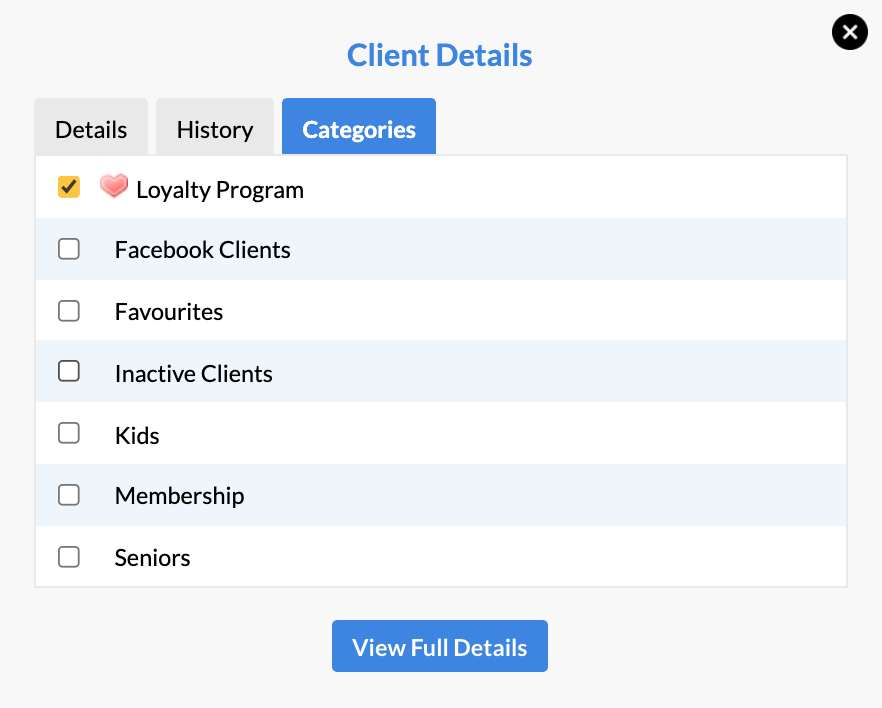
When you are creating a client's appointment and selecting their services via your Appointments page, you'll notice a Client Details button:
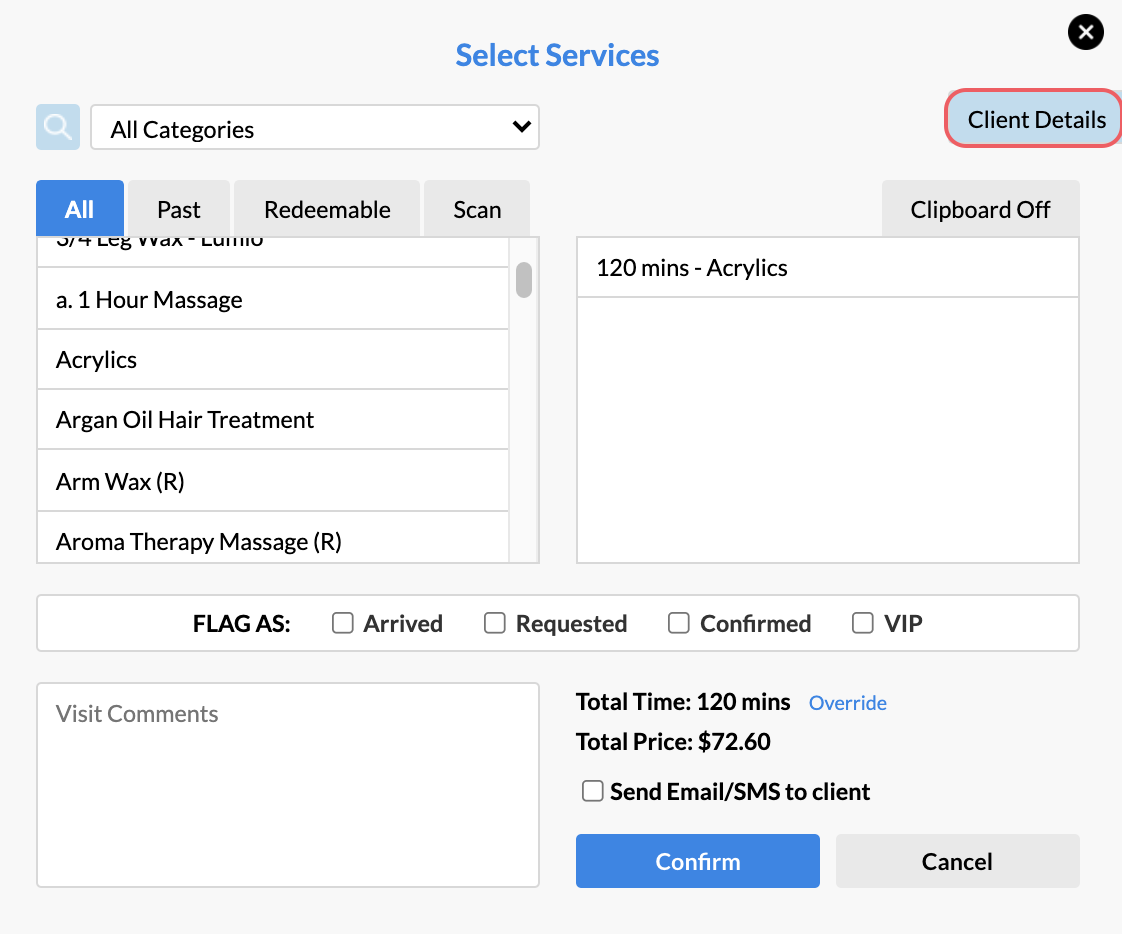
If you select this, you'll notice a Categories tab. Simply click this button and you can update the client's Client Category from here. There's no need to Save, as it will automatically update if you make any changes:
Viewing an Existing Appointment
When viewing a client's existing appointment via the Visit Details window (by selecting the client's name of the Appointments Page), you'll notice a Categories tab:
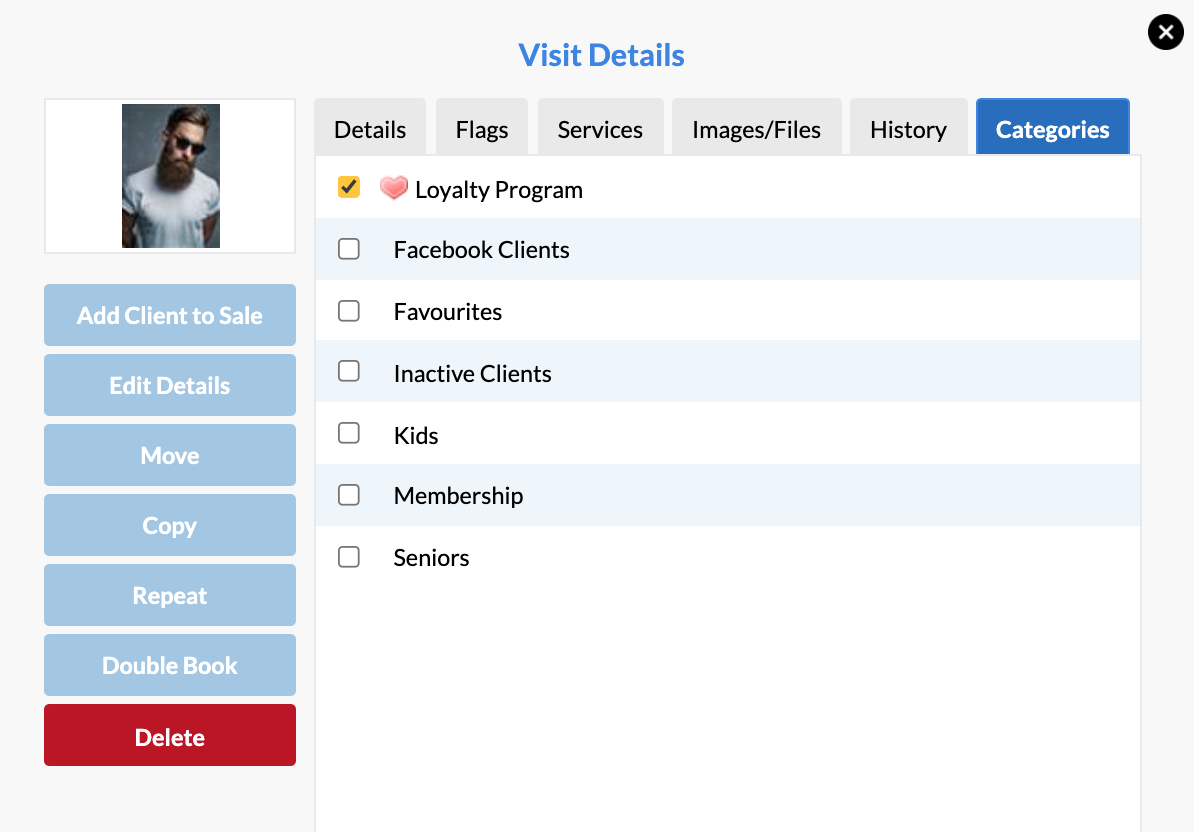
Simply click Categories and you can update the client's Client Category from here. There's no need to Save, as it will automatically update if you make any changes.
Sending an SMS or Email to a Specific Client Category
Once client's have been added to their categories, we can now communicate directly (via SMS or email) with this new Client Category.
One way to target market client groups is to send an SMS or email to all the clients who belong to a particular Client Category.
Go to your Marketing page, click the All Clients option.
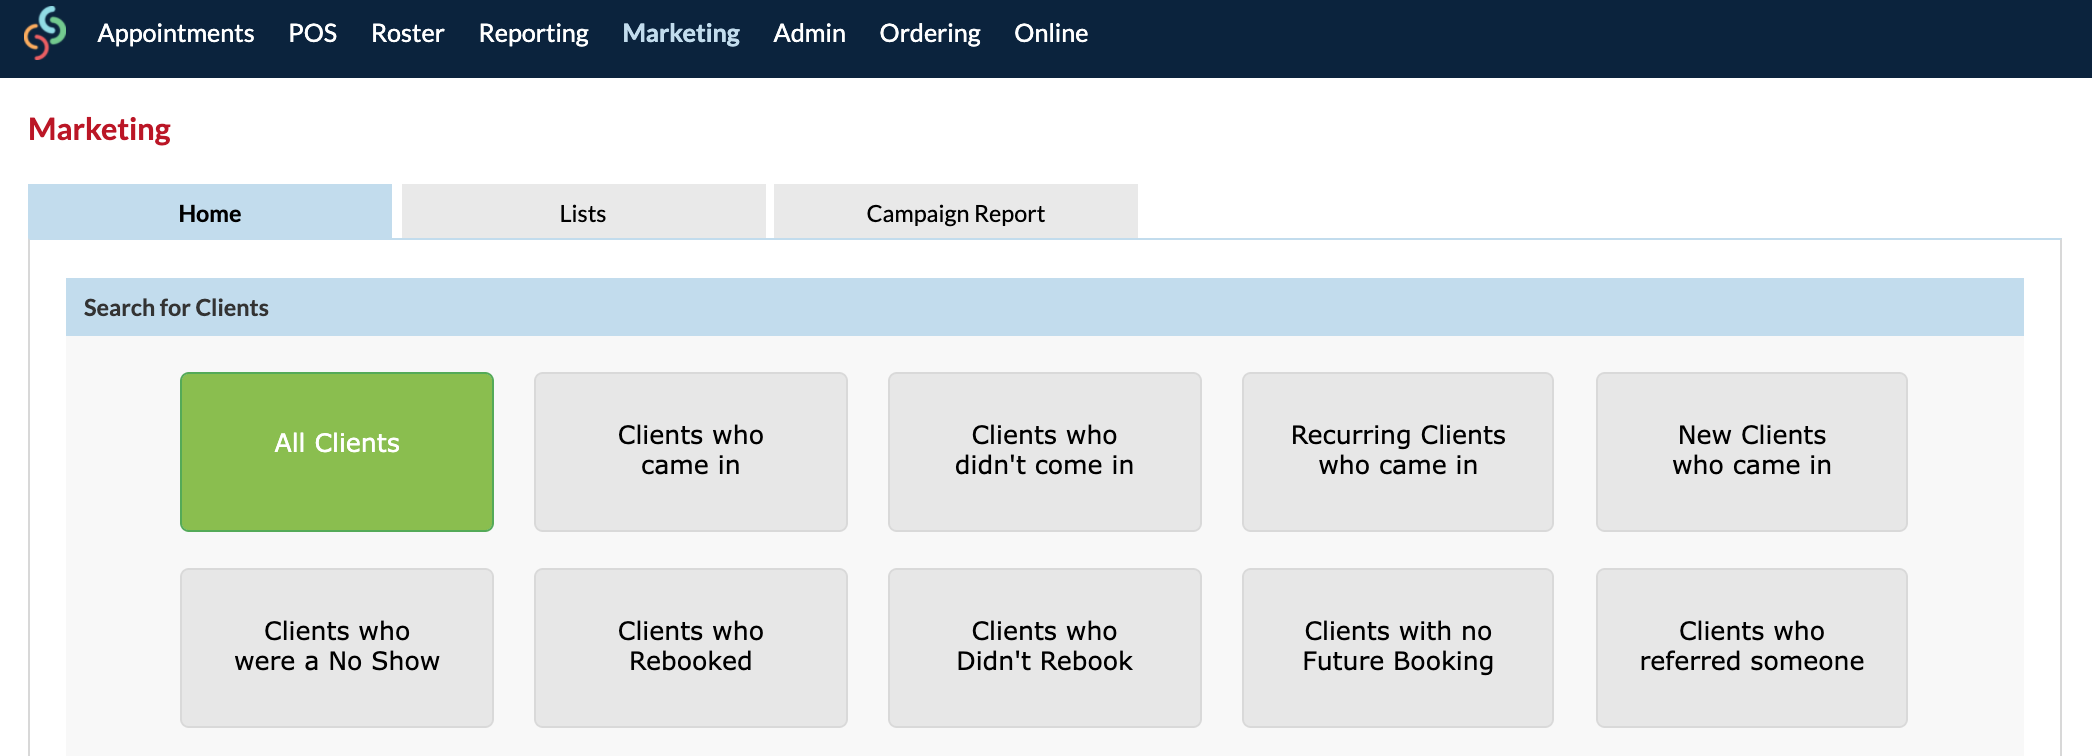
This will bring up a list of all of your clients. Now use the Category filter to target a specific client group/client category.
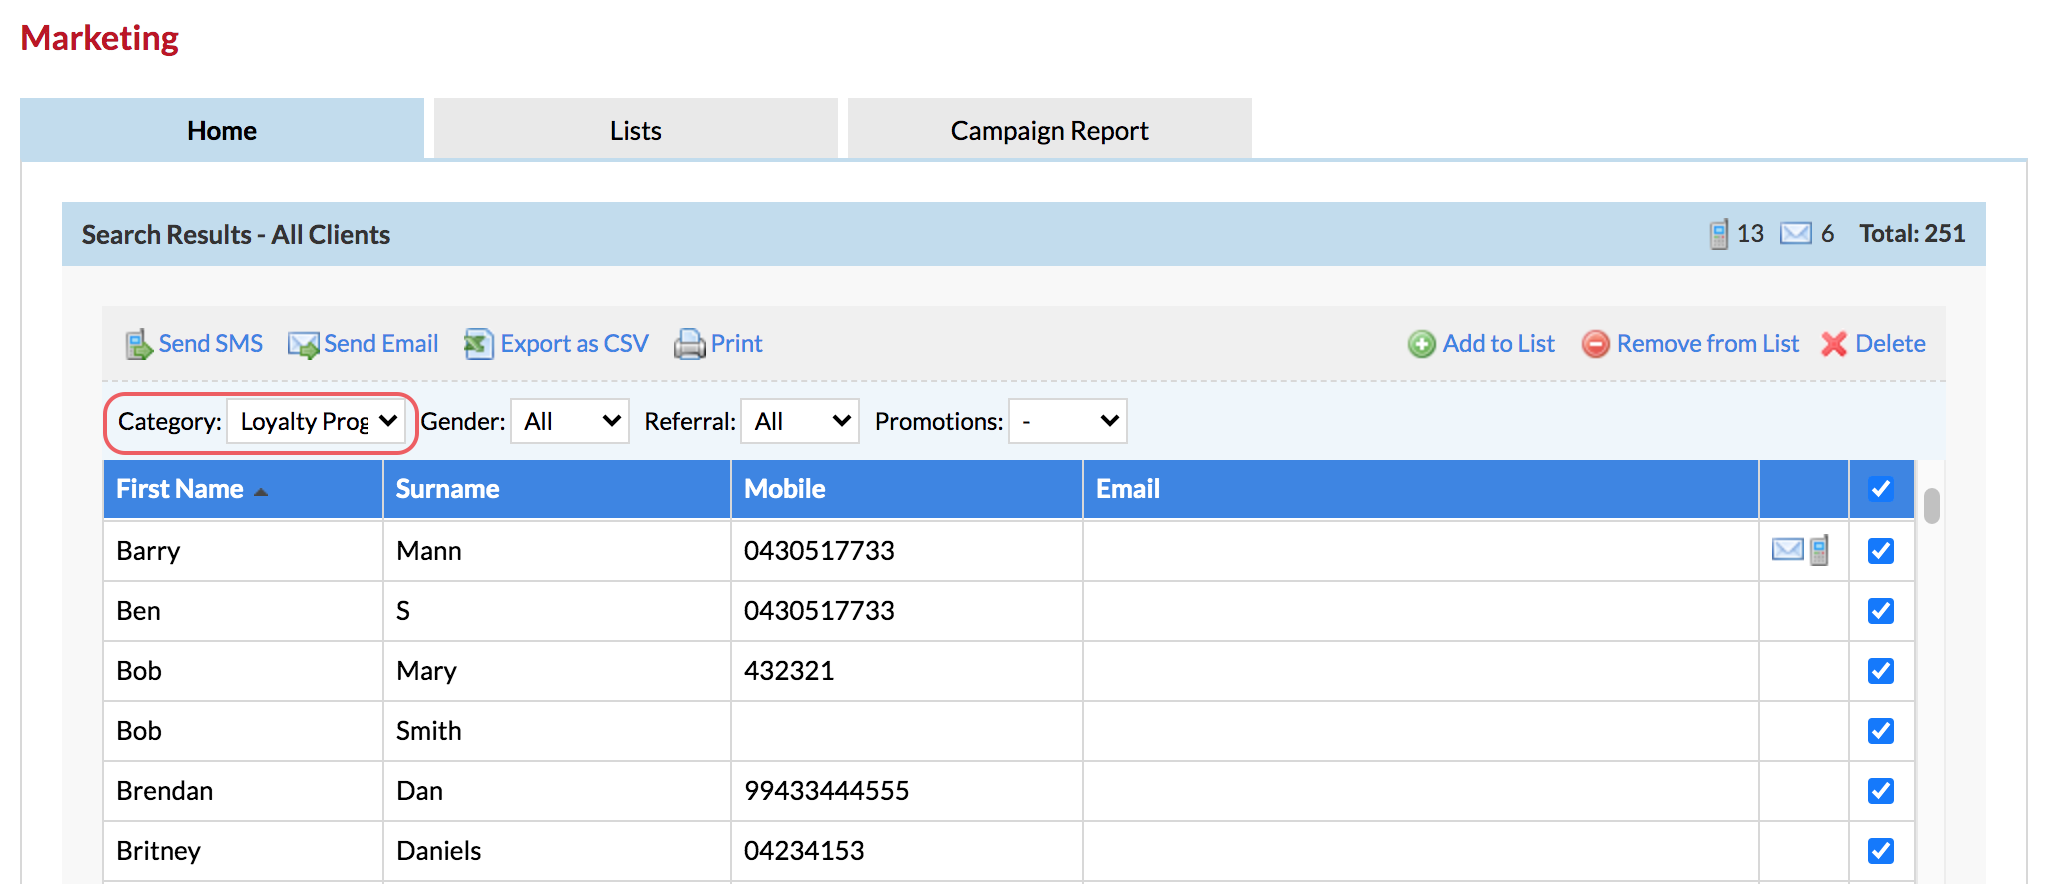
Once you have filtered the client list by your chosen client category, click Send SMS or Send Email to market to this specific group.
Note: You will notice that many of the Marketing options have the Category filter.
Start discovering how flexible and powerful your marketing is. You can drill down and filter the marketing options to bring up all sorts of client lists. For example, target clients from the Special Mums category who haven't been in for 6 months.
Get creative with your marketing options!
If you have any questions send them to us via the Submit a Request option in your Help & Support page.